

Introduction
This article will demonstrate how to dynamic form control in Angular application like textbox,selectbox.
Prerequisite
- Basic understanding of reactive form in angular.
- Setup of a local development environment. We will need Angular CLI to set up your environment.
Dynamical angular forms
Dynamic form works similarly to a static form with Reactive Form by using FormGroups, FormControls, and Validators. Angular form groups enable us to transform dynamic data into a form.
Generally, dynamic form controls are used when we need to create form fields based on API values.
Example
We will create new project to demonstrate simple contact form which will have fields like first name,lastname,email,gender.
ng new angular-dynamicform-exampleNext step is to import reactive form modules in app.module.ts file.
import { NgModule } from '@angular/core';
import { BrowserModule } from '@angular/platform-browser';
import { FormsModule, ReactiveFormsModule } from '@angular/forms';
import { AppComponent } from './app.component';

@NgModule({
  imports: [BrowserModule, FormsModule, ReactiveFormsModule],
  declarations: [AppComponent],
  bootstrap: [AppComponent],
})
export class AppModule {}
In order to work with reactive forms, we need to add ReactiveFormsModule to the imports array of the AppModule.
Add the code below in app.component.ts file.
import { Component } from '@angular/core';
import { Validators, FormGroup, FormControl } from '@angular/forms';

@Component({
  selector: 'my-app',
  templateUrl: './app.component.html',
  styleUrls: ['./app.component.css'],
})
export class AppComponent {
  constructor() {}
  name = 'Angular Dynamic Form ';
  contactForm: any;
  formFields = [
    {
      label: 'First Name',
      name: 'first_name',
      value: 'John',
      required: true,
      type: 'textbox',
    },
    {
      label: 'Last Name',
      name: 'last_name',
      value: 'Doe',
      required: true,
      type: 'textbox',
    },
    {
      label: 'Email',
      name: 'email',
      value: 'johndoe@xyz.com',
      required: true,
      type: 'textbox',
    },
    {
      label: 'Gender',
      name: 'gender',
      value: 'Male',
      required: false,
      type: 'selectbox',
      options: ['Male', 'Female', 'Others'],
    },
  ];

  ngOnInit(): void {
    this.contactForm = new FormGroup({});
    for (const formField of this.formFields) {
      const validationRule = this.setValidationRule(formField);
      this.contactForm.addControl(
        formField.name,
        new FormControl(formField.value, validationRule)
      );
    }
  }

  setValidationRule(formField) {
    if (formField.required) {
      return [Validators.required];
    }
  }
}
In app.component.ts above We have defined formfields array with labels, names, types, and required properties to determine if any fields are required or not. The name property will be used for the name of the form control.We have set default value for first_name,last_name,email,gender field.
In the ngOnInit lifecycle ,we have added contactForm with with the FormControl created from the fields of the formfieldssetValidationRule method.If form field has required set to true , then we add the Validators.required validator to our FormGroup .
Add css below in app.component.css file.
form {
  margin: 10% auto 0 auto;
  padding: 30px;
  width: 400px;
  height: auto;
  overflow: hidden;
  background: #5a5a5a;
  border-radius: 10px;
  color: white;
}

form label {
  font-size: 14px;
  cursor: pointer;
}

form label,
form input {
  float: left;
  clear: both;
}

form input {
  margin: 15px 0;
  padding: 15px 10px;
  width: 100%;
  outline: none;
  border: 1px solid #bbb;
  border-radius: 20px;
  display: inline-block;
}

form textarea {
  float: left;
  clear: both;
  width: 100%;
  outline: none;
  border: 1px solid #bbb;
  border-radius: 20px;
  display: inline-block;
}

button {
  padding: 15px 50px;
  width: auto;
  background: #337ab7;
  border: none;
  color: white;
  cursor: pointer;
  display: inline-block;
}
button:disabled {
  opacity: 0.5;
}
Last step is to add code in app.component.html file.
<div class="box-body">
  <form [formGroup]="contactForm">
    <div *ngFor="let formField of formFields" class="form-group">
      <label> {{ formField.label }}</label>
      <section [ngSwitch]="formField.type">
        <input
          *ngSwitchCase="'textbox'"
          class="form-control"
          value="{{ formField.value }}"
          type="{{ formField.type }}"
          formControlName="{{ formField.name }}"
        />
        <select
          *ngSwitchCase="'selectbox'"
          [id]="formField.name"
          [formControlName]="formField.name"
        >
          <option *ngFor="let opt of formField.options" [value]="opt">
            {{ opt }}
          </option>
        </select>
      </section>
      <div
        class="error"
        *ngIf="
          contactForm.controls[formField.name]?.errors?.required &&
          contactForm.controls[formField.name].touched
        "
      >
        {{ formField.label }} is required
      </div>
      <br />
    </div>
    <button
      type="submit"
      class="btn btn-primary"
      [disabled]="this.contactForm.invalid"
    >
      Submit
    </button>
  </form>
</div>
Here we have loop formFields array using *ngFor directive.Then we have set form input value according to value from formField array.We have also bind formGroup with contactForm which we have defined in app.component.ts file.Here we have also added the error message if the form control has error message and formcontrol field has been touched.In the button we have added the disabled the form if the contact form is invalid.
Result
Result with default value
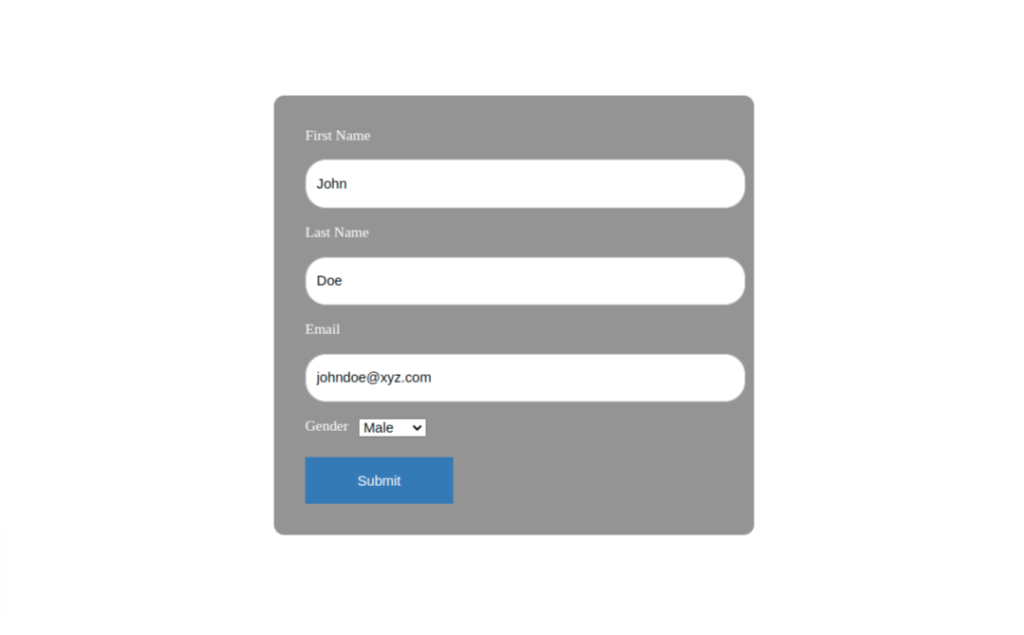
As we see here, the value has been prefilled in the form that we created while adding to app.component.ts
Result with validation message
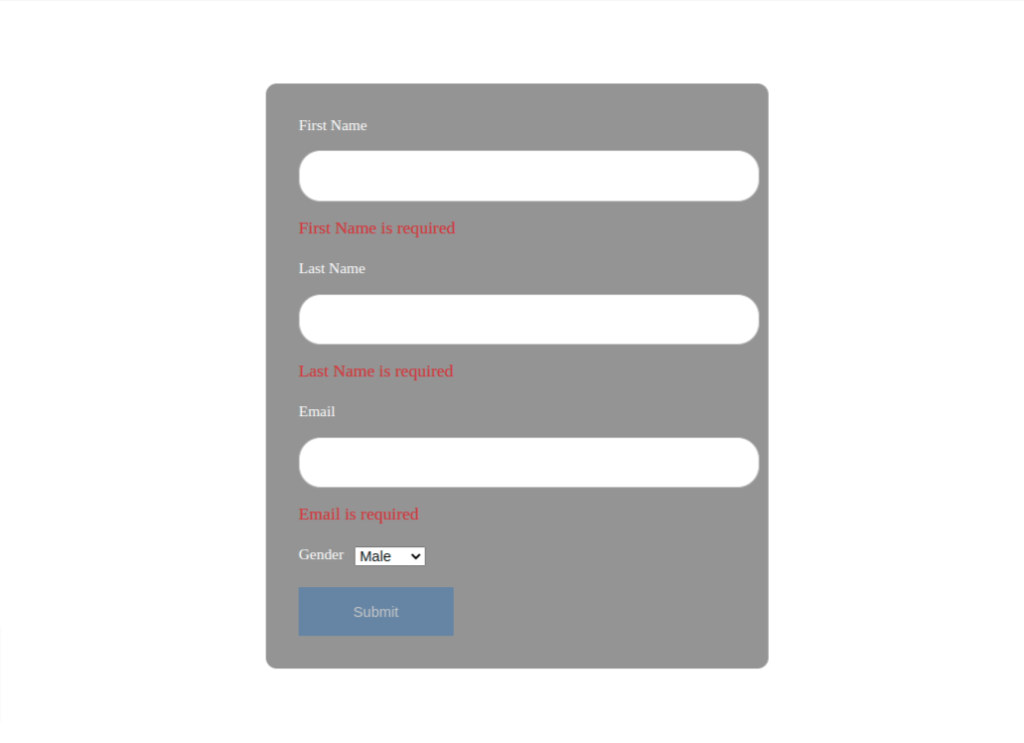
Here, we can see the required validation message for first name, last name, and email fields after we removed value for those fiedls.And the button has disabled since the form is invalid.
Conclusion
In this article we have learned about creating dynamic form controls in angular.