
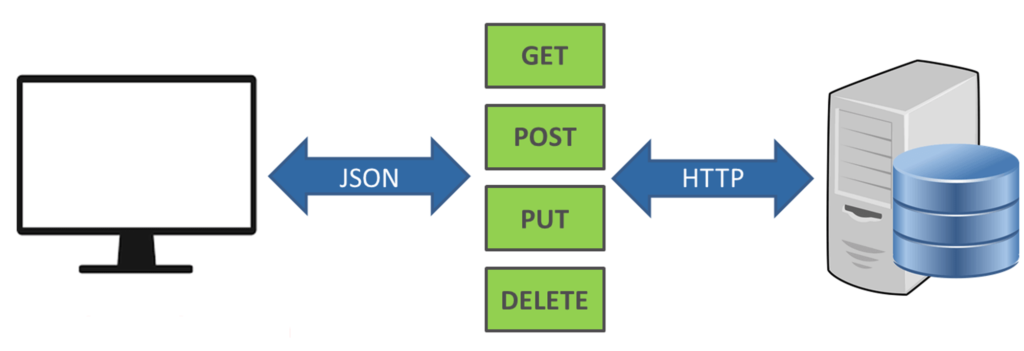
In this article, we will learn how to build REST API in Laravel 9. REST APIs are application programming interfaces that conform to the constraints of the REST architecture style and interact with RESTful web services. A REST API allows you to access web services in a simple and flexible manner without having to process any data.
Prerequisites
- A basic understanding of Laravel
How to build REST API in Laravel 9?
First, let’s create a Laravel 9 project using the following command.
composer create-project laravel/laravel:^9.0 laravel-restapiNext, let’s create a Laravel API database configuration. For that add the following lines in the .env file.
DB_CONNECTION=mysql
DB_HOST=127.0.0.1
DB_PORT=3306
DB_DATABASE= // Your database name
DB_USERNAME= // Your mysql username
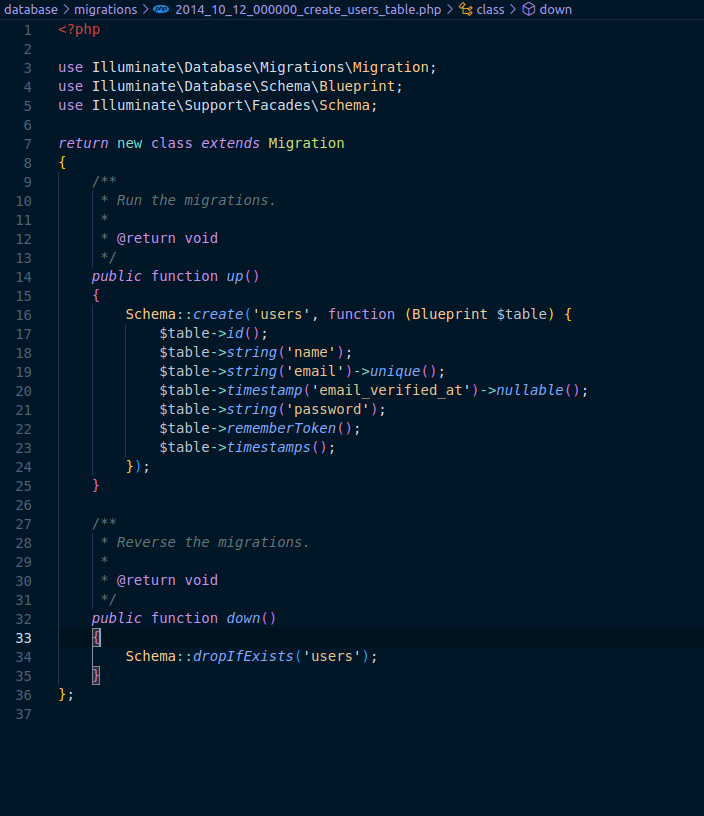
DB_PASSWORD= // Your mysql passwordThe next step is to create a table which our user data will be stored and retrieved from. For that, we will be using the default user table configuration provided by Laravel. The migration file will be located in the database>migrations folder and will be like following
Now execute the following command to run a migration.
php artisan migrateThen, let’s create routes using which we will be performing the CRUD operation. Add the following code inside the routes/api.php file.
use App\Http\Controllers\UserController;
Route::resource('users', UserController::class);
Now, let’s create a controller and model with the help of the following command.
php artisan make:controller UserController --resource
php artisan make:model User
The first command will create a controller file in app>Http>Controllers>UserController.php and the second command will create a model file in app>Models>User.php .
In the controller file by default following methods will be created.
- index()
- create()
- store()
- show()
- edit()
- update()
- destroy()
Now, update the UserController.php file content with following
<?php

namespace App\Http\Controllers;

use App\Models\User;
use Illuminate\Http\Request;
use Illuminate\Support\Str;

class UserController extends Controller
{
    /**
     * Display a listing of the resource.
     *
     * @return \Illuminate\Http\Response
     */
    public function index()
    {
        $users = User::latest()->get();
        return [
            "status" => 1,
            "data" => $users
        ];
    }

    /**
     * Show the form for creating a new resource.
     *
     * @return \Illuminate\Http\Response
     */
    public function create()
    {
        //
    }

    /**
     * Store a newly created resource in storage.
     *
     * @param  \Illuminate\Http\Request  $request
     * @return \Illuminate\Http\Response
     */
    public function store(Request $request)
    {
        $request->validate([
            'name' => 'required',
            'email' => 'required',
        ]);
        $data = $request->all();
        $password = Str::random(10);
        $data['password']  = $password;
        $user = User::create($data);
        return [
            "status" => 1,
            "data" => $user,
            "msg" => "User created successfully"
        ];
    }

    /**
     * Display the specified resource.
     *
     * @param  int  $id
     * @return \Illuminate\Http\Response
     */
    public function show($id)
    {
        $user = User::findOrFail($id);
        return [
            "status" => 1,
            "data" => $user
        ];
    }

    /**
     * Show the form for editing the specified resource.
     *
     * @param  int  $id
     * @return \Illuminate\Http\Response
     */
    public function edit($id)
    {
        //
    }

    /**
     * Update the specified resource in storage.
     *
     * @param  \Illuminate\Http\Request  $request
     * @param  int  $id
     * @return \Illuminate\Http\Response
     */
    public function update(Request $request, $id)
    {
        $request->validate([
            'name' => 'required',
            'email' => 'required',
        ]);
        $user = User::findOrFail($id);
        $user->update($request->all());

        return [
            "status" => 1,
            "data" => $user,
            "msg" => "User updated successfully"
        ];
    }

    /**
     * Remove the specified resource from storage.
     *
     * @param  int  $id
     * @return \Illuminate\Http\Response
     */
    public function destroy($id)
    {
        $user = User::findOrFail($id);
        $user->delete();

        return [
            "status" => 1,
            "msg" => "User deleted successfully"
        ];
    }
}
After completing the above process execute the server locally using the following command.
php artisan serveNow you can open any API development platform and execute the following URLs.
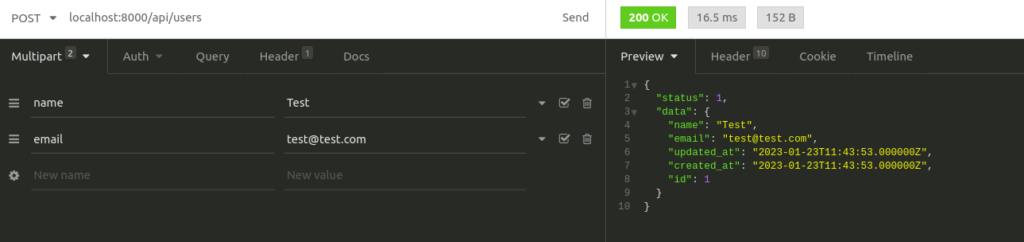
1. Create a user
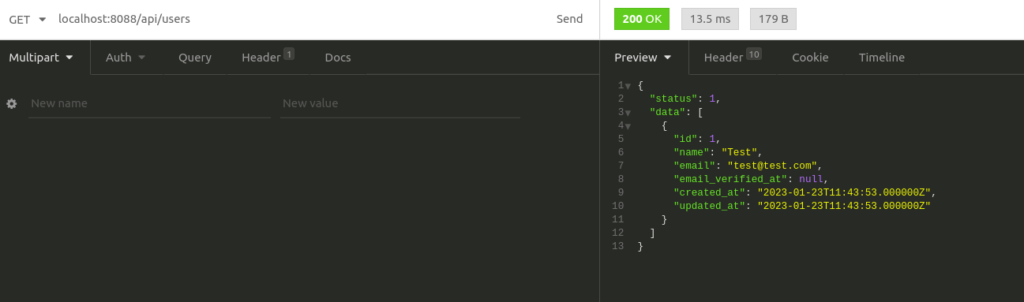
2. List all users
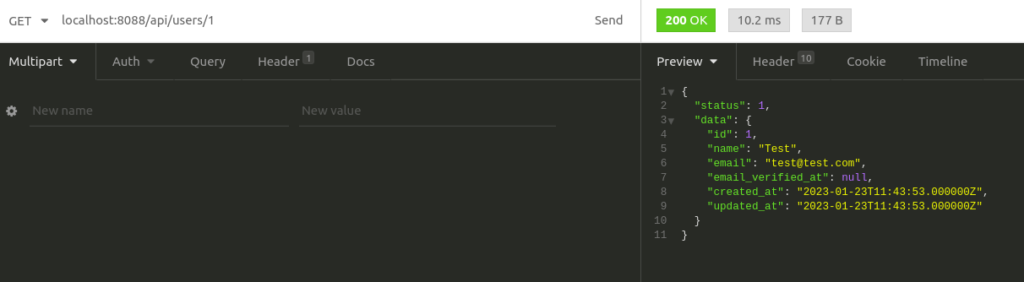
3. Get a user detail
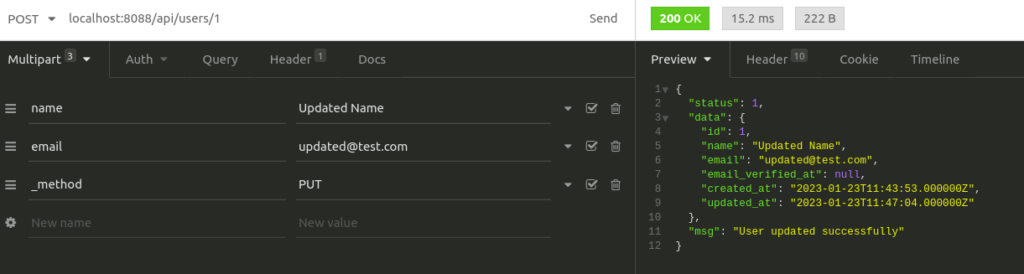
4. Update a user detail
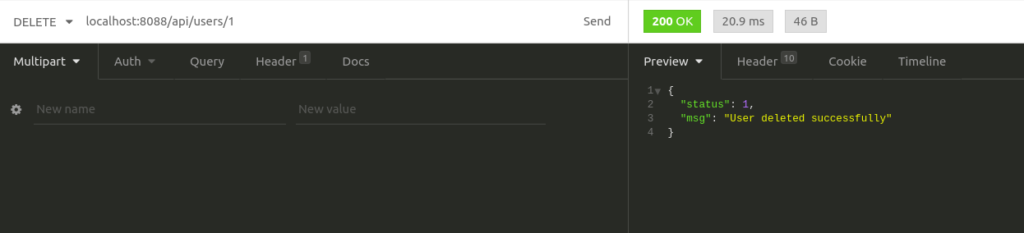
5. Delete a user
Conclusion
In this article, we have learned how to build REST API in Laravel 9. To learn more about Laravel visit here.