Let’s learn how to use npm packages with AWS Lambda. We will look at this by using Lambda Layers and also, by normal package installation method.
Introduction
Lambdas run on bare programming language itself, when we create a new Lambda it only has the core libraries that are present in the programming language. In addition the lambdas have a aws-sdk. The SDK is different in different programming languages, the aws-sdk provides core functions that help in interacting with AWS services. In the case of Node.js lambda aws-sdk package is provided out of the box when creating a Lambda.
So, what do we do in the case of adding new packages to lambda? For handling this it can be done in two ways, the Mentioned ways are:
So, without further waiting let’s get started using npm packages with AWS Lambda.
Prerequisites
Without using layers
In this, we are going to look at using npm packages, by uploading them straight to the lambda. To achieve let’s look at the steps to be taken.
Firstly create a Lambda.
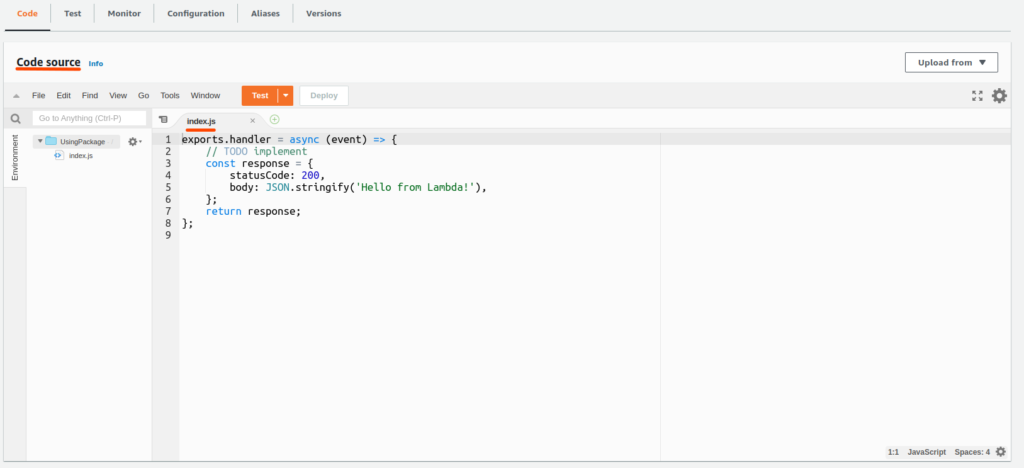
Now, that the lambda is created, initialize a node project with the same name as the lambda name in your local machine.

Installing NPM packages
$ mkdir UsingPackage && cd UsingPackage

$ npm init -y && npm install uuid

$ touch index.js && code .
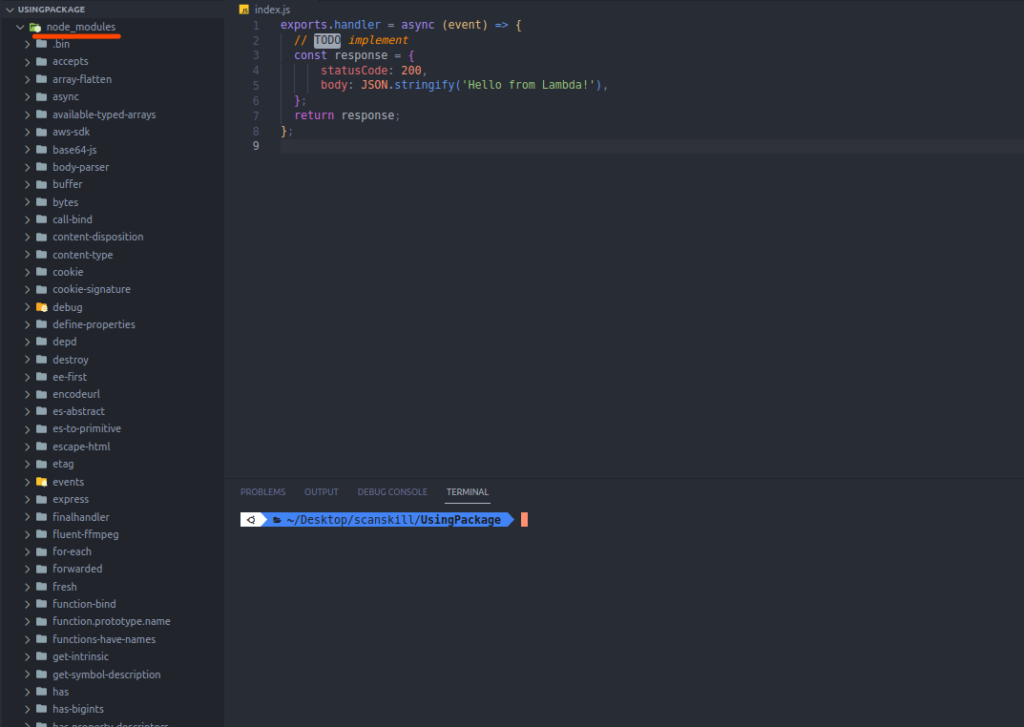
Now, that the node project has been initialized, copy the code present inside the index.js, of the lambda and paste it in the index.js of the local machine.

Now that the project is created, and the npm packages are installed, zip everything present inside the node project.

Now that the project is zipped, upload the created zip to the lambda, by following the process shown down below.


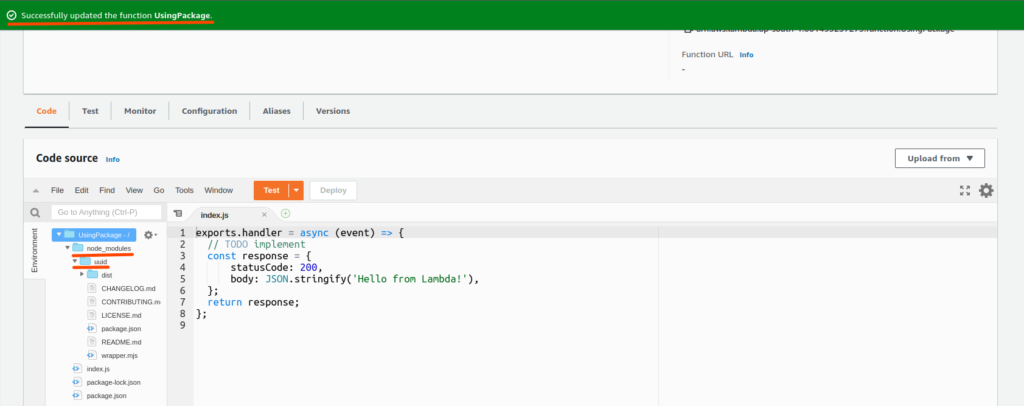
We can see that the node_modules, package.json, and package-lock.json are present in the uploaded lambda. Now that we have a new npm package named uuid in our lambda let’s test it.
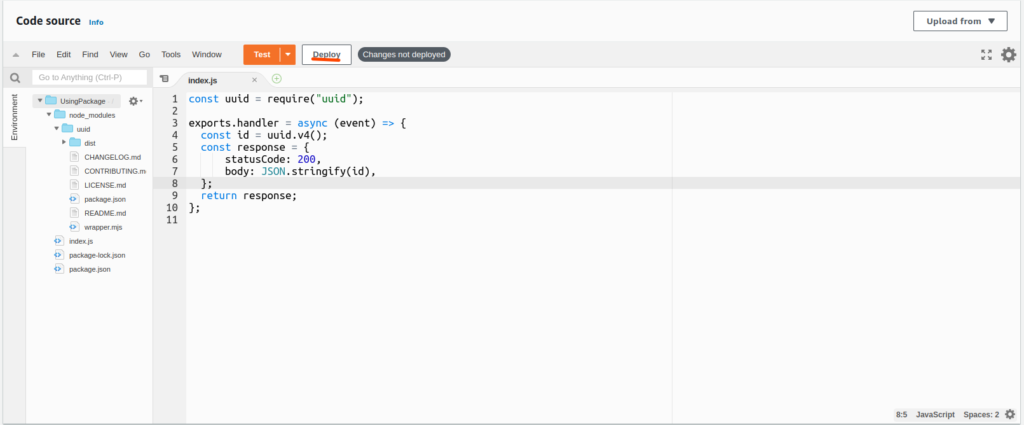
Click on test and configure a test event like shown in the image down below.

Let’s look at the result returned by the Lambda.

The lambda returned a random id in the body, which is generated by the uuid package.
The code is still editable, as seen in the above case where we were able to still see the code in the AWS Lambda dashboard. It is because the zip file was smaller than 10MB in size. Now let’s see what happens in the case of big packages. For achieving this we are going to install multiple packages that will make out file size bigger when zipped.
Uploading the Project
Let’s package the lambda from the local machine into a zip, and upload it to the lambda.

We can see that the package is 14.6 MB in size, let us look at the result we receive after uploading this zip.

Now, we can see that the code is not editable after the installation of multiple packages.
It will cause issues down the line, because the Lambda may have bugs present when packaged from the local machine if the issue is not tracked in the local environment itself, you cannot fix the problem on the lambda itself, because you are not able to edit the code.
So, to fix this issue before the problem of not being able to edit, and look at the code arises, let’s package the npm packages separately from the lambda so that the size of the lambda doesn’t go up. This is the first way, how to use npm packages with AWS Lambda.
Using Layers
The problem of installing, and packaging the npm packages together, but is fixed after using layers. Also, learn about how to use npm packages with AWS Lamda, but before getting into it let’s look at what layer is.
Lambda layers provide a convenient way to package libraries and other dependencies that you can use with your Lambda functions. Using layers reduces the size of uploaded deployment archives and makes it faster to deploy your code. It is packaged in the .zip format.
Now, in the Lambda function that you have created, go to the Layers area like in the image below.
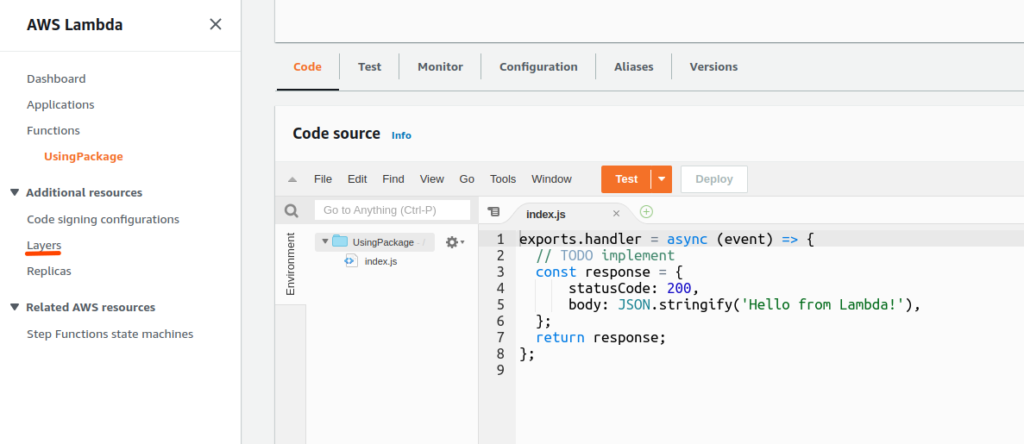
Click on the create layer button.

After clicking on the create a layer, go to your local machine, and then create a nodejs folder in the node project. As shown in the image below.
Creating a layer zip
## create a nodejs folder and move node_modules, package.json, and package-lock.json inside it
$ mkdir nodejs
move node_modules, package, and package-lock.json inside the nodejs folder.

After adding the folders and files, package the nodejs folder into a zip, as shown in the image below.

Now, go back to the AWS console create a layer section, then upload the layer as shown in the image down below.


Now, that the layer is created
After the layer is made go back to the Lambda, then go to the Layers section, which is present at the bottom of the lambda function page, and click on add a layer.

Then select options like those shown in the image below, then click on add button.

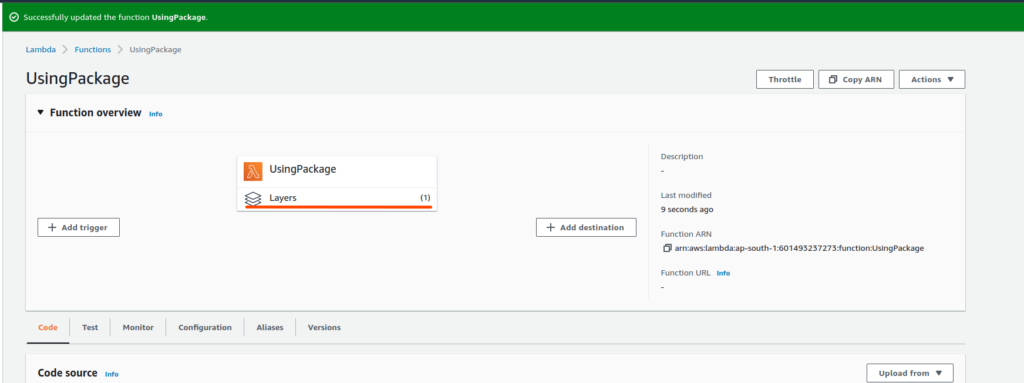
After the layer is added, let us test the code out by using the package that is present inside the layer. Finally, let’s test out a method present inside the uuid package, which is present inside the layer.
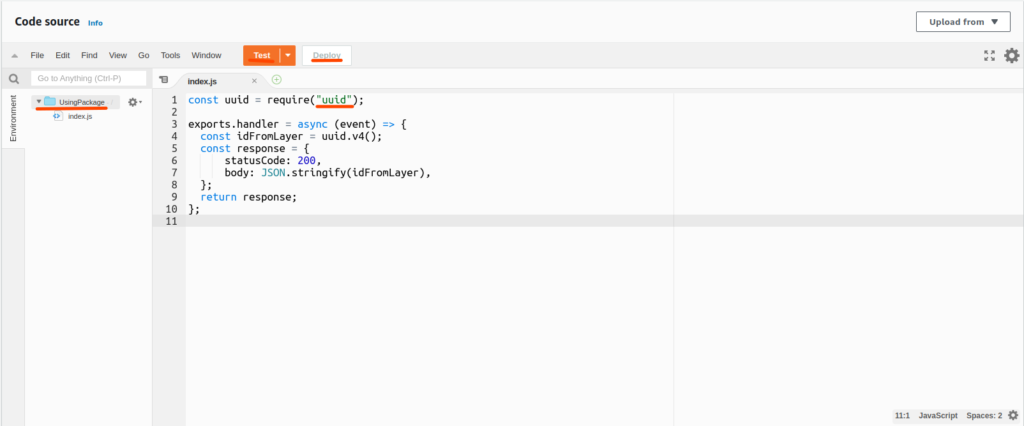
Now, that the code has been written which uses the uuid, package and uses its method v4(), which generates a UUID of version 4.

So, the result generated by testing the code was a success, it generated the required UUID. So, this is the second way, on how to use npm packages with AWS Lambda.
Conclusion
So, in this article, we saw how to use npm packages with AWS Lambda, and how it differs from uploading the package directly to AWS Lambda.
To learn more about AWS services, look into our AWS category here: AWS, and learn about building an API using AWS lambda and API gateway here.
