

Are you looking for how to add a custom domain to free Heroku app ?? for free ??
Heroku is one of the most popular cloud hosting services. It provides a free tier to host your websites which is also quite capable, you can deploy up to 5 applications, hosted in their *.herokuapp.com domain. But to move the app to a custom domain you have to pay. In this tutorial, you’ll learn to add a custom domain to free Heroku app using Cloudflare workers.
Let’s dive into the tutorial!
Prerequisites:
- Cloudflare Account (free)
- Cloudflare Workers enabled (free)
- Application hosted on Heroku
Add a Custom Domain to Free Heroku App Using Cloudflare
Create Cloudflare Worker
Cloudflare’s worker is a W3C standard API for scripts that run in the background in a web browser and intercept HTTP requests. It runs on Cloudflare’s servers, not in a browser. Using this feature, you can run any JavaScript code, Intercept and modify any HTTP request and response URLs, status, headers, and body content. Know more about Cloudflare Worker here.
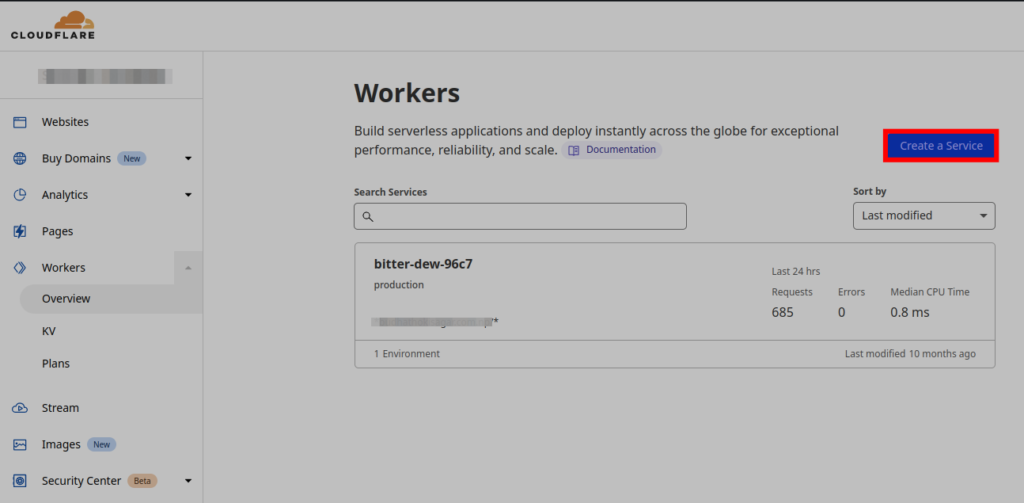
Login to your Cloudflare account and go to Workers from the sidebar menu:
- Click on Create a Service. Then select HTTP handler as a starter and click on Create Service.
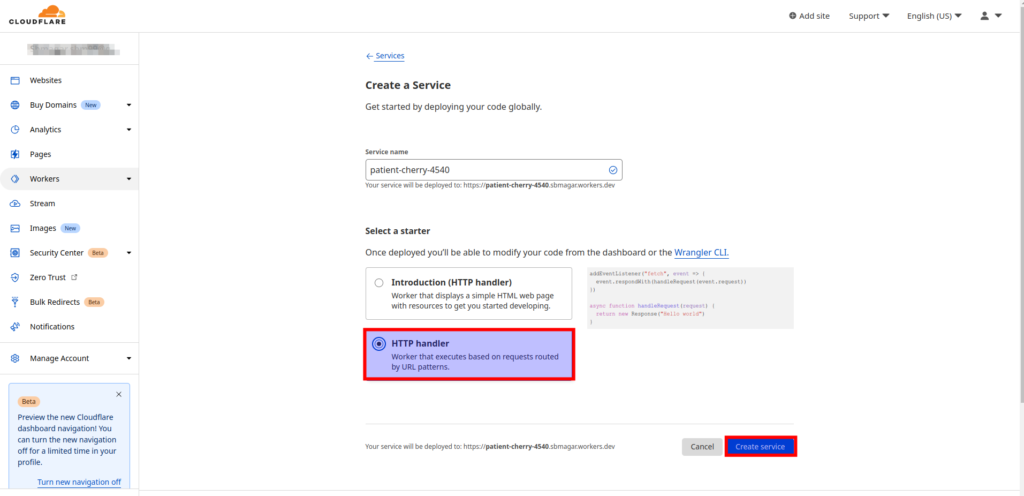
- On the next page you can create your own environment for this tutorial I have used the default environment (production).

- Click on Quick edit button. This is our most important part where you’ll define the worker.
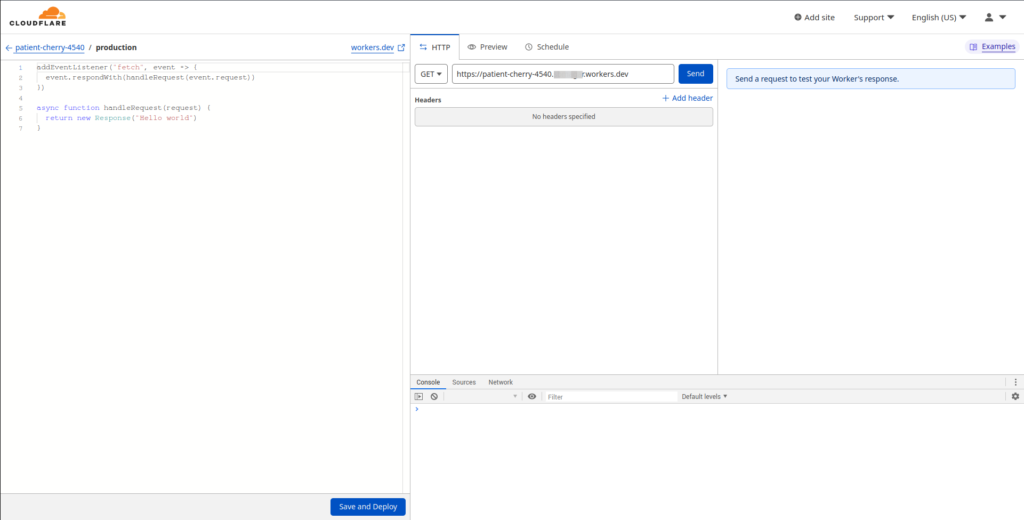
- Now replace Hello world code with the following code. Here, the code below will redirect the URLs from
*.yourdomain.com.np/*(or*.yourdomain.com/*) toyourapp.herokuapp.com/*
// keep track of all our blog endpoints here
const myBlog = {
  hostname: "yourapp.herokuapp.com",
//   targetSubdirectory: "/",
//   assetsPathnames: ["/", ""]
}

async function handleRequest(request) {
  // returns an empty string or a path if one exists
  const formatPath = (url) => {
    const pruned = url.pathname.split("/").filter(part => part)
    return pruned && pruned.length > 1 ? `${pruned.join("/")}` : ""
  }

  const parsedUrl = new URL(request.url)
  const requestMatches = match => new RegExp(match).test(parsedUrl.pathname)

  // if its blog html, get it
  if (requestMatches(myBlog.hostname)) {
    console.log("this is a request for a blog document", parsedUrl.pathname)
    const targetPath = formatPath(parsedUrl).substr(myBlog.hostname.length)
    return fetch(`https://${myBlog.hostname}/`)
  }

  // if its blog assets, get them
  if ([myBlog.assetsPathnames].some(requestMatches)) {
    console.log("this is a request for blog assets", parsedUrl.pathname)
    const assetUrl = request.url.replace(parsedUrl.hostname, myBlog.hostname);

    return fetch(assetUrl)
  }

  console.log("this is a request to my root domain", parsedUrl.host, parsedUrl.pathname);
  // if its not a request blog related stuff, do nothing
  return fetch(request)
}

addEventListener("fetch", event => {
  event.respondWith(handleRequest(event.request))
})
To know more click here.
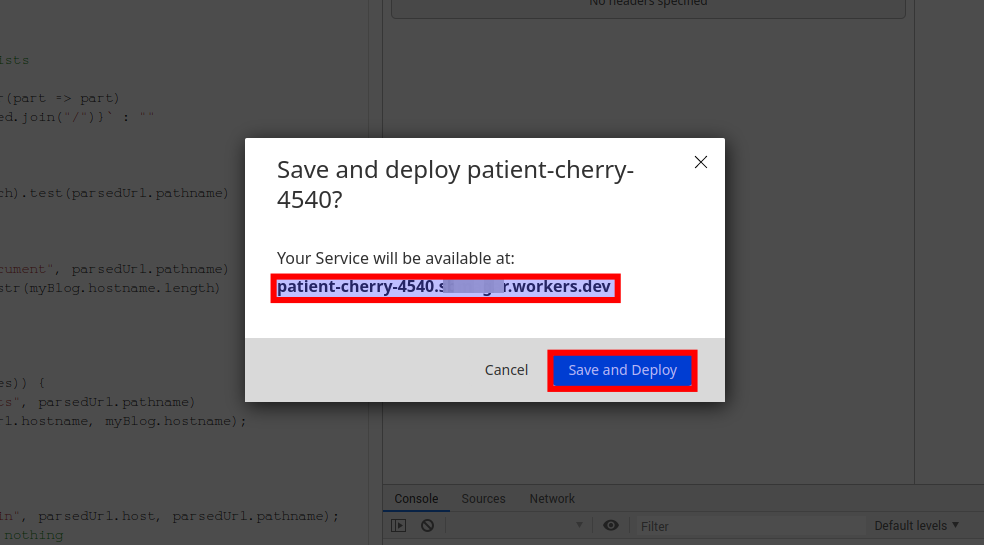
- After replacing the script, click on Save and Deploy button.

You have successfully deployed your worker to an auto-generated endpoint. Check the link shown to you in the confirmation pop-up window.
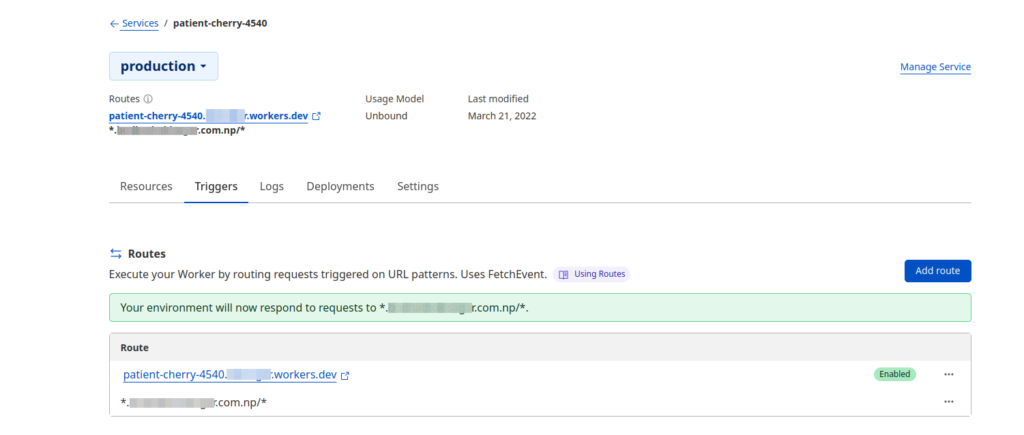
Add Routing
Go to Triggers, click on Add route.
- Edit route with your domain name or where you’d like to display the content hosted on Heroku.

- Select zone as your zone. Click on Add route.
Conclusion
Here you go, you’ve used Cloudflare’s worker to add a custom domain to free Heroku app.
Similar articles: