

Introduction
In this article we will be learning basic implementation services in Angular.
Prerequisite
- Basic knowledge of Angular
- Setup of a local development environment. You will need Angular CLI to set up your environment.
Angular Service
Angular service allow us to define code or functionality that is then accessible and reused throughout many components in our projects.The main purpose of an Angular service is to encapsulate a business logic and data with different Angular components.
It is class which is defined to perfom certain task and that can be easily used with any components.It helps us to isolate our controller doing business logic, communication, and storage related things because services are intended for business logic or communication with server either.
The majority of the time, we find ourselves reusing the same code across multiple components.So in those cases we can create the service and use that service in our components.
Let’s take an example. Our frontend application needss to communicate with the backend through APIs to send and retrieve data. Therefore, we create a service to handle the API calls so that the same logic can be shared and reused between components.
Why to use angular services
- It is used to interact angular application with the backend.
- It can be used to share common reuseable code among multiple components.We need to reusable code as our application will get bigger and it can be hard to manage our code base.
- It makes testing and debugging easier.
Creating the Service
We need to run command below to generate service in root project directory terminal.
ng generate service servicenameExample
We will create new project to show todos list from the service
ng new angular-service-exampleThe next step is to create todo service.Run the command below to generate todo service.
ng generate service service/todowe can see todo service file has been created inside service directory as todo.service.ts and todo.service.spec.ts
Add the code below in the todo.service.ts file
import { Injectable } from '@angular/core';

@Injectable({
  providedIn: 'root'
})
export class TodoService {

  public todos = [
    {
      "id": 1,
      "title": "Learn NodoJs"
    }, {
      "id": 2,
      "title": "Learn React"
    }, {
      "id": 3,
      "title": "Create video for youtube"
    }, {
      "id": 4,
      "title": "Read books"
    }, {
      "id": 5,
      "title": "Go for walk"
    }
  ]
  getTodos(): any[] {
    return this.todos;
  }
}
Here we have created TodoService.We have defined todos array with id and title.Then getTodos method has been added which will return the list of todos.
Add the code below in app.component.ts file
import { Component } from '@angular/core';
import {TodoService} from './service/todo.service'
@Component({
  selector: 'app-root',
  templateUrl: './app.component.html',
  styleUrls: ['./app.component.css']
})
export class AppComponent {
  title = 'angular-service-example';
  todos:any =[];

  constructor(public _todoService:TodoService){
  }
  ngOnInit() {
    this._todoService.getTodos().subscribe(x=>{
      this.todos = x;
    });
  }
}
Here we have import TodoService and injected that service in AppComponent.In the ngOnInitlifecycle,we have subscribe the getTodos method which we have created in TodoService.
Add the code below in app.component.hml file
<h2>Todo List </h2>
<ul>
  <li *ngFor="let item of todos">{{item.id}} - {{item.title}}</li>
</ul>
Results
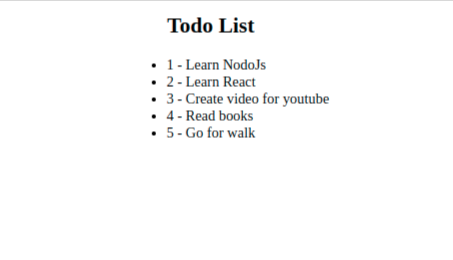
Here we have displayed the list of todos with id and title which we have created in TodoService.
Conclusion
In this article we have learned basic implementation services in Angular.