
In this article, you’ll learn about local set up Kubernetes with Minikube so that you can use a local Kubernetes instance for your development environment.
What you’ll get
You’ll learn to:
- Install a local Kubernetes instance by using
minikubeon Linux, macOS ,or Windows. - Expose ingress for services outside of the Kubernetes cluster.
- Additionally, configure the hostname to your ingress IP.
Minikube
minikube is an open-source utility that allows you to quickly deploy a local Kubernetes cluster on your personal computer. By using virtualization technologies, minikube creates a virtual machine (VM) that contains a single-node Kubernetes cluster. VMs are virtual computers and each VM is allocated its own system resources and operating system.
The latest minikube releases also allow you to create your cluster by using containers instead of virtual machines. Nevertheless, this solution is still not mature, and it is not supported for this course.
And, minikube is compatible with Linux, macOS, and Windows operating systems.
Note: Installing a local Kubernetes cluster needs administrative privileges in your system. If you do not have administrative privileges then you can’t use the Kubernetes cluster locally. In such a case, you can use a remote Kubernetes cluster. e.g. Redhat’s OpenShift
Prerequisites
- At least 2 GB of free memory
- 2 CPUs or more
- At least 20 GB of free disk space
- A locally installed hypervisor (using a container runtime is not supported in this course)
Local Set Up Kubernetes with Minikube
Let’s install minikube first.
Note: You must install or enable hypervisor technology on your system before installing
minikube. Hypervisor is software that is used to create and manage virtual machines on a shared physical hardware system.
Step-1: Install minikube
This tutorial is for Linux systems only, to set up on MacOS or Windows follow the official documentation: minikube installation.
1.1) Install Hypervisor on Linux
The preferred hypervisor for Linux systems is kvm2. minikube communicates with the hypervisor using the libvirt virtualization API libraries.
Note: Prefix the following commands with
sudoif you are running a user without administrative privileges.
Install virtualization libraries (for other than Ubuntu use respective package manager and libraries — google it):
# For Ubuntu/Debian
$ sudo apt update
$ sudo apt -y install qemu-kvm libvirt-daemon bridge-utils virtinst libvirt-daemon-system
Start the libvirtd service:
$ systemctl start libvirtd
$ systemctl enable libvirtd
OR,
You can use VirtualBox to use Minikube.
To install VirtualBox run the following command in Linux:
# for Arch Linux
$ sudo pacman -S virtualbox

# for Ubuntu
$ sudo apt-get update
$ sudo apt-get install virtualbox
$ sudo apt-get install virtualbox—ext–pack
1.2) Install Minikube on Linux
- If your system contains a package manager or software manager including
minikube, then use it and verify the version matches the minimum requirements.
$ sudo apt install minikube

# For Arch Linux
$ sudo pacman -S minikube
- If your package manager doesn’t have
minikuberepository, then go to https://github.com/kubernetes/minikube/releases and download the latest release matching your operating system.
1.3) Start Minikube Cluster on Linux
To initialize your minikube cluster, use the minikube start command. (I’m using Arch Linux with virtualbox — you can use kvm2)
$ minikube start --driver=virtualbox
  minikube v1.25.2 on Arch "rolling"
    ▪ KUBECONFIG=/home/sagar/.kube/confi
✨  Using the virtualbox driver based on existing profile
👍  Starting control plane node minikube in cluster minikube
🔄  Restarting existing virtualbox VM for "minikube" ...
🎉  minikube 1.26.1 is available! Download it: <https://github.com/kubernetes/minikube/releases/tag/v1.26.1>
💡  To disable this notice, run: 'minikube config set WantUpdateNotification false'

🐳  Preparing Kubernetes v1.23.3 on Docker 20.10.12 ...
    ▪ kubelet.housekeeping-interval=5m
    ▪ Using image gcr.io/k8s-minikube/storage-provisioner:v5
    ▪ Using image kubernetesui/dashboard:v2.3.1
    ▪ Using image kubernetesui/metrics-scraper:v1.0.7
    ▪ Using image k8s.gcr.io/ingress-nginx/controller:v1.1.1
    ▪ Using image k8s.gcr.io/ingress-nginx/kube-webhook-certgen:v1.1.1
    ▪ Using image k8s.gcr.io/ingress-nginx/kube-webhook-certgen:v1.1.1
🔎  Verifying Kubernetes components...
🔎  Verifying ingress addon...
🌟  Enabled addons: storage-provisioner, default-storageclass, ingress, dashboard
🏄  Done! kubectl is now configured to use "minikube" cluster and "default" namespace by defaul
Note: To set the default driver, run the command
minikube config set driver DRIVER.
Step-2: Verify Minikube installation
Use the minikube status command to validate that the minikube installation is running successfully:
$ minikube status
minikube
type: Control Plane
host: Running
kubelet: Running
apiserver: Running
kubeconfig: Configured
If any errors please ensure the driver is set up correctly or refer to Minikube Get Started documentation for troubleshooting.
Step-3: Add extensions to Minikube
To add more features to your minikube, it provides an add-on-based extension system so that one can add more features by installing the needed add-ons.
To view the list of add-ons available and installation status use the following command:
$ minikube addons list

minikube addons list
|-----------------------------|----------|--------------|--------------------------------|
|         ADDON NAME          | PROFILE  |    STATUS    |           MAINTAINER           |
|-----------------------------|----------|--------------|--------------------------------|
| ambassador                  | minikube | disabled     | third-party (ambassador)       |
| auto-pause                  | minikube | disabled     | google                         |
| csi-hostpath-driver         | minikube | disabled     | kubernetes                     |
| dashboard                   | minikube | disabled     | kubernetes                     |
| default-storageclass        | minikube | enabled ✅   | kubernetes                     |
| efk                         | minikube | disabled     | third-party (elastic)          |
| freshpod                    | minikube | disabled     | google                         |
| gcp-auth                    | minikube | disabled     | google                         |
| gvisor                      | minikube | disabled     | google                         |
| helm-tiller                 | minikube | disabled     | third-party (helm)             |
| ingress                     | minikube | disabled     | unknown (third-party)          |
| ingress-dns                 | minikube | disabled     | google                         |
| istio                       | minikube | disabled     | third-party (istio)            |
...
In my output, you can see I have only default add-ons (Right tick with enabled status). Other are available add-ons for your Minikube.
To enable add ons run the following command:
$ minikube addons enable ingress

    ▪ Using image k8s.gcr.io/ingress-nginx/controller:v1.1.1
    ▪ Using image k8s.gcr.io/ingress-nginx/kube-webhook-certgen:v1.1.1
    ▪ Using image k8s.gcr.io/ingress-nginx/kube-webhook-certgen:v1.1.1
🔎  Verifying ingress addon...
🌟  The 'ingress' addon is enabled
As in my Output, versions and docker images can vary in your case, but make sure the final validation is successful.
Also, let’s enable the dashboard add-on with the following command:
$ minikube addons enable dashboard

    ▪ Using image kubernetesui/dashboard:v2.3.1
    ▪ Using image kubernetesui/metrics-scraper:v1.0.7
💡  Some dashboard features require the metrics-server addon. To enable all features please run:
        minikube addons enable metrics-server
🌟  The 'dashboard' addon is enabled
Now see the addons status by running the list command again:
$ minikube addons list

|-----------------------------|----------|--------------|--------------------------------|
|         ADDON NAME          | PROFILE  |    STATUS    |           MAINTAINER           |
|-----------------------------|----------|--------------|--------------------------------|
| ambassador                  | minikube | disabled     | third-party (ambassador)       |
| auto-pause                  | minikube | disabled     | google                         |
| csi-hostpath-driver         | minikube | disabled     | kubernetes                     |
| dashboard                   | minikube | enabled ✅   | kubernetes                     |
| default-storageclass        | minikube | enabled ✅   | kubernetes                     |
| efk                         | minikube | disabled     | third-party (elastic)          |
| freshpod                    | minikube | disabled     | google                         |
| gcp-auth                    | minikube | disabled     | google                         |
| gvisor                      | minikube | disabled     | google                         |
| helm-tiller                 | minikube | disabled     | third-party (helm)             |
| ingress                     | minikube | enabled ✅   | unknown (third-party)          |
| ingress-dns                 | minikube | disabled     | google                         |
| istio                       | minikube | disabled     | third-party (istio)            |
| istio-provisioner           | minikube | disabled     | third-party (istio)            |
...
As you can see, from my output, dashboard, and ingress are enabled.
Note: Here,
Ingressis installed so that an IP is assigned to the minikube using that we can expose our kubernets cluster to outside the cluster. i.e. access from outside K8s cluster.
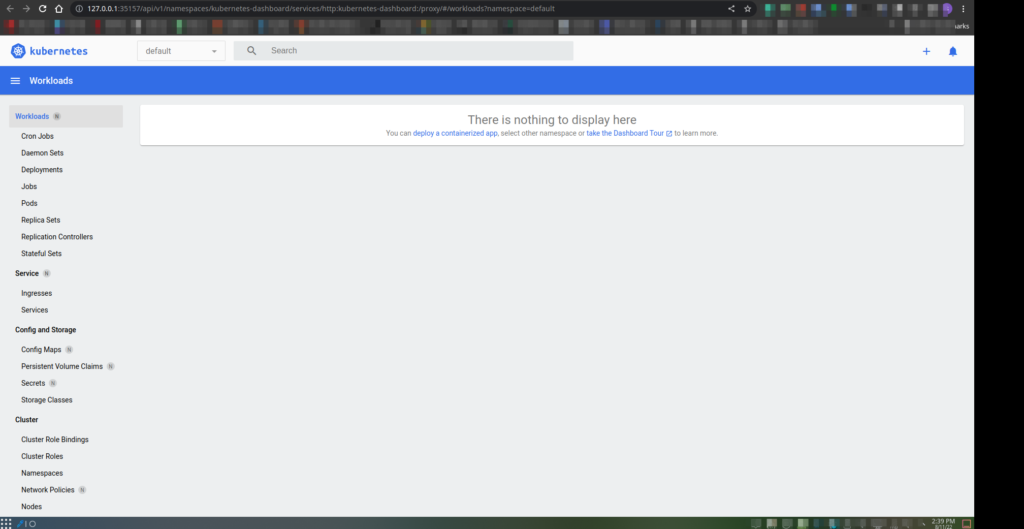
Once the dashboard is enabled you can open it by using the minikube dashboard command. This command will open the dashboard in your web browser.
$ minikube dashboard

🤔  Verifying dashboard health ...
🚀  Launching proxy ...
🤔  Verifying proxy health ...
🎉  Opening <http://127.0.0.1:35157/api/v1/namespaces/kubernetes-dashboard/services/http:kubernetes-dashboard:/proxy/> in your default browser...
Gtk-Message: 14:38:42.184: Failed to load module "appmenu-gtk-module"
Opening in existing browser session.
Browser output:
Press Ctrl+C in the terminal to stop the connection.
Step-4: Enable external access to Minikube Ingress
Now using the external Minikube IP and hostname associated with our Ingress we can access from outside the Kubernetes cluster.
4.1) External access to Minikube
Routing traffic from your local machine to your Minikube Kubernetes cluster requires two steps.
First, you must find the local IP assigned to your Ingress add-on. To find the ingress IP run the following command:
$ minikube ip

192.168.59.109
Your IP might be different as it depends on your virtual environment configuration.
Now you can access Kubernetes applications from outside the K8s cluster (from a local machine) using this IP.
Additional Step
In this step, you will be configuring the hostname to your Minikube ingress IP, so that you can use hostname instead of IP.
To do this follow the steps:
- Edit /etc/hosts file:
# Linux or MacOS
$ sudo nano /etc/hosts
For windows go to C:\\Windows\\System32\\drivers\\etc\\hosts and edit with administrative privileges.
- Add the following line:
<IP_Address> test.example.comReplace <IP_Address> with your minikub ingress IP. In my case hosts file look like this:
# Static table lookup for hostnames.
# See hosts(5) for details.
127.0.0.1       localhost
::1             localhost
127.0.1.1       arch_linux

# Minikube ingress IP
192.168.59.109  dev.sagar.com
Here, I have declared dev.sagar.com as the hostname for my kubernetes minikube ingress IP.
<IP-ADDRESS> hello.example.comNote: If you delete and recreate your minikube cluster, then you have to update IP address assigned to the hosts file accordingly.
Now, you can access services in the cluster with the hostname and the relative path associated to the ingress. For example, if your application is mapped to the path /demoapp you can access it using the hostname as http://dev.sagar.com/demoapp.
That’s it!
Conclusion
In this tutorial, we talked about how we can create a local Kubernetes cluster with Minikube and make it accessible from the outside of the Kubernetes cluster.
Thank you!