

Let’s look into using PostgreSQL with Node.js, performing connection to the database, and performing INSERT, READ, UPDATE, and DELETE operations.
Introduction
PostgreSQL commonly referred to as Postgres, has become one of the most popular options for developers using Node.js as a database. PostgreSQL all in all is an open-source, object-relational database system that extends on the SQL language, making it more extensible. It supports more datatypes, complex ones too to be precise. Postgres is commonly used because of its ability to handle complex queries, and deal with huge datasets, and mainly because it provides this many features while being open source and free for anyone to use.common
Node.js is an open-source, language runtime for JavaScript. It executes Javascript code on the server. It was designed to build scalable applications that run on the backend.
So, the combination of PostgreSQL and Node.js, in most server-side applications is commonly seen, for the reason of both being open source, easier to get started on, and their scalability when the task requires for it.
Prerequisites
- PostgreSQL is installed on the machine: https://www.postgresql.org/download/
- Node.js
PostgreSQL With Node.js
For using PostgreSQL with Node.js, we need to install additional packages. Let’s look into the installation of dependencies, then look into performing CRUD operations in PostgreSQL with Node.js.
Installing Dependencies And Starting Project
Initialization of project
## creating project directory and initializing node project
$ mkdir node-postgres && cd node-postgres
$ npm init -y

## creating start point
$ touch index.js
Adding Dependencies
## Installing express as a server
$ npm install express

## installing pg for interacting with PostgreSQL database
$ npm install pg

## installing dotenv for using environment variables
$ npm install dotenv

## installing nodemon as a dev dependency for hot reload on code change
$ npm install --save-dev nodemon

## add .env file to keep all the environment varibles
$ touch index.js
Editing package.json file
{
  "name": "postgresql-with-nodejs",
  "description": "Using PostgreSQL with Node.js",
  "version": "1.0.0",
  "main": "index.js",
  "scripts": {
    "dev": "nodemon index.js",
    "start": "node index.js"
  },
  "keywords": [],
  "author": "Shuvam Lamichhane",
  "license": "ISC",
  "dependencies": {
    "express": "^4.18.1",
    "pg": "^8.8.0"
  },
  "devDependencies": {
    "nodemon": "^2.0.19"
  }
}
In the above package.json file, we added start and dev scripts, the start script is basically used for production. Whereas the dev script is used for development as it supports hot reload on code change.
CRUD Operations
Now that the project is set up and all the dependencies are added, let’s start performing the crud operations.
Firstly let’s add environment variables to the .env file.
# .env

DB_USER = database_users_name
DB_PASSWORD = database_users_password
DB_HOST = database_host_name
DATABASE = name_of_database_to_use
DB_PORT = database_port_name
PORT = 3000
Now, that the environment variables are added let’s start the CRUD Operations.
For performing crud operations we have created a table, the tables schema is provided below.

So, from the above schema, we can see that it has the field student_id which is an integer, is the primary key, and is automatically incremented on the addition of a new field. The next is the name column which is a varchar(255) and is not able to be null, i.e. data insertion value should be inserted in the name column. Likewise, the column is the same as that of the name column but, the data inserted in this field should be unique.
Now, let us connect to PostgreSQL with Node.js.
//* index.js

//* express initialiazation
const express = require("express");
const app = express();
app.use(express.json());

//* setting up dotenv to make use of environment variable possible
require("dotenv").config();
const PORT = process.env.PORT || 3000;

//* Setting up postgres and connection through pool
const pg = require("pg");
const pool = new pg.Pool({
  user: process.env.DB_USER,
  password: process.env.DB_PASSWORD,
  host: process.env.DB_HOST,
  database: process.env.DATABASE,
  port: process.env.DB_PORT,
});

/*
    *** CRUD CODES PRESENT HERE ***
*/

//* Starting express server
app.listen(PORT, () => console.log(`SERVER STARTED ON PORT -> ${PORT}`))
Now that the express server is set up, and the connection to the PostgreSQL is made, let’s perform CRUD operations.
Finally, let’s look at different CRUD operations through different routes.
Create/Insert Operation
app.post("/", async (req, res) => {
  const { name, email } = req.body;
  try {
    const insertQuery = "INSERT INTO student (name, email) values($1, $2) RETURNING *";
    const result = await pool.query(insertQuery, [name, email]);
    return res.send(result.rows);
  } catch (error) {
    return res.status(500).send(error);
  }
});
The query inserts data into the database and then returns the inserted values back.
Result

After inserting, we can see that the, autogenerated values such as student_id, and created_at are also returned back.
Read/Select Operation
Select All / Get All Data
app.get("/", async (req, res) => {
  const selectQuery = "SELECT * FROM student";
  const result = await pool.query(selectQuery);
  return res.status(200).send(result.rows);
});
The query selects all the data present in the student table.
Result
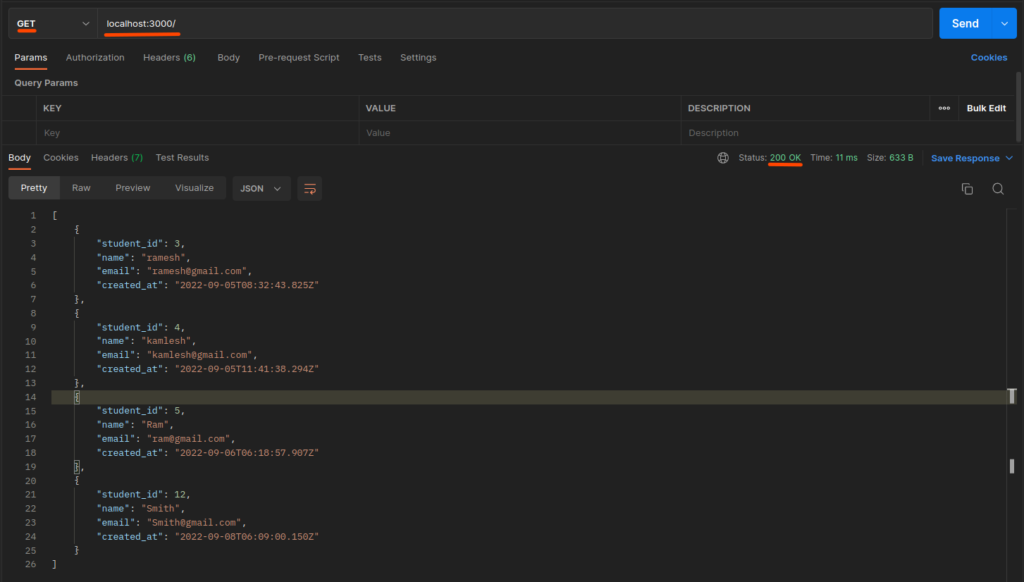
Specifically, we see that all the data from the student table is returned back.
Select One / GetById
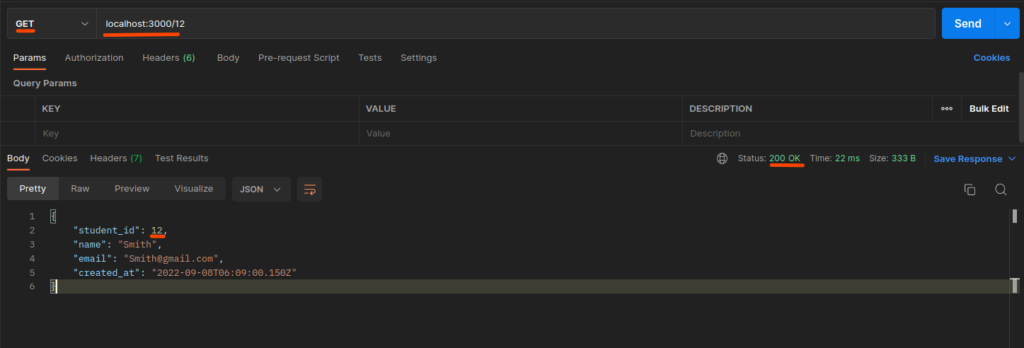
app.get("/:id", async (req, res) => {
const id = req.params.id;
const selectQuery = "SELECT * FROM student where student_id = $1";
const result = await pool.query(selectQuery, [id]);
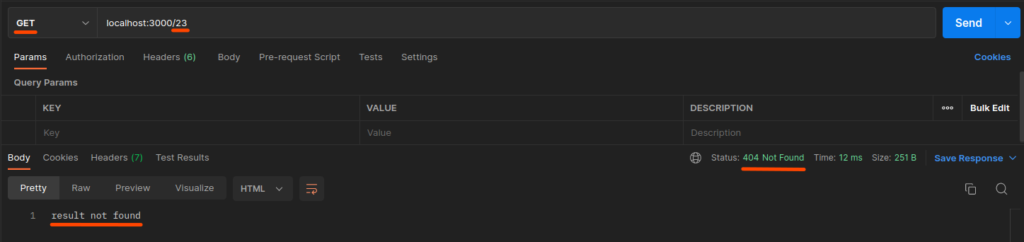
if (!result.rowCount) {
return res.status(404).send("result not found");
}
return res.status(200).send(...result.rows);
});The query selects returns one data if data is present with matching student_id.
Result on Success
Result on failure
Update Operation
app.put("/:id", async (req, res) => {
  let { email, name } = req.body;
  const id = req.params.id;
  const selectQuery = "SELECT * FROM student WHERE student_id = $1";
  const selectResult = await pool.query(selectQuery, [id]);

  if (!selectResult.rowCount) {
    return res.status(400).send("data for the id not found");
  }
  const student = selectResult.rows[0];

  email = email || student.email;
  name = name || student.name;

  const updateQuery = "UPDATE student SET email = $1, name = $2 WHERE student_id = $3 RETURNING *";
  const updateResult = await pool.query(updateQuery, [email, name, id]);

  return res.status(200).send(updateResult.rows[0]);
});
It updates the incoming data to the specified student, with the provided :id which is the student’s student_id, and returns all the data back. We will edit the data of student Smith with student_id = 12.
Result Before Edit
Result After Edit

We see that the data of students with student_id = 12 was edited and returned back.
Delete Operation
app.delete("/:id", async (req, res) => {
const id = req.params.id;
try {
const deleteQuery = "DELETE FROM STUDENT WHERE student_id = $1 RETURNING *";
const result = await pool.query(deleteQuery, [id]);
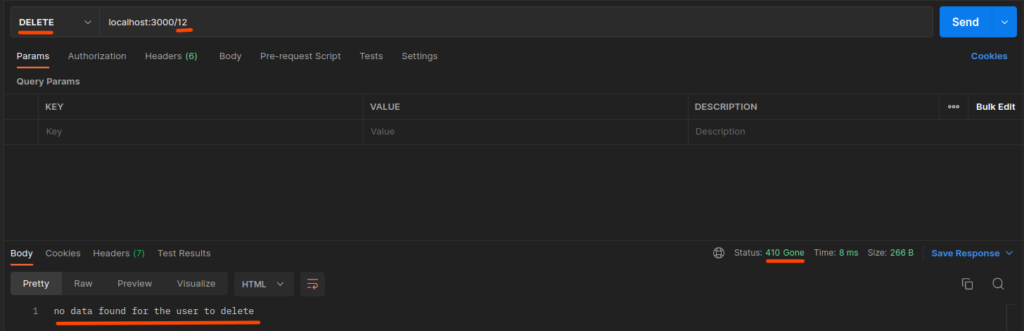
if (!result.rowCount) {
return res.status(410).send("no data found for the user to delete");
}
return res.send(result.rows);
} catch (error) {
return res.status(409).send(error);
}
});It searches and deletes the student’s data with the matching student_id, and returns back the deleted data. Let’s delete the student with the student_id=12.
Deleting student

Removing non-existing student
Finally, we can see that the student with the student_id=12 was deleted.
Conclusion
So, in this article, we looked at how to perform CRUD operations in PostgreSQL with Node.js. We used the Express framework as the server and interacted with PostgreSQL Database with the pg package, therefore using PostgreSQL with Node.js.