

Amazon SES(Simple Email Service) is a simple cost-efficient email service that is used to send and receive email using your email address or domain. By default AWS SES allows us to send and receive emails from verified email addresses and domains in order to prevent spamming.
Amazon SES charges you on the basis of the volume of the emails sent and received. There is no hidden charge like subscriptions, contract negotiations, etc. Amazon provides 62,000 messages per month in their Free Usage Tier with no charge. For further detailed information about the charge, you can follow this link.
How to send email using SES and node.js Lamda
The figure below shows how SES sends emails from sender to recipient.

Pre-requisites
- AWS Credentials with permission to SES
- Basic understanding of AWS SES and SAM
The Amazon SES provides three different ways to send an email. Ther are using the console, using the SMTP interface, and using the API (i.e. lambda in our case). In this article, we will use the following steps to send emails using SES and node Lambda
- Setting up email for SES
- Creating a lambda function to send email
Setting up email for SES
In the development environment, SES allows only verified identities like email, domain, subdomain to send and receive email. We will add an email in the SES configuration using which we will send and receive an email.
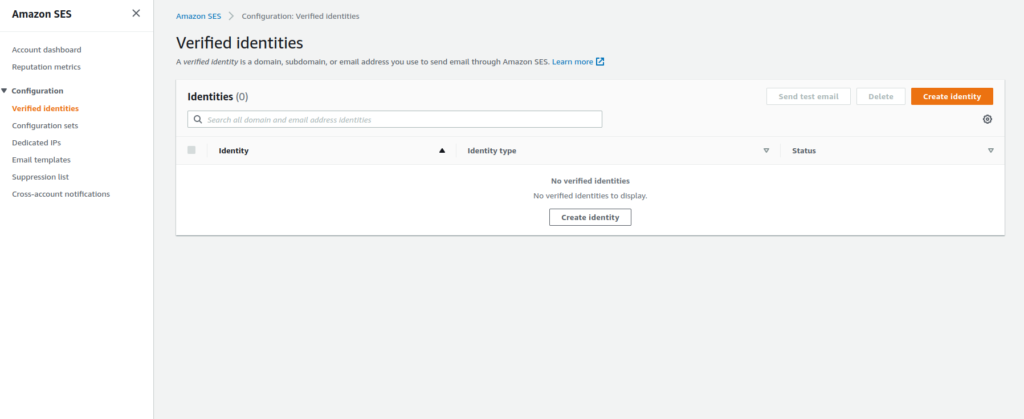
- Go to AWS Management Console and open the Amazon SES console.
- In the navigation pane, under Configuration, choose Verified identities and under Verified identities choose Create Identity.
3. Under Identity details choose an Email address
4. In email address input, enter the email address which will be able to send and receive an email.
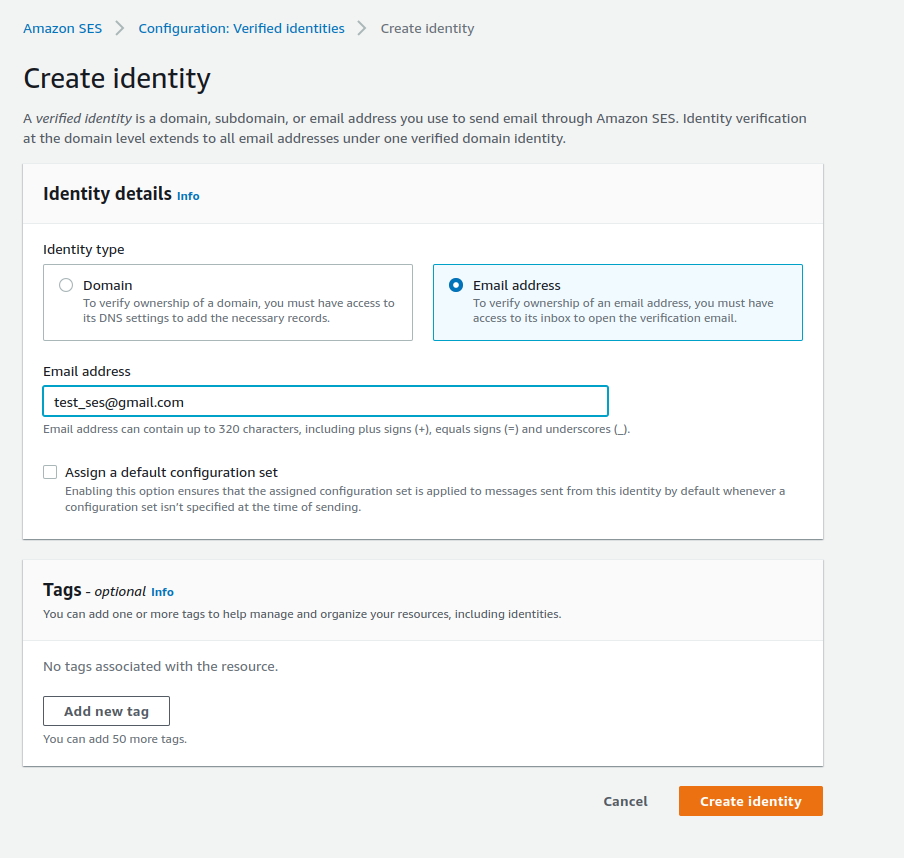
5. To create your email address identity, click Create identity. After it’s created, you should receive a verification email from AWS regarding email verification. The next step is to verify your email address by clicking the link provided in the email sent to the above email address.
Creating a lambda function to send email
Now we have verified an email address using which we can send an email. As discussed above, we will use the lambda function to send an email.
const AWS = require("aws-sdk");

const SEService = new AWS.SES({
  apiVersion: "2010-12-01",
  accessKeyId: AWSACCESSKEYID,
  secretAccessKey: AWSSECRETACCESSKEY,
  region: AWSREGION,
});

exports.handler = async (event, context) => {
  const params = {
    Destination: {
      ToAddress: [test@gmail.com]
    },
    Message: {
      Body: {
        Html: {
          // HTML Format of the email
          Charset: "UTF-8",
          Data:
            "<html><body><h1>Hello User</h1><p>Sample email body</p></body></html>"
        },
        Text: {
          Charset: "UTF-8",
          Data: "Hello User Sample Sample email body"
        }
      },
      Subject: {
        Charset: "UTF-8",
        Data: "Test email"
      }
    },
    Source: "test@gmail.com"
  };
  const response = SEService.sendEmail(params).promise();
  return response;
};
In the above sample code, we use aws-sdk to send emails.
- Destination.ToAddress : This parameter takes array of email address the we want to send an email.
- Message.Body.Html.Data: This parameter contains the html body part of the email sent. which every browser and email application displayed.
- Message.Body.Text.Data: This parameter contains the text body part displayed in mobile view of the mail.
- Message.Body.Subject.Data: This parameter contains subject of the email
- Source: This parameter contains email address of the sender
In our case, the destination address and source both have the same email (test_ses@gmail.com) as we have only one verified email address.
And that’s how we can send mail using Amazon SES and Lambda function.