Introduction
Digital image processing is a method of using digital computers to process images. The images are processed through several steps and follow different algorithms to process them. The process of processing images usually includes but is not limited to the following steps:
- Reading the image
- Enhancing image
- Removing noise and distortions
- Saving the image
Digital image processing is more important than ever. As the images that can be taken from our regular mobile devices have seen an increase in quality. Increasing picture quality means increasing file sizes. Applications today generally have a section for uploading images. Unprocessed images take a longer time to load. They also cover a sizable chunk of your storage systems.
Sharp is a Node.js package created by Lovell Fuller, made to convert large images into smaller, web-friendly formats such as JPEG/ JPG, PNG, GIF, and WebP. Sharp is used to change the format, quality, resize/crop, grayscale, and composite images. It is 4x-5x times faster in resizing images than the fastest offering ImageMagic.
This module supports reading JPEG, PNG, WebP, GIF, AVIF, TIFF, and SVG images. Output images can be in JPEG, PNG, WebP, GIF, AVIF, and TIFF formats as well as uncompressed raw pixel data.
Prerequisites
- Basic understanding of Node.js
Process URL based images using Sharp
Prerequisites: JavaScript language, Node.js framework, and sharp package
As the article is based handling URL based Sharp, so it assumes that you have basic understanding of the sharp package.
Step 1: Setting up the project
mkdir {project-name} && cd {project-name}
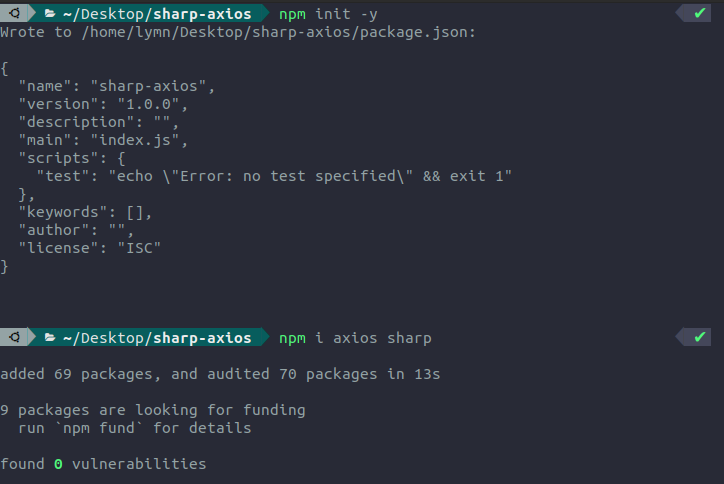
npm init -y
npm i axios sharp
open your project in your favorite code editor and create a file index.js at the root of the project.
Step 2: Writing code
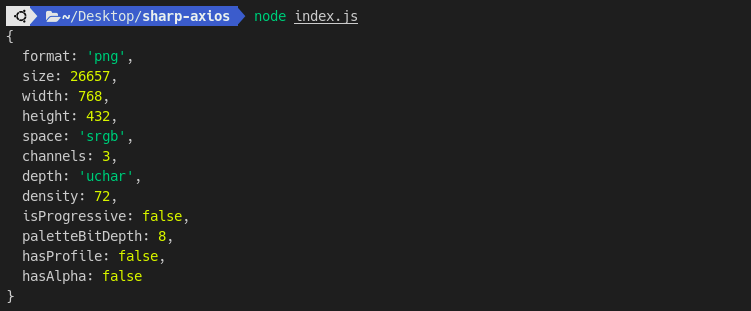
The code bellow takes image from the URL processes it, then logs the metadata of the processed image.
index.js
const axios = require("axios"); //* importing the axios package
const sharp = require("sharp"); //* importing the sharp package

async function getImageMetadata() {
    const url = "https://i0.wp.com/scanskill.com/wp-content/uploads/2022/02/An-Introduction-to-Python-Programming-Language.png?resize=768%2C432&ssl=1";

     //* gets the image from url in the arraybuffer
    const response = await axios.get(url, {
        responseType: "arraybuffer",
    });

    // converts the arraybuffer to base64
    const buffer = Buffer.from(response.data, "base64");

    const metadata = await sharp(buffer).metadata();
    //const metadata = await sharp(response.data).metadata();  //* Takes a little bit more time

    console.log(metadata);
};

getImageMetadata();
Now run the code
node index.jsoutput:

Explanation of index.js
const response = await axios.get(url, {
        responseType: "arraybuffer",
});

// converts the arraybuffer to base64
const buffer = Buffer.from(response.data, "base64");
const metadata = await sharp(buffer).metadata();
The Axios get’s data present in the URL in the form of an array buffer. The data then is kept in the response object and the actual image data is inside the data key of the response object. Then the Buffer.from(response.data, "base64") takes the array buffer data present inside the response. data key and converts it to base64 format. Now as the image is present inside the buffer variable. The await sharp(buffer).metadata() the sharp function takes the buffer as a parameter then the metadata() gets the metadata of the image present inside the buffer, which is the same image as the image from the URL.
Conclusion
In this article, you learned how to process URL based images using sharp in Node.js. Then we used metadata() method to get the metadata of the image present in the URL. For an in-depth visit the sharp documentation. For using other technologies for image manipulation with NodeJs look into Image Manipulation Using Jimp In Node JS.
