

In this article, we are going to learn how to implement MySQL in NestJS. Also after the setup, we will also look into performing CRUD operations with MySQL through NestJS.
Introduction
NestJS is a framework for building scalable Node.js server-side applications. It uses the Express HTTP Server framework under the hood which is a framework based on Node.js. Nest has full TypeScript support and uses it primarily, but users can also use JavaScript. Also, it combines the support for Object-Oriented Programming (OOP), Functional Programming (FP), and Functional Reactive Programming (FRP). Developers have the freedom to use third-party modules made for Node in it. Nest provides out-of-the-box application architecture based on the Model View Controller (MVC) architecture making the written application highly testable, scalable, easily maintainable, and loosely coupled. It is heavily inspired by Angular making it easier for angular developers to get up and running NestJS faster.
MySQL is an open-source relational database management system. It is based on the Structured Query Language (SQL). It runs on all platforms like Linux, Windows, and UNIX. Also, it is one of the best RDBMS used for applications, ranging from web-based applications to server-side applications.
Now we are going to look at how to work with MySQL in NestJS.
Setting up the Application – Implement MySQL in NestJS
In this section, we are going to look into the initialization of the nest application along with adding and implementing the sequelize package which will help with the MySQL database connection.
Initializing a NestJS application
Let’s set up a Nest application by using the nest CLI.
## initializing a nest application
$ nest new project-name
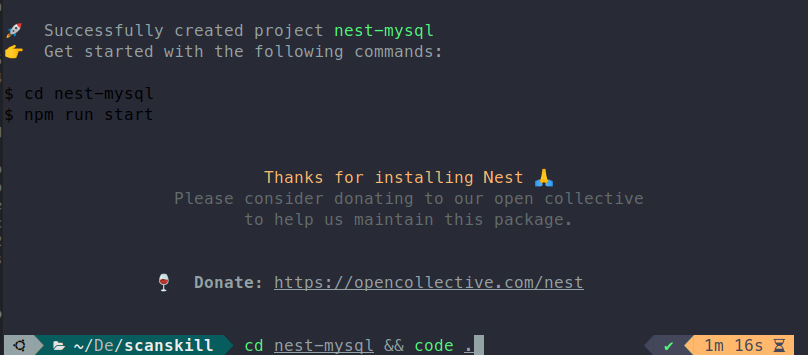
## open the application with your favorite code editor
$ code project-name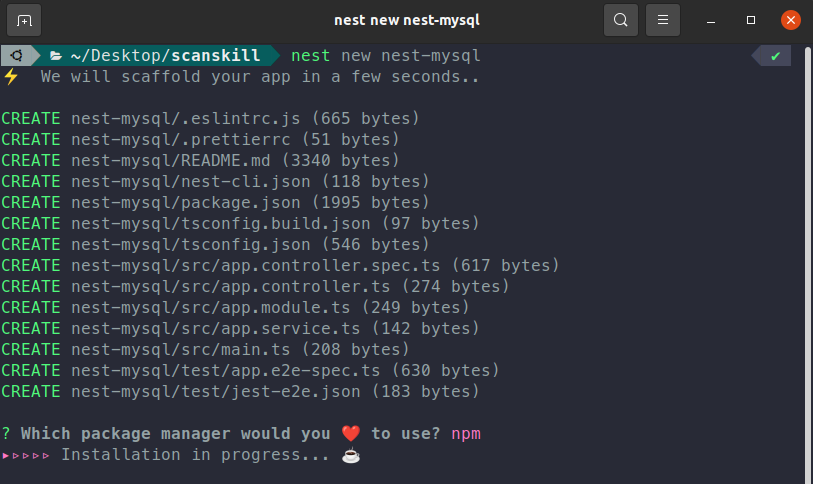
After initializing the NestJS application. We will install some dependencies that nest needs for it to be working with MySQL, and as we are working with user inputs look into how it is validated in NestJs here.
Adding and implementing the sequelize package
We are going to interact with MySQL using the sequelize package which is a modern TypeScript and Node.js ORM for MySQL, SQLite, Postgres, SQL Server, and more. It supports transactions, raw queries, and much more. Now we install some dependencies.
$ npm install --save @nestjs/sequelize sequelize sequelize-typescript mysql2
$ npm install --save-dev @types/sequelize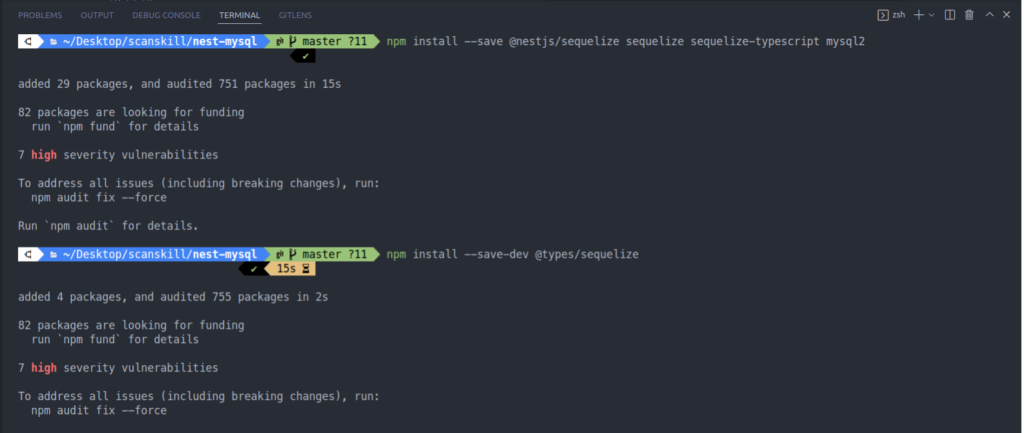
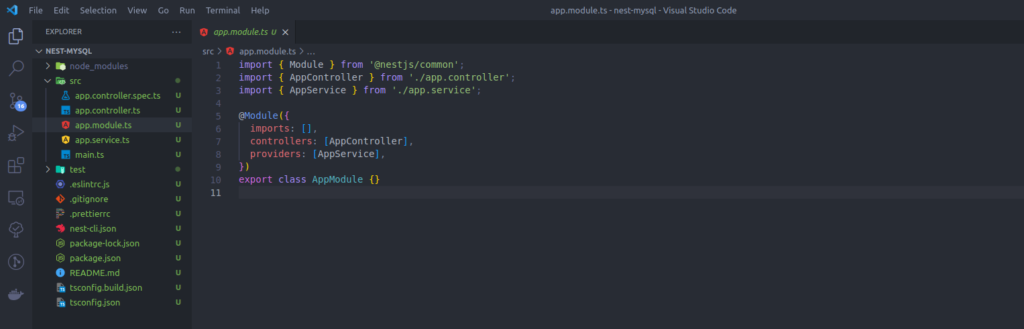
Now that the dependencies are added we need to initialize the sequelize at the start of the application for it to connect with the MySQL database. We achieve this by initializing sequelize in the main module of the application which happens to be app.module.ts. We add the code for connecting to the MySQL database in the imports key of the @Module() decorator.
import { Module } from '@nestjs/common';
import { SequelizeModule } from '@nestjs/sequelize';
import { AppController } from './app.controller';
import { AppService } from './app.service';

@Module({
  imports: [
    SequelizeModule.forRoot({
      dialect: 'mysql',
      host: 'localhost',
      port: 3306,
      username: 'root',
      password: 'password',
      database: 'scan_skill',  //* if not provided than you have full database access
    }),
  ],
  controllers: [AppController],
  providers: [AppService],
})
export class AppModule {}
We added SequelizeModule.forRoot({dialect, host, port, username, password, database}) in the import section, it creates the connection with the database. When the application starts the connection with MySQL also starts. If the database key is not defined then you have access to all databases present inside your MySQL server.
So we have created the connection with the MySQL database successfully. For testing, if it truly has a connection with the database, let’s perform CRUD operations with it.
CRUD operations
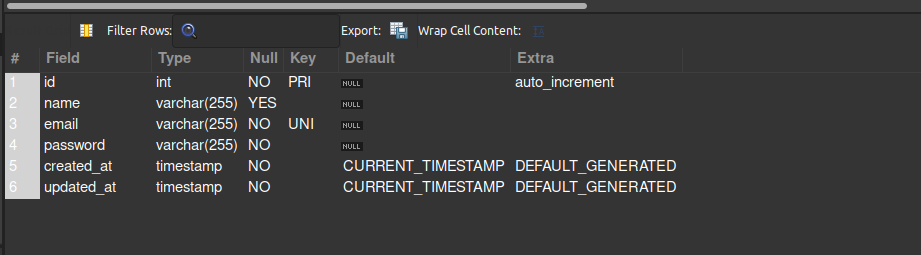
Now that we have initialized the application and created a connection with the MySQL database, the next step is performing CRUD operations with it. The schema of the user table is.
For performing the operation we create a user service and user controller.
## creating user controller and service
$ nest g controller user --no-spec
$ nest g service user --no-spec 
Create operation
We are going to create a user. For that let’s create a insertUser() the method inside user service and controller.
//# user.service.ts
import { Injectable } from '@nestjs/common';
import { Sequelize } from 'sequelize-typescript';
import { QueryTypes } from 'sequelize';

@Injectable()
export class UserService {
  constructor(private readonly sequelize: Sequelize) {}

  async insertUser(data) {
    const { name, email, password } = data;
    const insertQuery =
      'INSERT INTO user (name, email, password) VALUES (:name, :email, :password)';

    await this.sequelize.query(insertQuery, {
      replacements: {
        name: name,
        email: email,
        passowrd: password,
      },
      type: QueryTypes.INSERT,
    });

    return data;
  }

}
//# user.controller.ts
import { Body, Controller, Post } from '@nestjs/common';
import { UserService } from './user.service';
@Controller('user')
export class UserController {
constructor(private readonly userService: UserService) {}
@Post()
async insertUser(@Body() body) {
return await this.userService.insertUser(body);
}
}Now let’s hit the POST /user route to create a new user.
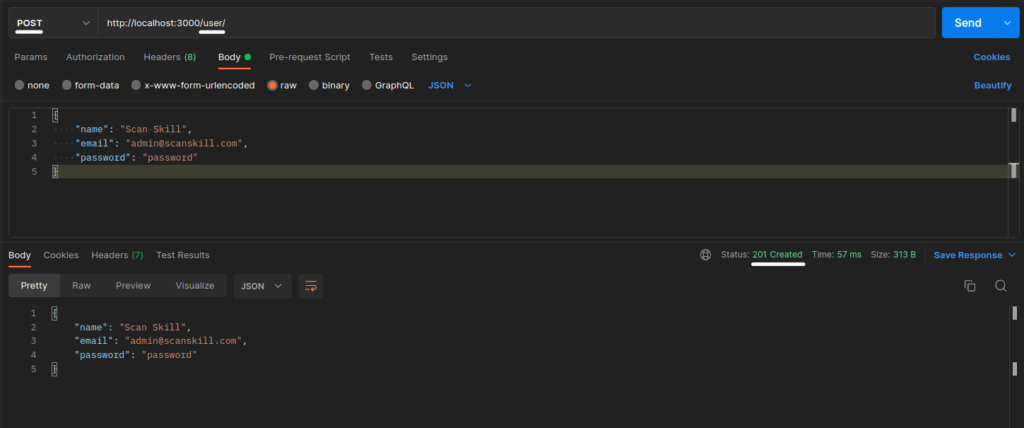
/user APISo, lets check the user table if the data is present or not.

We see that the new value is present in the database.
Read operation
For a read operation let’s create getUsers() method.
//# user.service.ts
import { Injectable } from '@nestjs/common';
import { Sequelize } from 'sequelize-typescript';
import { QueryTypes } from 'sequelize';

@Injectable()
export class UserService {
  constructor(private readonly sequelize: Sequelize) {}

  async getUsers() {
    const selectQuery = 'SELECT * FROM user';
    const result = await this.sequelize.query(selectQuery, {
      type: QueryTypes.SELECT,
    });
    return result;
  }

}
//# user.controller.ts
import { Body, Controller, Get, Post } from '@nestjs/common';
import { UserService } from './user.service';
@Controller('user')
export class UserController {
constructor(private readonly userService: UserService) {}
@Get()
async getUsers() {
return await this.userService.getUsers();
}
}Now let’s send a GET request at /user.
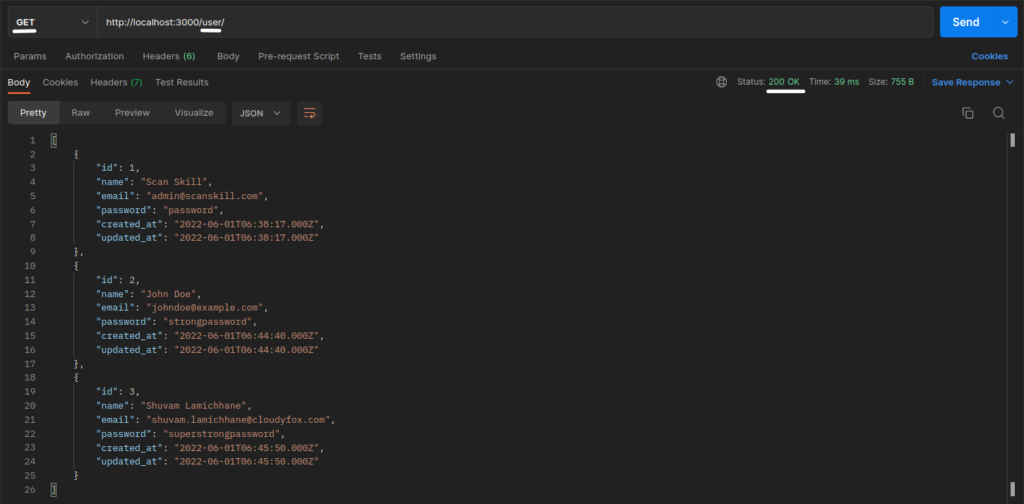
/user routeWe can see that all the data present inside the user table is sent back in response.
Update operation
For update let’s create updateById() method that takes the user id and edits the data.
//# user.service.ts

import { Injectable } from '@nestjs/common';
import { Sequelize } from 'sequelize-typescript';
import { QueryTypes } from 'sequelize';

@Injectable()
export class UserService {
  constructor(private readonly sequelize: Sequelize) {}

  async updateById(id, data) {
    const selectQuery = 'SELECT * FROM user';
    const [oldDocs]: any = await this.sequelize.query(selectQuery, {
      type: QueryTypes.SELECT,
    });

    const name = data.name || oldDocs.name;
    const email = data.email || oldDocs.email;
    const password = data.password || oldDocs.password;

    const updateQuery =
      'UPDATE user SET name = :name, email = :email, password = :password, updated_at = CURRENT_TIMESTAMP WHERE id = :id';
    await this.sequelize.query(updateQuery, {
      replacements: {
        name: name,
        email: email,
        password: password,
        id: id,
      },
      type: QueryTypes.UPDATE,
    });

    return { id, ...data };
  }

}
//# user.controller.ts
import { Body, Controller, Delete, Get, Param, Post, Put } from '@nestjs/common';
import { UserService } from './user.service';
@Controller('user')
export class UserController {
constructor(private readonly userService: UserService) {}
@Put('/:id')
async updateById(@Param('id') id, @Body() body) {
return await this.userService.updateById(id, body);
}
}Now, let’s send a PUT request to /user/:id route and edit information of the user with id 1.
Before edit


/user
So, we can see the update changed the value present in the database.
Delete operation
Now let’s create deleteById() method which deletes the user with matched id.
//# user.service.ts
import { Injectable } from '@nestjs/common';
import { Sequelize } from 'sequelize-typescript';
import { QueryTypes } from 'sequelize';

@Injectable()
export class UserService {
  constructor(private readonly sequelize: Sequelize) {}

  async deleteById(id) {
    const deleteQuery = 'DELETE FROM user WHERE id = :id';
    await this.sequelize.query(deleteQuery, {
      replacements: { id: id },
      type: QueryTypes.DELETE,
    });

    return { id };
  }

}
//# user.controller.ts
import { Body, Controller, Delete, Get, Param, Post, Put } from '@nestjs/common';
import { UserService } from './user.service';
@Controller('user')
export class UserController {
constructor(private readonly userService: UserService) {}
@Delete('/:id')
async DeleteById(@Param('id') id) {
return await this.userService.deleteById(id);
}
}So, let us send a DELETE request at /user/:id where the id is 1.

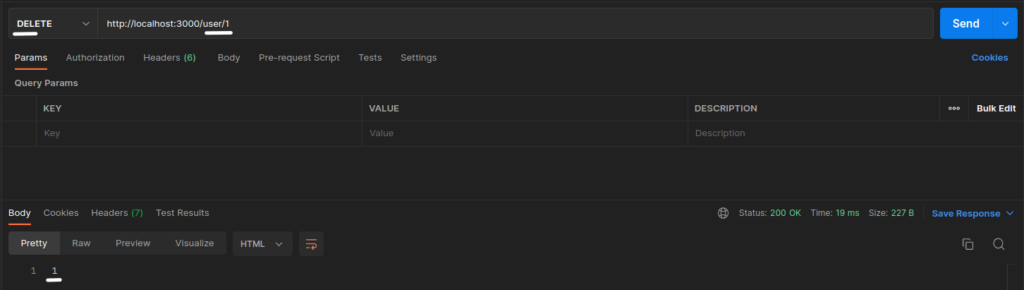
/user/:id route
The user with id: 1 is deleted from the user table.
So, this concludes performing CRUD operation in MySQL with NestJS.
Conclusion
In this article saw and learned how to work with and implement MySQL in NestJs along with performing CRUD operations on it. Learn how to do the same thing on MongoDB on Detailed Way To Implement MongoDB In NestJS. For learning backend development along with NestJs visit JavaScript Backend Development Course For Beginners.