

In this article, we’ll be implementing authentication using Google OAuth in Node.js. For this, we’ll be using Passport.js, which is a package for Node.js, used for authentication.
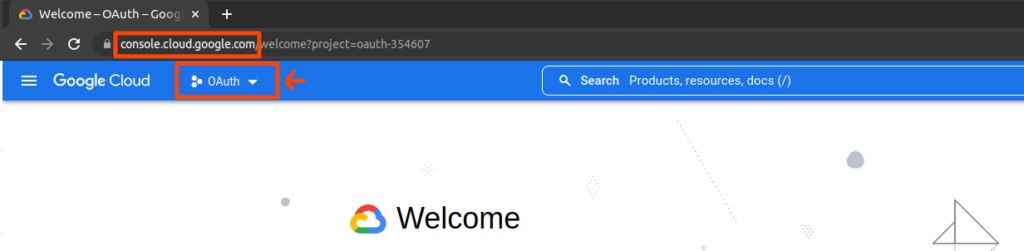
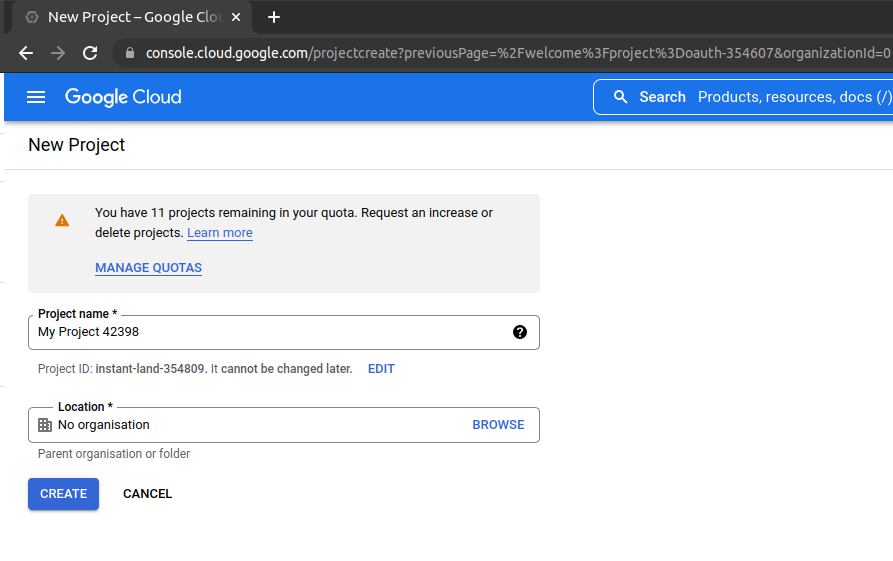
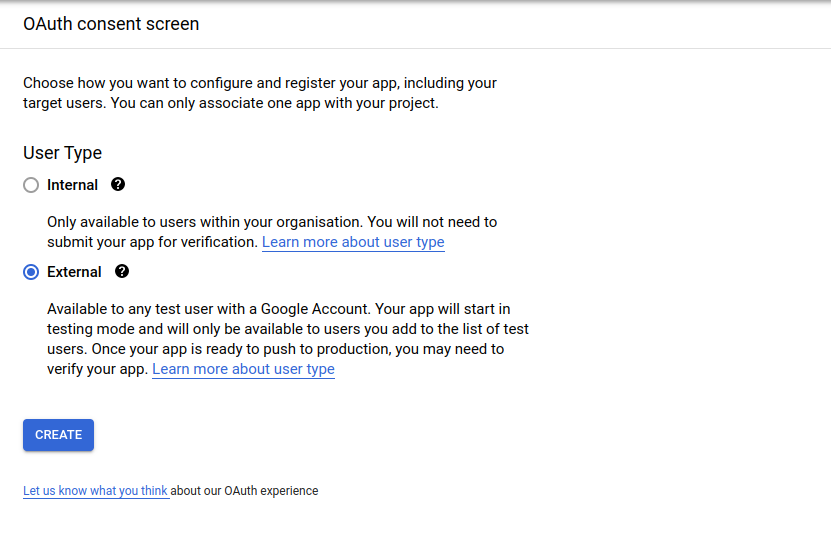
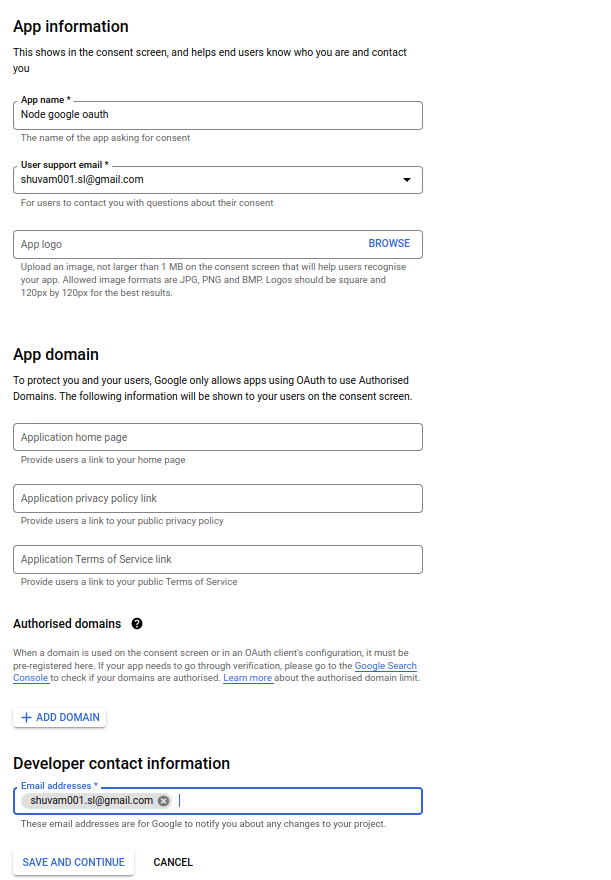
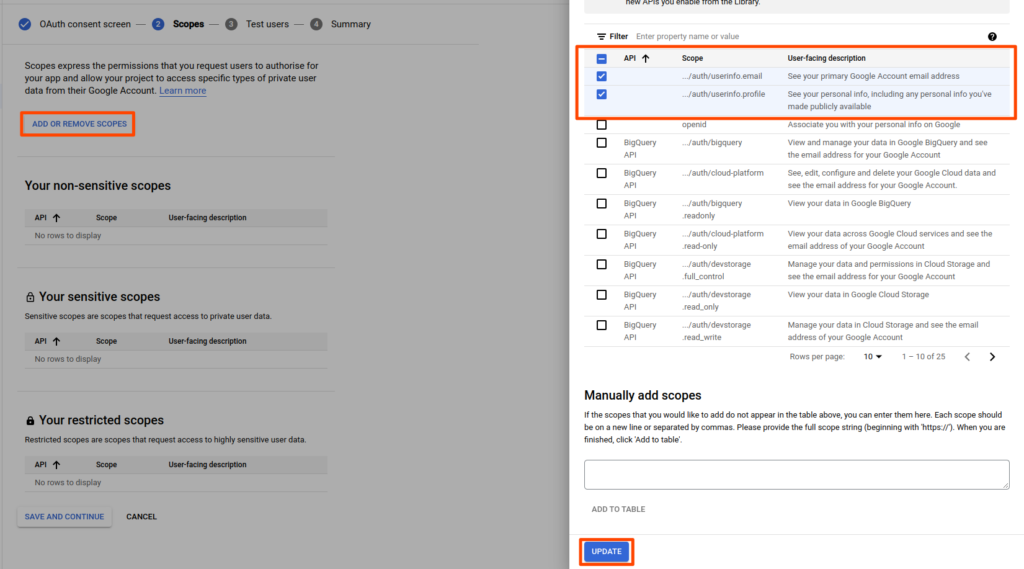
For implementing authentication using Google OAuth in Node.Js, we need to create a Google client ID. We can create a client ID and client secret using its Google API Console. You need to follow below steps shown below.
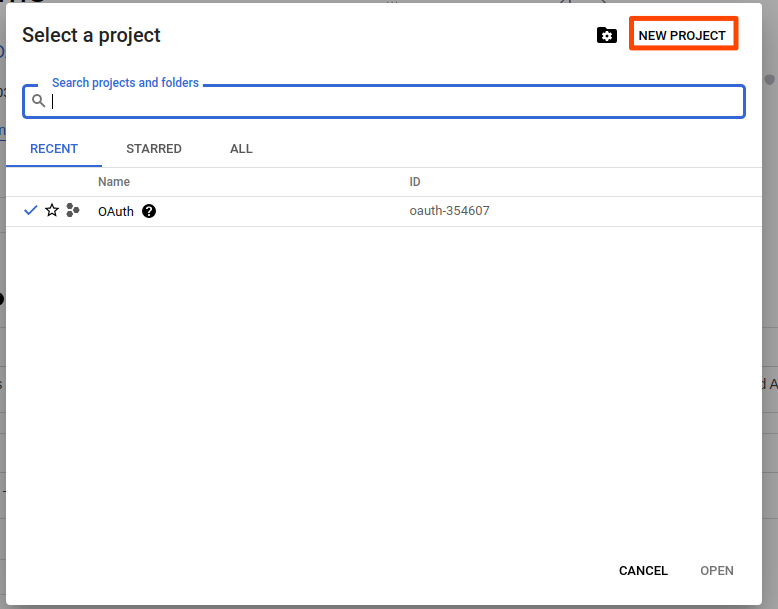
Now, that the project is created go to the same drop don and select the newly created project
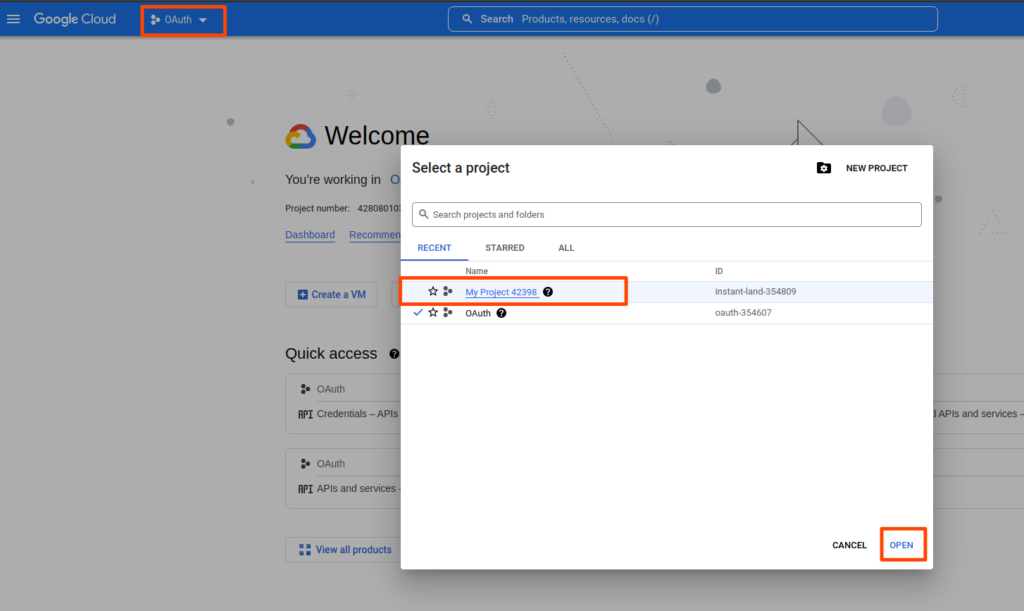
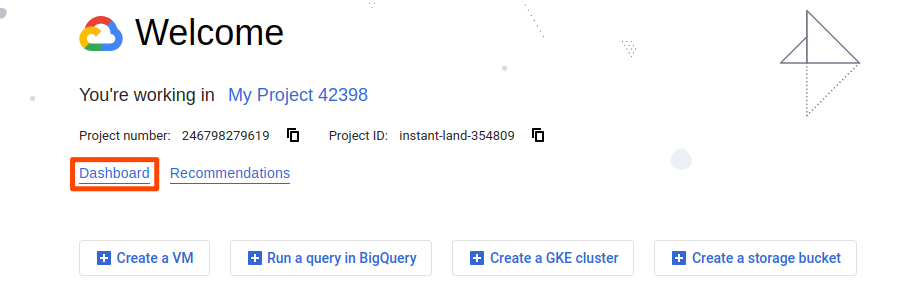
Now go into the dashboard
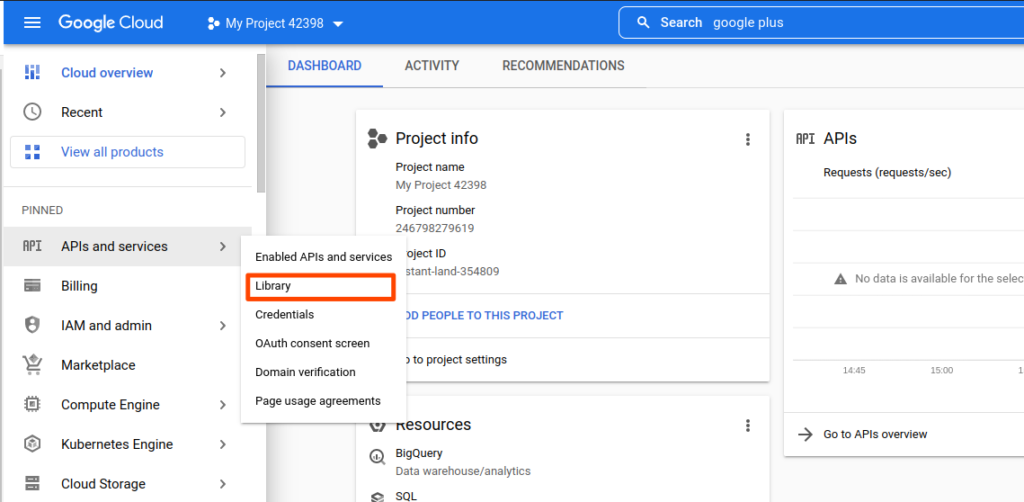
Now, go into APIs and services and select enable APIs and services.
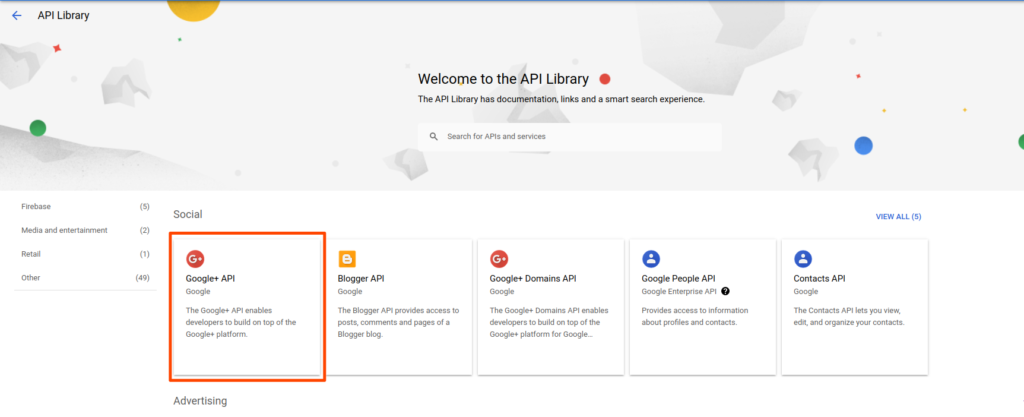
Now select Google+ API in the library
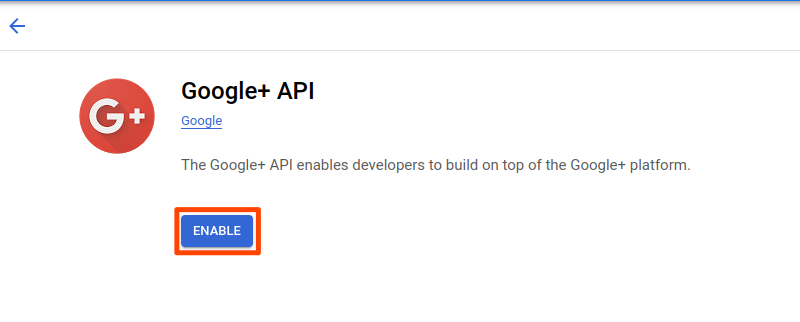
Then next step is to enable it.
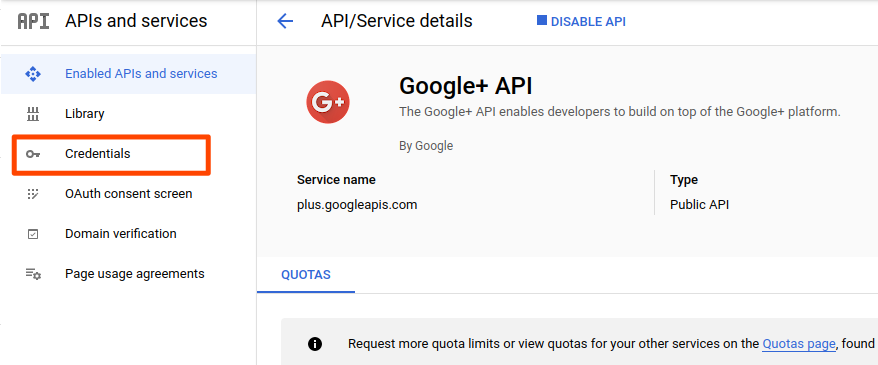
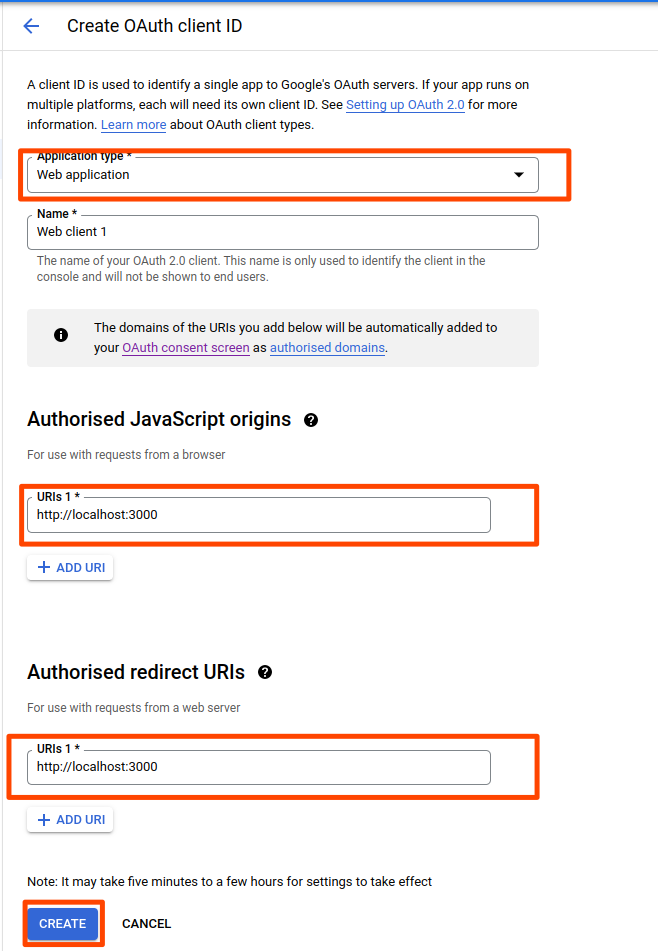
Now the google plus api is create credentials, for that follow the steps below

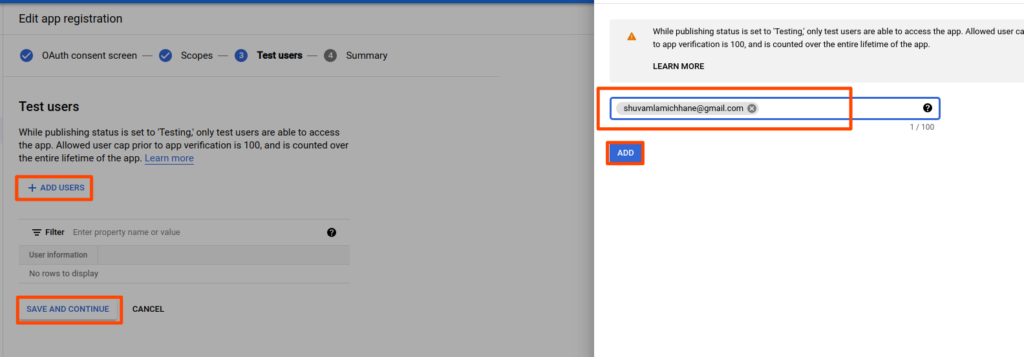
Now add a test user
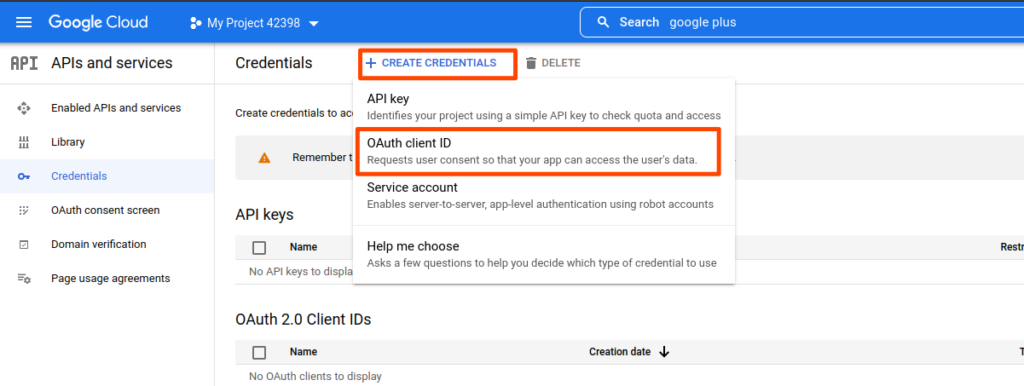
Now lets get into the credentials page

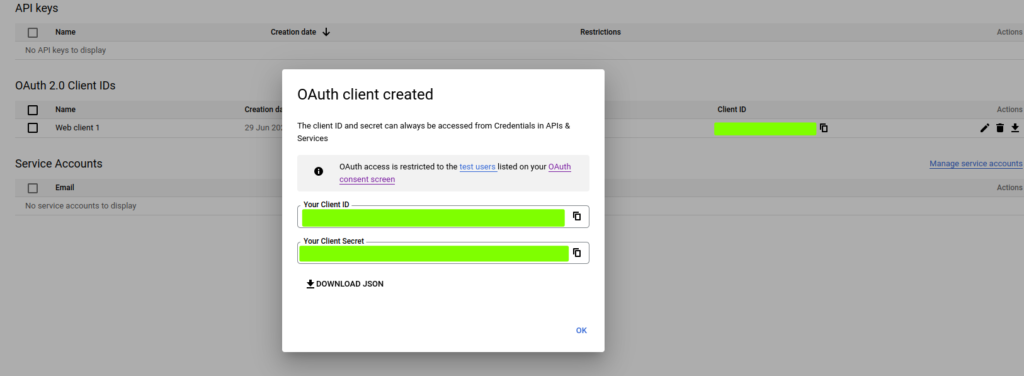
After this process is complete you receive your client id and your client secret copy them and keep them secure.
Now that the application is created and you have received your client id and client secret, now comes the coding part.
Coding part for Google OAuth in Node.js
Create a folder and initialize a nodejs application, add the dependencies those being
- express: server
- dotenv: use environment variables
- passport: used for authentication
- passport-google-oauth20: provides strategy for google authentication
Now, create three files .env, index.js, and passport.js
## creating a directory
$ mkdir google-auth && cd google-auth

## Initializing a Node.Js application
$ npm init -y

## add dependencies
$ npm i dotenv passport passport-google-oauth20 express

## creating file and opening it in a code editor
$ touch index.js .env passport.js
$ code .
.env file
Add your google client secret and client id that you copied here.
## .env file

GOOGLE_CLIENT_ID= XXXXXXXX
GOOGLE_CLIENT_SECRET= XXXXXXXX
index.js file
//* index.js file

const express = require("express");
const passport = require("passport");
const app = express();
require("dotenv").config();

require("./passport");

app.use(passport.initialize());

app.get(
  "/google",
  passport.authenticate("google", {
    scope: ["profile", "email"],
    prompt: "consent",
    session: false,
  })
);

app.get(
  "/",
  passport.authenticate("google", {
    session: false,
    successRedirect: "/success",
    failureRedirect: "/fail",
  })
);

app.get("/success", (req, res) => {
  res.send("User Logged In");
});

app.get("/fail", (req, res) => {
  res.send("Login failed");
});

app.listen(3000, console.log("3000 started"));
passport.js file
//* passport.js file

const passport = require("passport");
const GoogleStrategy = require("passport-google-oauth20").Strategy;

passport.use(
  new GoogleStrategy(
    {
      clientID: process.env.GOOGLE_CLIENT_ID,
      clientSecret: process.env.GOOGLE_CLIENT_SECRET,
      callbackURL: "http://localhost:3000",
    },
    function (accessToken, refreshToken, profile, done) {
      console.log(profile);
      return done(null, profile);
    }
  )
);
The above callback URL is the same as the URL added in the google developer console, authorized callback url.
Now let’s test the code
firstly we go the the google login route which is http://localhost:3000/google
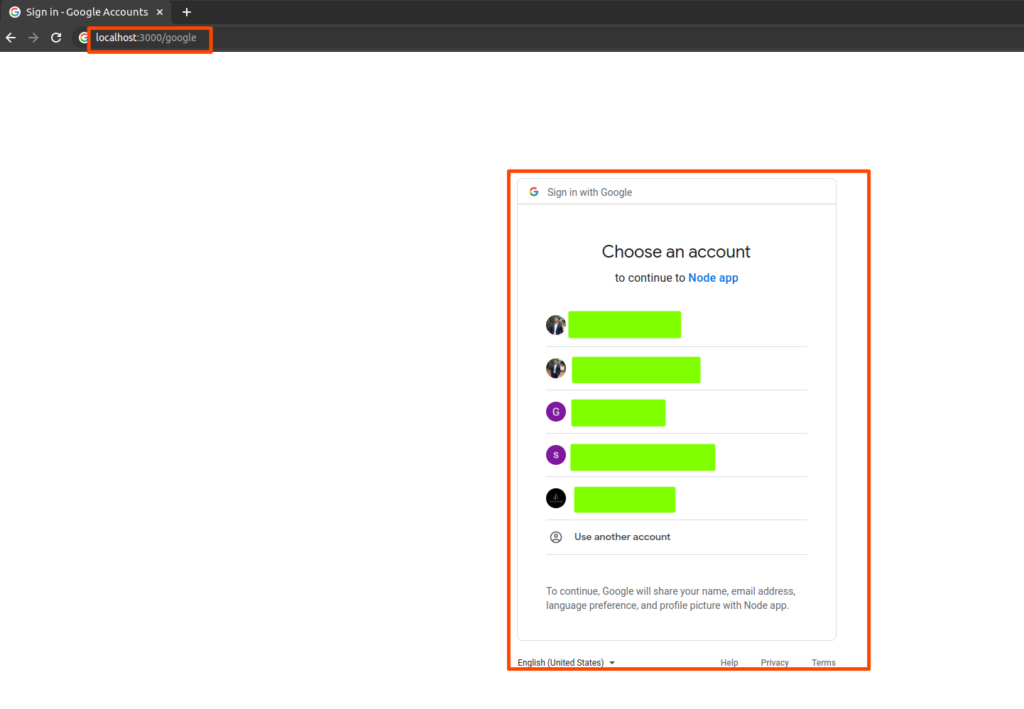
localhost:3000/googleAfter getting the sign up form, let us choose an account to login to the application.
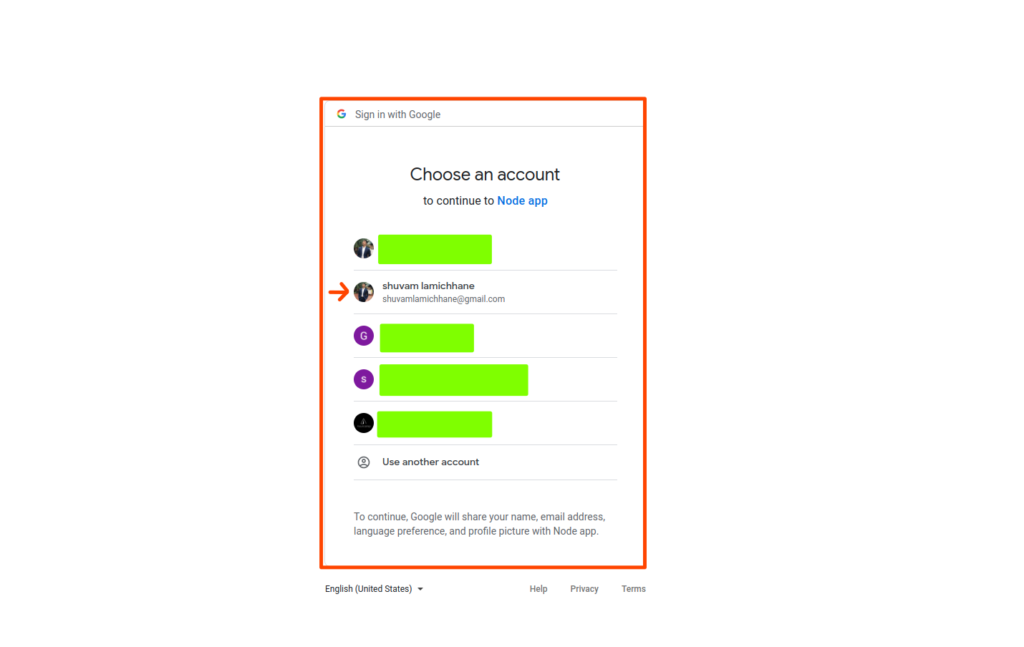
Now, that is account is chosen, we get success response and the data received is User Logged in.

At the same time google has sent us the user information which are email and profile info. We have logged the profile, so let’s look at the log to check if the user data has been sent or not.
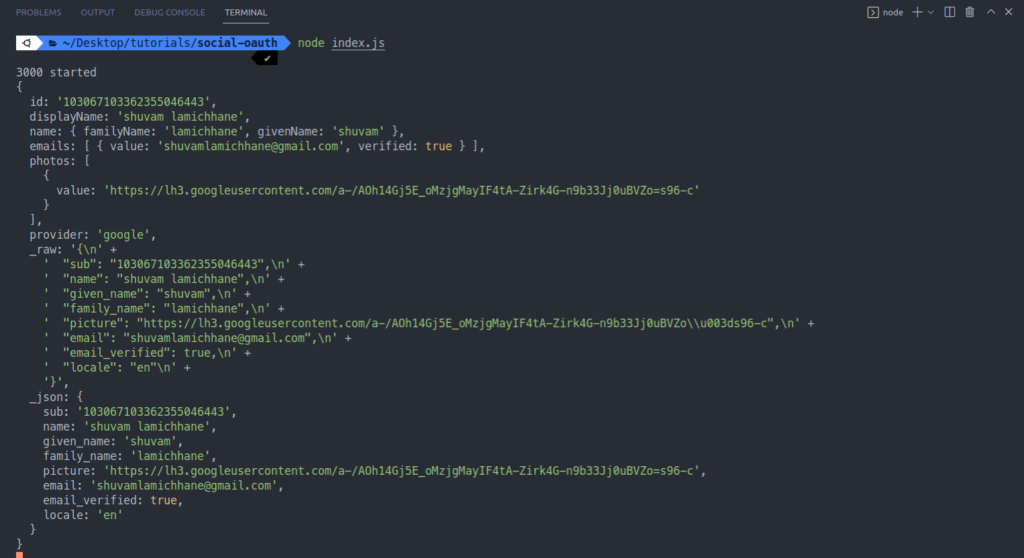
So, we can see that the response from google has all the data that is email and profile which is needed to identify a user.
Conclusion
We have touched upon two topics in this article, first one being generating client id and client secret through the google developer console, and the next being authentication via Google OAuth using Passport.js in Node.js. Look into how to send emails using a Gmail account here.