
In this, we’ll set up AWS EKS and deploy an application to it. It’ll be our production-grade Kubernetes cluster.
Nowadays, Kubernetes is one of the most popular and most used industry-standard container orchestration. Amazon Web Services (AWS) is a well-known cloud service provider, but Kubernetes is becoming the standard way to manage application containers in production.
This guide will walk you through deploying a new Kubernetes cluster using Amazon EKS once the desired architecture is configured. Amazon also has a setup guide, but it’s might not be enough to get you started. You can find the official documentation here.
AWS EKS
EKS is a managed Kubernetes service by AWS i.e. its control plane is managed by AWS. Due to this, you need less time to manage cluster configurations. Because you spend less time administering the cluster, you have more time to concentrate on creating and delivering applications.
Prerequisites
- AWS credentials
- AWS CLI – installed on your machine. (https://docs.aws.amazon.com/cli/latest/userguide/cli-chap-configure.html)
- eksctl – set up (https://github.com/weaveworks/eksctl)
Set Up AWS EKS and Deploy an Application
AWS EKS Set Up
Before setting up, make sure you have AWS CLI installed and configured with your AWS credentials. To check configuration:
$ aws configure list

			Name                    Value             Type    Location
      ----                    -----             ----    --------
   profile                 eks-user             None    None
access_key     ****************GYJU shared-credentials-file
secret_key     ****************0jxI shared-credentials-file
    region           ap-southeast-1      config-file    ~/.aws/config
Step-1: Install and configure kubectl for EKS
- Download and install kubectl
$ curl -o kubectl <https://s3.us-west-2.amazonaws.com/amazon-eks/1.22.6/2022-03-09/bin/darwin/amd64/kubectl>
- Verify the downloaded binary with the SHA-256 sum for your binary.
$ curl -o kubectl.sha256 <https://s3.us-west-2.amazonaws.com/amazon-eks/1.22.6/2022-03-09/bin/darwin/amd64/kubectl.sha256>
- Check the SHA-256 sum for your downloaded binary.
$ openssl sha1 -sha256 kubectl
- Apply to execute permissions to the binary.
$ chmod +x ./kubectl
- Copy the binary to a folder in your
PATH
$ mkdir -p $HOME/bin && cp ./kubectl $HOME/bin/kubectl && export PATH=$HOME/bin:$PATH
- Add the $HOME/bin path to your shell initialization file
$ echo ‘export PATH=$HOME/bin:$PATH’ >> ~/.zshrc
Here, I’ve used ~/.zshrc as I am using oh-my-zsh as a shell, you may have different(like ~/.bashrc for ubuntu)
- Check kubectl version
$ kubectl version --short --client

Client Version: v1.22.6-eks-7d68063
Step-2: Installing aws-iam-authenticator
- Download the Amazon EKS-vended
aws-iam-authenticatorbinary from Amazon S3
$ curl -o aws-iam-authenticator <https://s3.us-west-2.amazonaws.com/amazon-eks/1.21.2/2021-07-05/bin/linux/amd64/aws-iam-authenticator>
- Apply execute permissions to the binary
$ chmod +x ./aws-iam-authenticator
- Copy the binary to a folder in your
$PATH
$ mkdir -p $HOME/bin && cp ./aws-iam-authenticator $HOME/bin/aws-iam-authenticator && export PATH=$HOME/bin:$PATH
- Add
$HOME/binto yourPATHenvironment variable
$ echo ‘export PATH=$HOME/bin:$PATH’ >> ~/.zshrcStep-3: Create a K8s Cluster on AWS
AWS EKS charges USD 0.20 per hour for your cluster. You can create a cluster from the console or using AWS CLI or using eksctl tool. In this, I’ll show how to install using AWS CLI and eksctl only.
Using AWS CLI
$ aws eks --region region update-kubeconfig -- name cluster_name --profile profile-name
Here, replace cluster_name, region, and profile-name with your values. e.g.:
$ aws eks --region ap-southeast-2 update-kubeconfig -- name example-cluster --profile eks-user
It will take around 5 minutes to be a cluster in Active State.
Using eksctl
$ eksctl create cluster --region=ap-southeast-2 --name=example-cluster
This commands creates an EKS cluster with a default two worker node and m5.large instance. You can change this configuration on your own also. For more click here.
It takes some time to create a cluster.
The master nodes are inaccessible to you. But the worker nodes are entirely under your control. The worker nodes in your AWS account are standard Amazon EC2 instances.
Amazon EKS cluster will be ready after the eksctl command is finished running!
The cluster’s two worker nodes can be listed using:
$ kubectl get nodes

NAME                                                STATUS   ROLES    AGE   VERSION
ip-192-168-25-57.ap-southeast-2.compute.internal    Ready    <none>   23m   v1.22.6
ip-192-168-68-152.ap-southeast-2.compute.internal   Ready    <none>   23m   v1.22.6
To set up kubectl for your EKS cluster, skip to step-4.
The worker nodes may be examined in the AWS EC2 Console because they are standard Amazon EC2 instances in your AWS account.
In your AWS account’s AWS EKS Console, you can also check the actual Amazon EKS resource.
You can see that your Amazon EKS cluster has other related resources; these resources take care of all the elements necessary for a production-grade cluster, including networking, access control, security, and logging. eksctl handles all of those resource creation.
Note: If you use AWS CLI or Console, you may need to set it up manually. Like, tagging VPC, subnets, security groups, etc. (We’ll talk about this in our future articles — stay tuned!)
Author
Now, you have successfully set up Production Grade EKS Cluster.
Step-4: Configure kubectl for EKS cluster
Follow the following commands:
create (if not present)
$ mkdir -p ~/.kube
$ cd .kube
create (if not present) config file with the following content:
apiVersion: v1
clusters:
- cluster:
    server: <endpoint-url>
    certificate-authority-data: "<base64-encoded-ca-cert>"
  name: example-cluster
contexts:
- context:
    cluster: example-cluster
    user: eks-udrt
  name: example-cluster
current-context: example-cluster
kind: Config
preferences: {}
users:
- name: eks-user
  user:
    exec:
      apiVersion: client.authentication.k8s.io/v1beta1
      args:
      - --region
      - ap-southeast-2
      - eks
      - get-token
      - --cluster-name
      - example-cluster
      command: aws
Here, make sure you have replaced parameters for your configuration.
You can find values for the following from EKS console:
- server: <endpoint-url>
- certificate-authority-data: “<base64-encoded-ca-cert>”
- “<cluster-name>”
Now, export the config file:
$ export KUBECONFIG=$KUBECONFIG:~/.kube/config$ echo 'export KUBECONFIG=$KUBECONFIG:~/.kube/config' >> ~/.zshrc
You have successfully configured kubectl with your EKS cluster. Now confirm using some kubectl commands. e.g.
$ kubectl get svc

NAME         TYPE        CLUSTER-IP     EXTERNAL-IP   PORT(S)          AGE
kubernetes   ClusterIP   172.20.0.1     <none>        443/TCP          45m
So it is showing that our configuration is working perfectly.
Deploy Application on AWS EKS
Step-1: Create deploy manifest
Now let’s deploy our application to the Kubernetes cluster we just created. To deploy an application to a pod, we first need to create a deployment. Below is the deployment manifest used for the deployment. Create deployment.yaml file:(You can set your filename on your own)
apiVersion: apps/v1
kind: Deployment
metadata:
  labels:
    app: api
  name: api
spec:
  replicas: 3
  revisionHistoryLimit: 5
  selector:
    matchLabels:
      app: api
  template:
    metadata:
      labels:
        app: api
    spec:
      containers:
      - name: api
        image: 31888888897.dkr.ecr.ap-southeast-2.amazonaws.com/example-api:<VERSION>
        ports:
        - containerPort: 80
        imagePullPolicy: Always
        resources:
          limits:
            cpu: "500m"
            memory: "500Mi"
          requests:
            cpu: "250m"
            memory: "250Mi"
      restartPolicy: Always
status: {}
Here,
- Our application label is app:api
- In spec:template:spec:containers set image for the AWS ECR image we pushed
- Number of replicas for the application is 3
Now, apply and create kubernetes deployment:
$ kubectl apply -f deployment.yaml
Check the deployment:
$ kubectl get deployments

NAME   READY   UP-TO-DATE   AVAILABLE   AGE
api    3/3     1            3           5m
Here, we can see that our deployment is created and is running on three pods.
Step-3: Create Service Manifest
Now we need to create a service to access our application. Since we need to access the application from the outside, the service type will be Nodeport.
apiVersion: v1
kind: Service
metadata:
  labels:
    app: api
  name: api
spec:
  ports:
    - port: 8000
      protocol: TCP
      targetPort: 80
  selector:
    app: api
  type: NodePort
status:
  loadBalancer: {}
Here,
- service type is Nodeport
- targetPort is 8000 since that is our container exposed port
- the selector will be app:api since that is the label we defined in our deployment
Now, create service:
$ kubectl apply -f service.yaml
Check whether service is created or not:
$ kubectl get services

NAME         TYPE        CLUSTER-IP     EXTERNAL-IP   PORT(S)          AGE
api          NodePort    172.20.37.72   <none>        8000:31100/TCP   10d
kubernetes   ClusterIP   172.20.0.1     <none>        443/TCP          11d
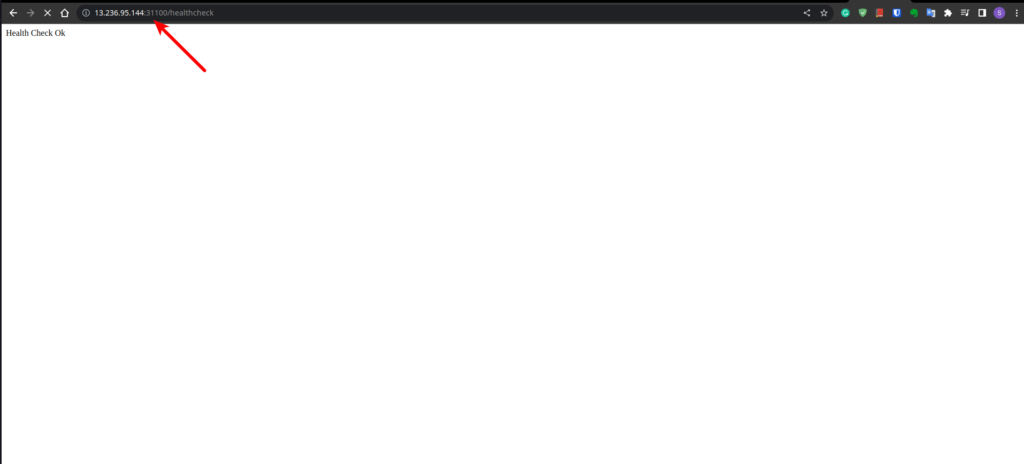
Now let’s access the web application from the outside. From this service, we can see that the application is listening on port 31100. Next, you need to get the public IP address of your application node. First, let’s find out where our application’s pods are running.
$ kubectl get pods -o wide

NAME                   READY   STATUS    RESTARTS   AGE     IP            NODE                                             NOMINATED NODE   READINESS GATES
api-5fd798cdf5-cbwtd   1/1     Running   0          4m53s   10.10.1.40    ip-10-10-1-126.ap-southeast-2.compute.internal   <none>           <none>
api-5fd798cdf5-hnqml   1/1     Running   0          4m55s   10.10.1.229   ip-10-10-1-126.ap-southeast-2.compute.internal   <none>           <none>
api-5fd798cdf5-tkp5k   1/1     Running   0          4m57s   10.10.1.11    ip-10-10-1-126.ap-southeast-2.compute.internal   <none>           <none>
From this, you can identify the node of the pod your application is running on. To get the external IP addresses of these nodes, run the get nodes command.
In the node list above, we can see that two nodes have external IPs and one node does not. This is because we configured it as a private worker node. Now you know your IP address and the port it’s listening on. The next task is to add this port to the node’s security group to allow traffic. To do this, locate the security group created for your node and add an inbound rule to allow traffic on port 31100.

Now, we can get a public node IP address with port number 31100 to get the application:
Conclusion
That’s it!
In this article, you learned how to set up AWS EKS and deploy an application. Furthermore, we’ll talk about load balancing with AWS ALB using Kubernetes Ingress in our next article. Stay tuned!
Thank you!