

In this article, we will learn how to import data from S3 to the Dynamo DB table. DynamoDB is a fully managed proprietary NoSQL database service that supports key-value and document data structures. in the DynamoDB table, each item is uniquely identified by a primary key. DynamoDB supports two types of primary keys: a simple primary key made up of just a partition key, and a composite primary key made up of a partition key and a sort key.
Amazon S3 is a web-based cloud storage service provided by AWS (Amazon Web Services) that stores files in buckets. Amazon S3 provides durability and security for the files stored within the buckets. There are no limitations on the number of files stored in Amazon S3. The Amazon S3 charges only for the resources you used, there are no hidden charges.
Prerequisites
How to import data from S3 to Dynamo DB?
Step 1: Create an S3 Bucket
- Go to AWS Console and Log In
- In the search bar, type
S3 - Select the
S3options displayed underServicessection

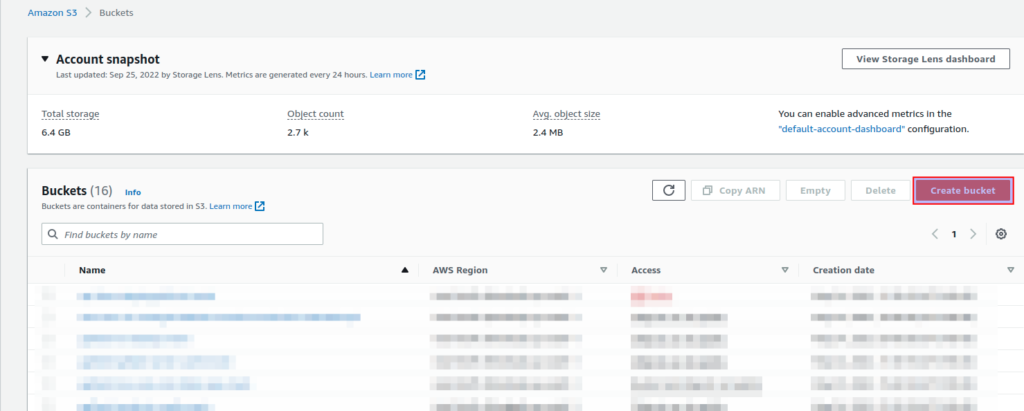
- After that AWS S3 page will appear. Then click the
Create bucketbutton on the right side of the page so that we can create a new bucket where we will be uploading our dummy JSON file containing data to be imported into the Dynamo DB table.
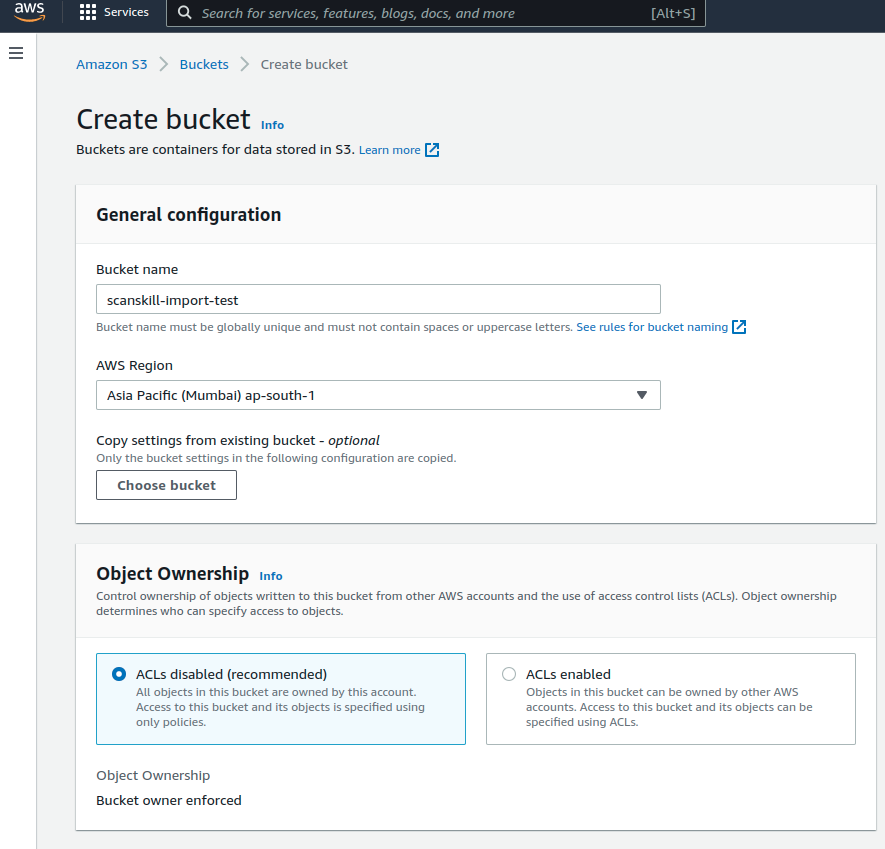
- Now, let’s create an S3 bucket.
- Here, enter your desired name and region of the bucket, we will be using
scanskill-import-testandap-south-1respectively.
Step 2: Prepare JSON Data
- Now, let’s create some dummy data which will be imported into Dynamo DB using S3.
- We will be using preparing data in Dynamo DB JSON format. For that create a file name
user_demo.jsonand add the following content
{
  "Item": {
      "userId": {
          "S": "U101"
      },
      "name": {
          "S": "Dummy User 1"
      },
      "email": {
          "S": "dummyuser1@email.com"
      },
      "age": {
          "N": "22"
      },
      "address": {
          "S": "Kathmandu"
      }
  }
}
{
  "Item": {
      "userId": {
          "S": "U102"
      },
      "name": {
          "S": "Dummy User 2"
      },
      "email": {
          "S": "dummyuser2@email.com"
      },
      "age": {
          "N": "23"
      },
      "address": {
          "S": "Bhaktapur"
      }
  }
}
{
  "Item": {
      "userId": {
          "S": "U103"
      },
      "name": {
          "S": "Dummy User 3"
      },
      "email": {
          "S": "dummyuser3@email.com"
      },
      "age": {
          "N": "24"
      },
      "address": {
          "S": "Lalitpur"
      }
  }
}
Step 3: Upload the data to S3
- Now, let’s upload the above-prepared data to the S3.
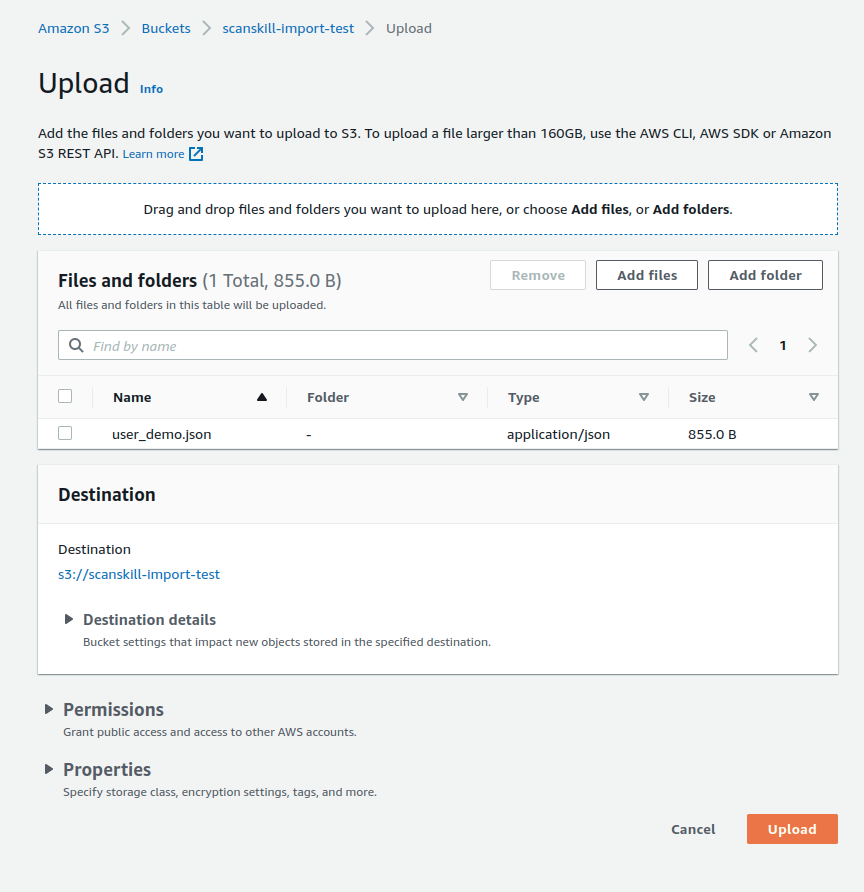
- Let’s go to the S3 dashboard and click the bucket created. In our case, the bucket will be named
scanskill-import-test. - Then, click the Upload button on the right side of the page. You can also drag and drop your file inside the bucket.
- Then, click the Add Files option and select the file you want to upload to the S3 bucket.
Step 4: Import From S3
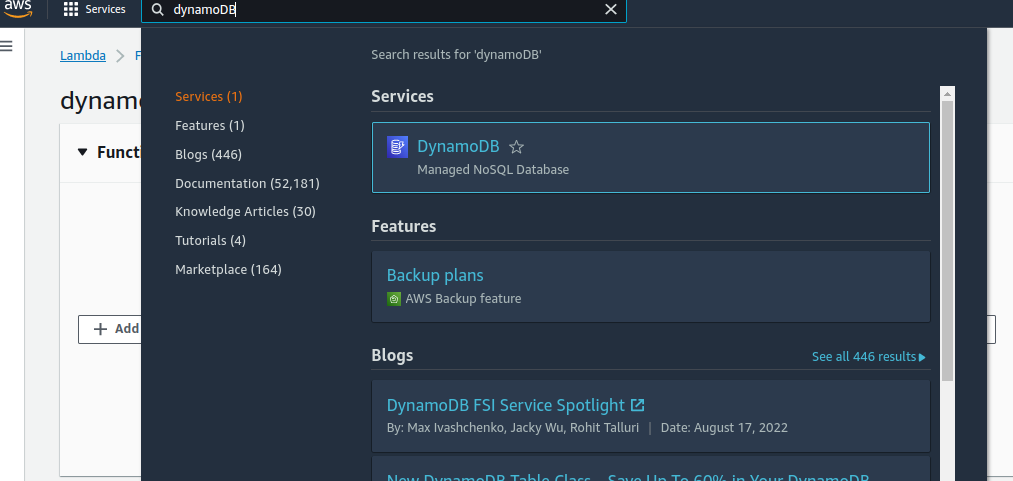
- Now let’s go to the Dynamo DB page.
- In the search bar, type
dynamoDB - Select the
dynamoDBServicessection
- Then, click the
Import from S3option on the left side. - Now, Click the
Import from S3option on the right side of the page.

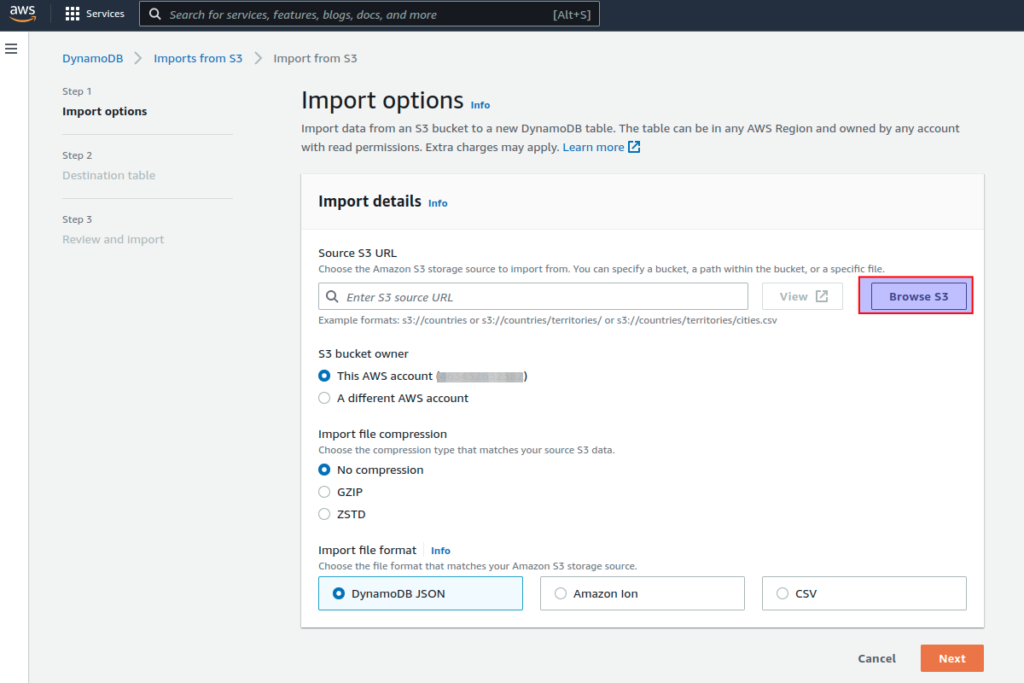
- Now, let’s configure
Import options - Choose the location of the file from the S3 using
Browse S3option. - We can use the bucket available inside the same account as well as the S3 bucket of another AWS account.
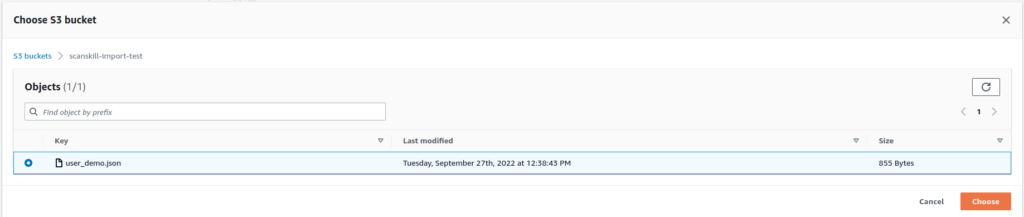
- Then choose the bucket where you have uploaded the JSON file. In our case it will be
scanskill-import-test

- Click the bucket name and select the file you want to upload to the S3.
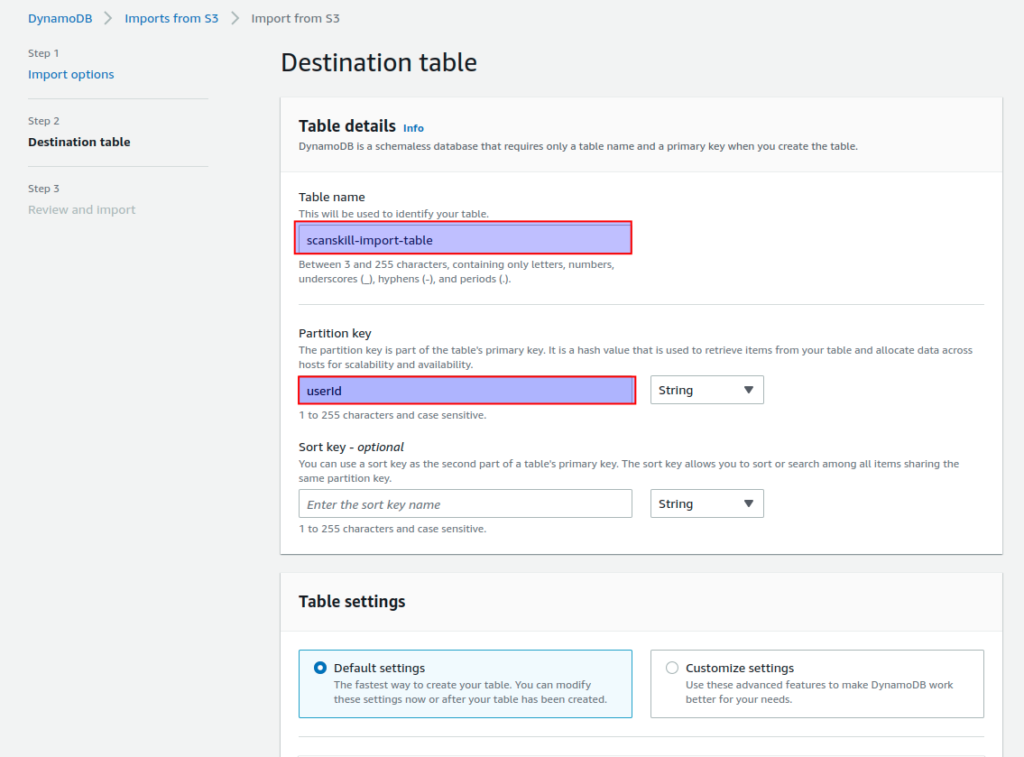
- Let’s configure the
Destination table - Here, enter the table name where you want to import the data.
- Also, enter the partition and sort the key according to your data. In our case, we only need the partition key so only that option is filled.
- After completing the above steps, you can review the changes and if all the options are correct you can choose
Importoption to begin your import. - Then you will be redirected to the following page. It will take some time to complete the importing process.
- The import process can be determined with the help of the
statuscolumn.

- We can see further detail about the import by clicking the import id of the desired import row.

- Now, let’s go to the newly created table, to verify whether the data has been properly imported or not.
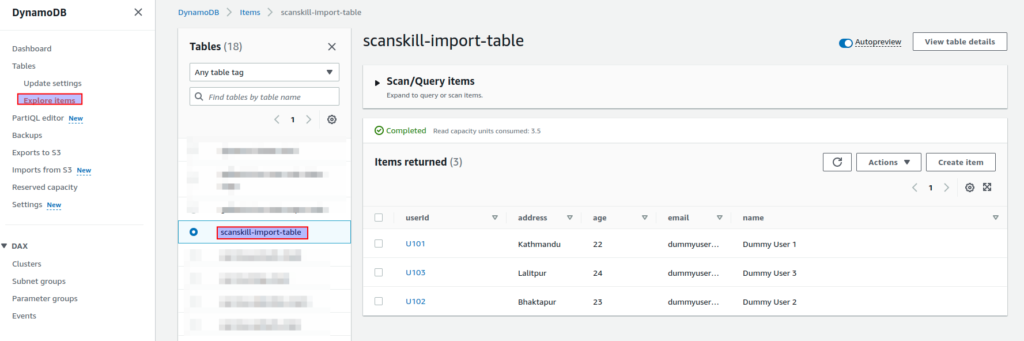
- Here, we can see that all three data have been imported successfully.
Conclusion
By following the above steps, we can import data from S3 to Dynamo DB tables. Not only that we can export data or logs of our function to an S3 bucket. If we want to perform other operations after importing the data in Dynamo DB tables automatically we can follow this article.