In this article, we will learn how to use Ajv in AWS lambda. AJV stands for Another JSON Schema Validator and represents the fastest validator for JSON schemas around. The Ajv is one of the best javascript validation tools that allow the implementation of complex data validation logic via declarative schemas in your JSON data without having to write any code.
AWS Serverless Application Model (SAM) provides a shorthand syntax for expressing functions, APIs, databases, and event source mappings that are necessary for building serverless applications. Lambda is an Amazon Web Service compute service that lets you run code without managing or provisioning servers. In Lambda, your code is executed on a high-availability compute infrastructure, and all of the compute resources are managed, including server and operating system maintenance, capacity provisioning, automatic scaling, and logging.
Prerequisites
Now let’s set up AWS SAM for using Ajv.
Project Setup
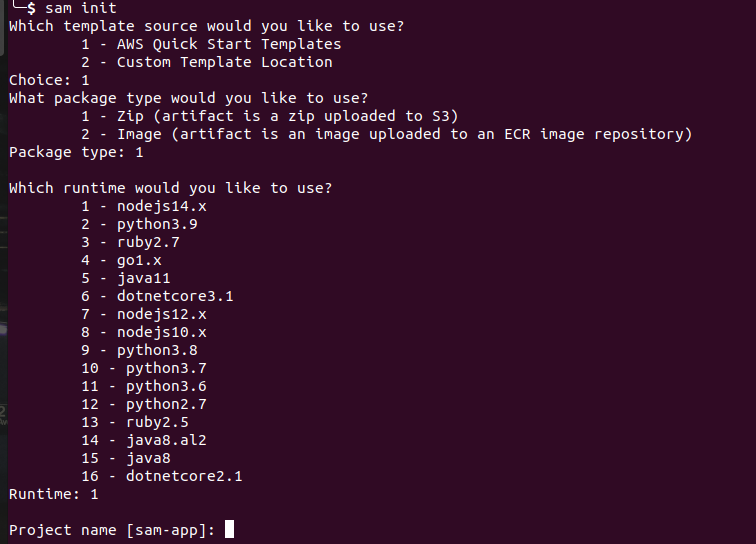
let’s initialize the SAM project using the following steps:
sam init
## for template source choose -> 1 - AWS Quick Start Templates
## for package type -> 1 - Zip (artifact is a zip uploaded to S3)
## for run time choose -> 1 - nodejs14.x (as the article is made for node)
Enter the name you want for your project. We will use sam-ajv for this article. Then let’s choose option 1 (Hello World Example) for this article.

This will generate a basic SAM folder structure as in the image below.

Now let’s install the Ajv package inside the hello-world folder. In lambda, each module is independent of the other so, all the dependent packages should be installed in each and every module. You can have a look here for detail about using the npm package in Lambda.
npm i ajvThen, create a file named vaidate.js inside the hello-world folder which will contain our validation logic.
const Ajv = require("ajv");
const bodySchema = {
  type: "object",
  properties: {
    fname: {
      type: "string",
    },
    lname: {
      type: "string",
    },
    email: {
      type: "string",
    },
  },
// Field inside the required array is required otherwise optional
  required: [
    "fname",
    "lname",
    "email"
  ],
};
const ajv = new Ajv({ allErrors: true });
const Validate = (body) => {
  const validate = ajv.compile(bodySchema);
  const valid = validate(body);
  if (!valid) {
    const validationErrors = validate.errors.map((error) => {
      let errorObject = { message: "", name: "" };
      switch (error.keyword) {
        case "required":
          errorObject = {
            message: `${error.params.missingProperty} is required.`,
            name: error.params.missingProperty,
          };
          break;
        case "type":
          errorObject = {
            message: `${error.instancePath.split("/")[1]} ${error.message}.`,
            name: error.instancePath.split("/")[1],
          };
          break;
        default:
          errorObject = {
            message: `${error.instancePath.split("/")[1]} is invalid.`,
            name: error.instancePath.split("/")[1],
          };
      }
      return errorObject;
    });
    return validationErrors;
  }
  return true;
};
module.exports = {
  Validate,
};
Here, we have written a required validation logic in which fname , lname and email fields are required. By default all the parameters are optional. Only those parameters inside the required array are required.
Now, let’s modify the app.js file so that it will return the success response if the request passed the validation and returns a validation error if it fails.
#app.js

const { Validate } = require('./validate'); //import the valdiation file
exports.lambdaHandler = async (event, context) => {
    try {
        const request = JSON.parse(event.body);
        const valid = Validate(request); // check if the request body passed the validation or not
        if (valid !== true) {
            return {
                'statusCode': 422,
                'body': JSON.stringify({
                    message: "There are some validation errors on your request",
                    errors: valid,
                })
            }
        }
        return {
            'statusCode': 200,
            'body': JSON.stringify({
                message: "The lambda passed validation",
            })
        }
    } catch (err) {
        console.log(err);
        return err;
    }
};
Let’s go to the root directory and run the following command so that we can access the lambda.
## compiling the application
sam build
## running the application
sam local start-api
Now, you will be able to access the application using the URL http://127.0.0.1:3000/ . Let’s check whether our validation logic works or not.
If we access the route, http://127.0.0.1:3000/hello without the parameters fname, lname, and email, it returns a validation error like the one below.

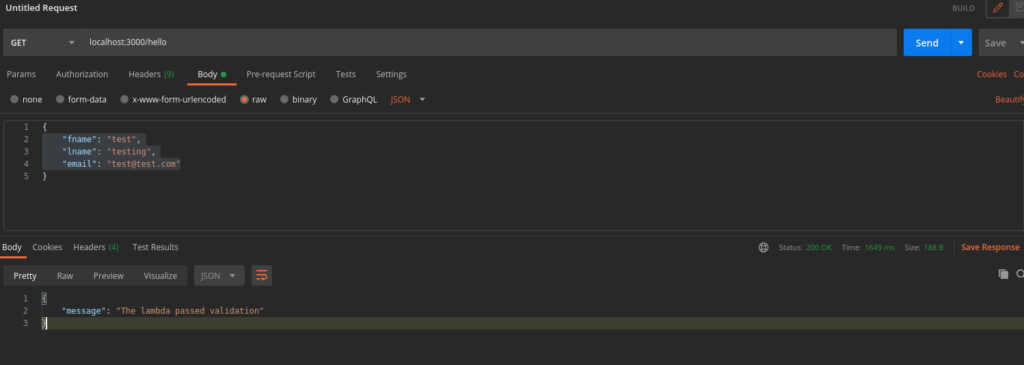
If we access the route, http://127.0.0.1:3000/hello with the parameters fname, lname, and email, it returns a success message as below.

Conclusion
In this article, we’ve learned how to implement Ajv in the AWS Lambda function and how to validate the request body provided through the route.
