

In this article, we will learn how to use AWS Lambda with Amazon EventBridge. AWS Lambda is an Amazon Web Service compute service that lets you run code without managing or provisioning servers. In Lambda, your code is executed on a high-availability compute infrastructure, and all of the compute resources are managed, including server and operating system maintenance, capacity provisioning, automatic scaling, and logging.
Amazon EventBridge is an event bus that can be used to build events-driven applications at scale using events generated from applications, SaaS applications, and AWS services. Using EventBridge, you can stream real-time data from applications like Zendesk or Shopify to AWS Lambda and other SaaS applications. Amazon Event Bridge can be used to schedule a cron job to perform sometime tasks in the future.
Prerequisites
- AWS account
- Basic AWS Lambda and EventBridge concepts
How to use AWS Lambda with Amazon EventBridge ?
Step 1: Create a Lambda Function
- Go to AWS Console and Log In
- In the search bar, type
lambda - Select the
Lambdaoptions displayed underServicessection
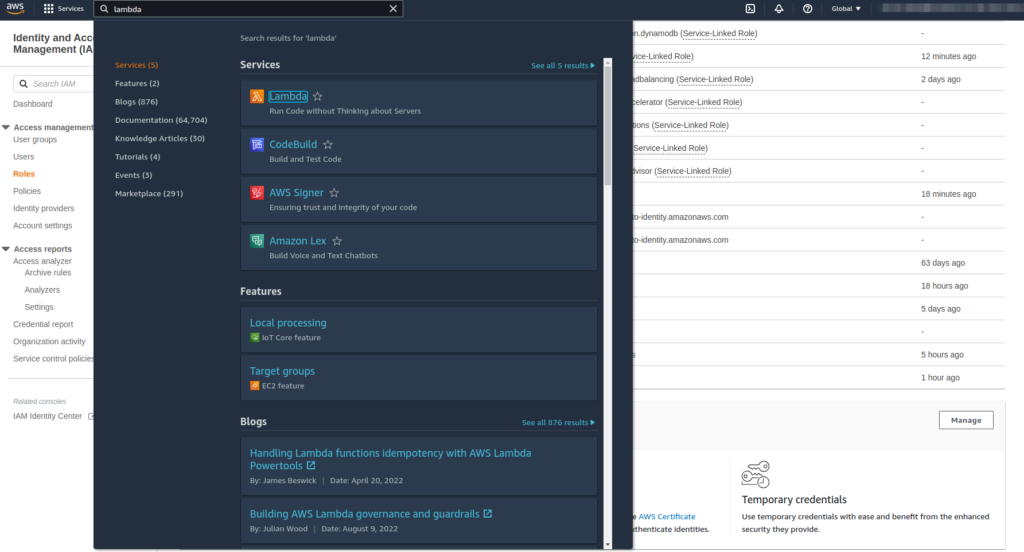
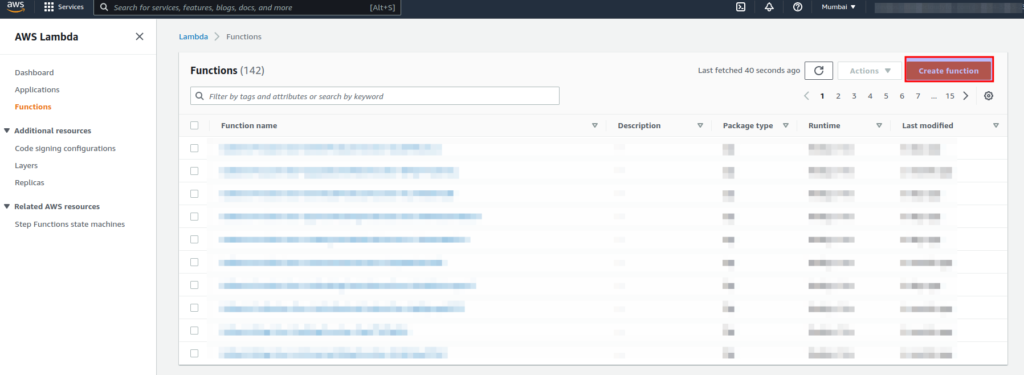
- After that AWS Lambda page will appear. Then click the
Create functionbutton on the right side of the page.
- Now, let’s create a function named
triggerEventBridgeFunction. Then clickCreate Function.
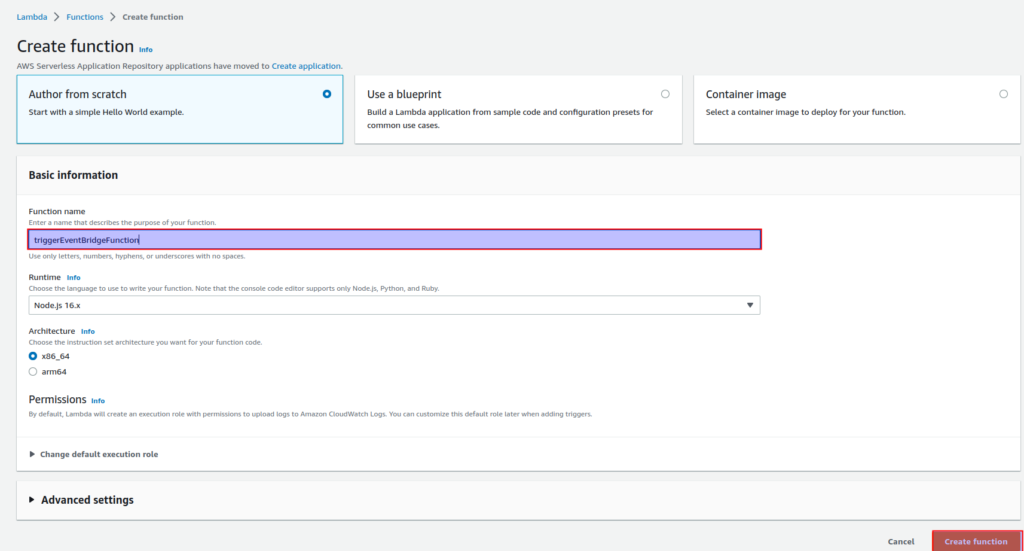
- It will take some time to create a lambda function and you will be redirected to the following page.
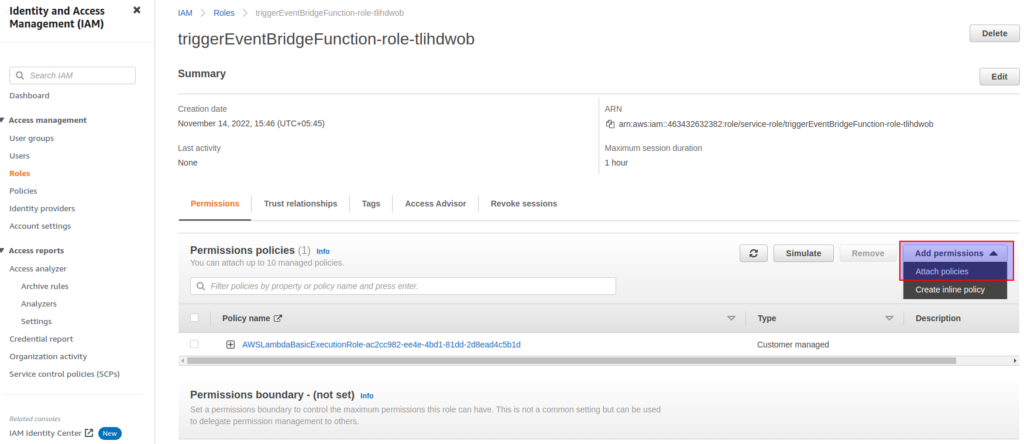
- Then, let’s add a new role to our lambda so that it can access the event bridge features.
- To do that click the
Configurationtab and click the role provided under the Execution Role section.

- Then, you will be redirected to the IAM roles page.
- Here, click
Add permissionsthe button and then chooseAttach policiesoption.
- Now, let’s search for the event bridge policies to be attached to the lambda.
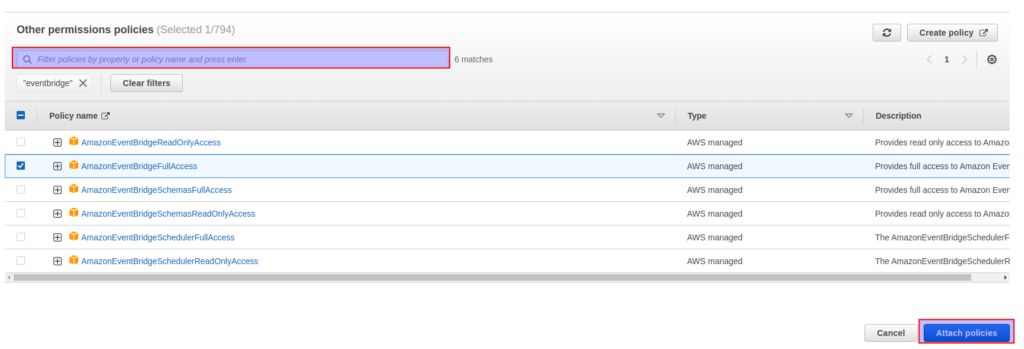
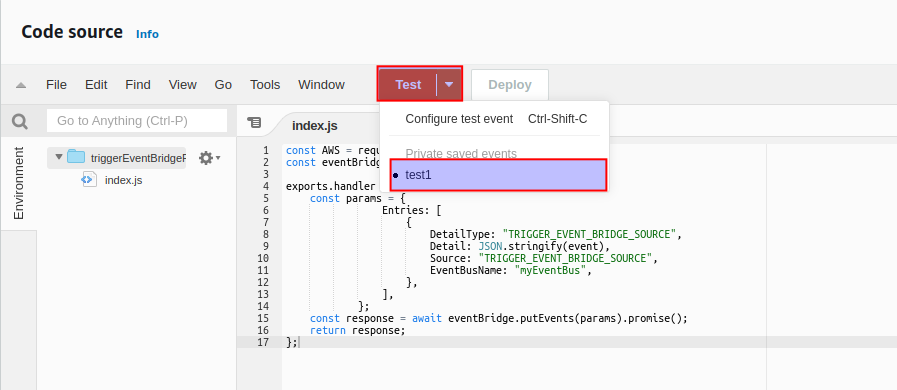
- Now, let’s modify the
index.jsfile of our lambda. So, that it will trigger the Amazon EventBridge when the Lamda is executed.
const AWS = require("aws-sdk");
const eventBridge = new AWS.EventBridge();

exports.handler = async (event) => {
    const params = {
                Entries: [
                    {
                        DetailType: "TRIGGER_EVENT_BRIDGE_SOURCE",
                        Detail: JSON.stringify(event),
                        Source: "TRIGGER_EVENT_BRIDGE_SOURCE",
                        EventBusName: "myEventBus",
                    },
                ],
            };
    const response = await eventBridge.putEvents(params).promise();
    return response;
};- Now, let’s create another lambda named
readEventBridgeby following the above steps. This lambda will log the event provided by the event bridge triggered by our first lambda. - After creating the lambda function, replace the index.js file with the following sample code.
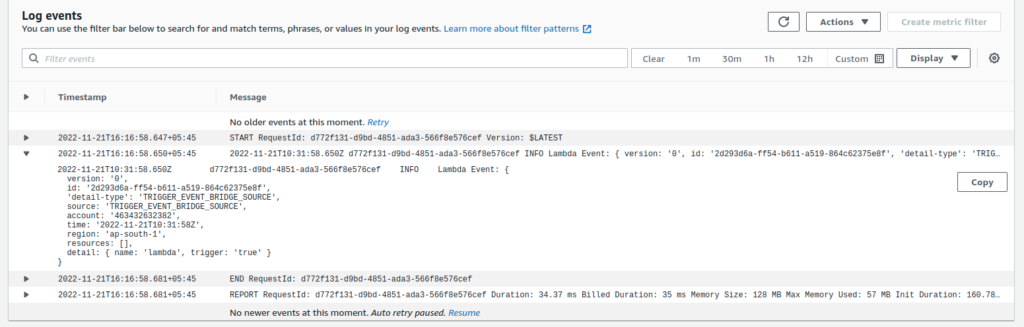
- The sample code will log the event provided to the lambda.
exports.handler = async (event) => {
    // TODO implement
    console.log("Lambda Event:", event);
};
Step 2: Create a Custom Event Bus and Rules
- Now, let’s create a custom event bus and rule using AWS Event Bridge so that we can execute our lambda using another lambda.
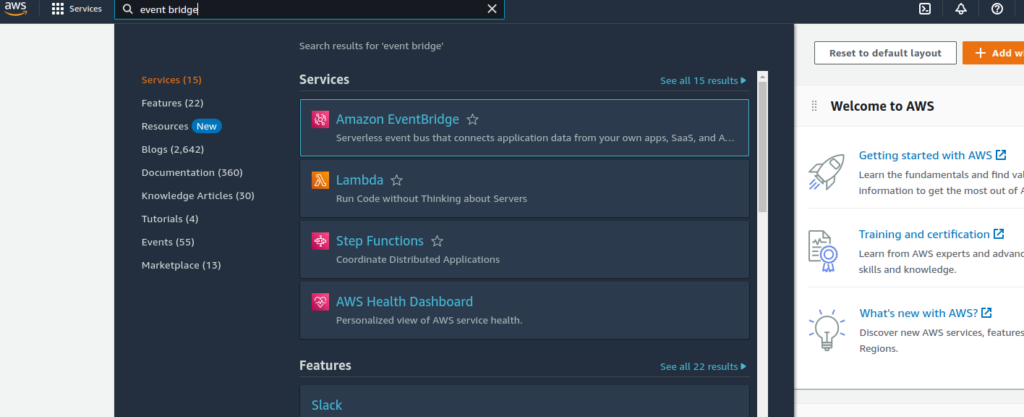
- In the search bar, type
event bridge - Select the
Amazon EventBridgeoptions displayed underServicessection.
- After that AWS EventBridge page will appear. Then click the
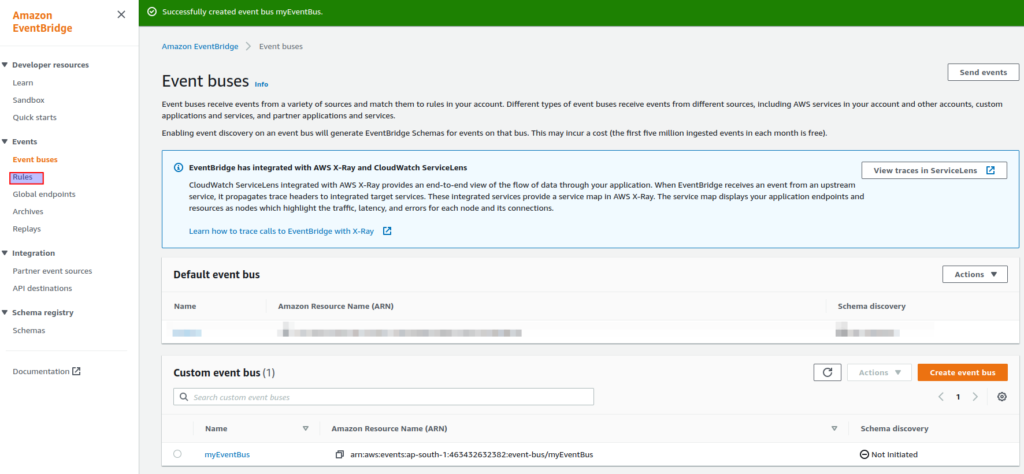
Event busesbutton on the left side of the page. - Then, you will be redirected to the Event buses page.
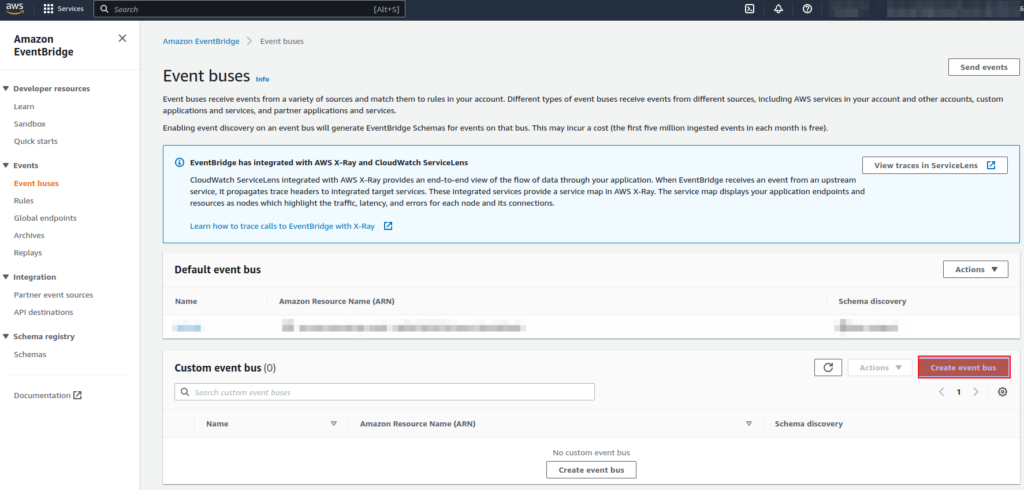
- After that, enter the Event Bus Name and click Create button.
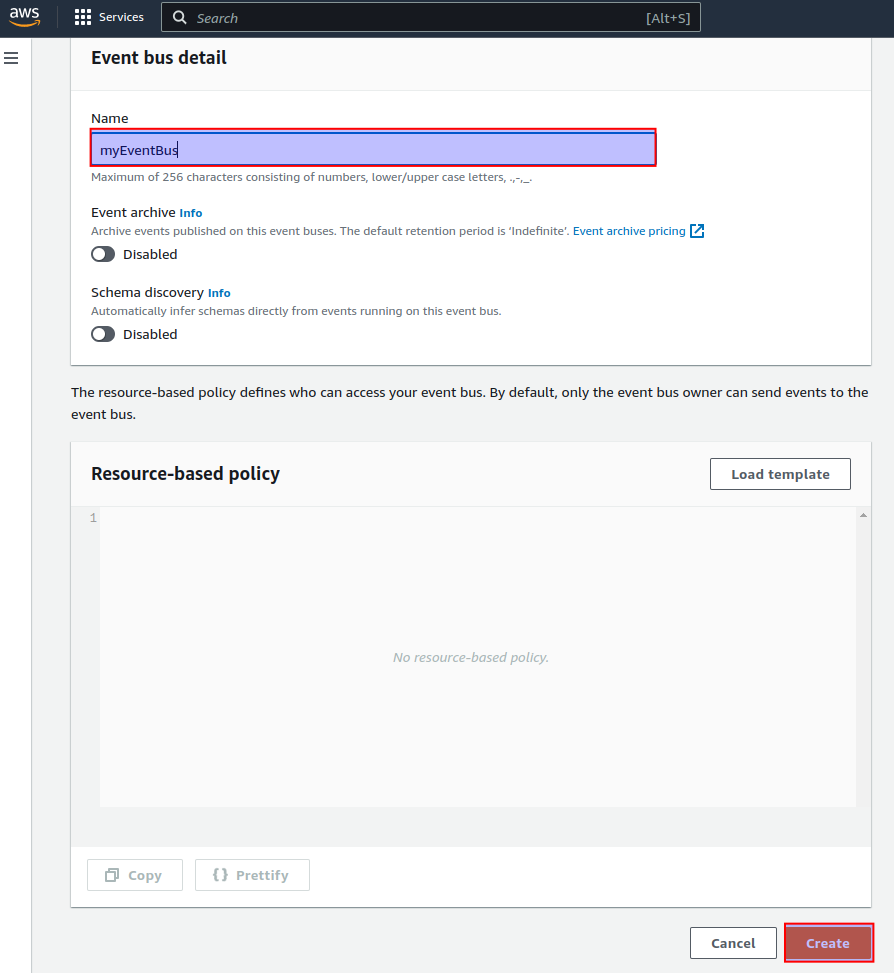
- Then, you will be redirected to the Event buses page.
- Click the
Rulesoption on the left side of the page to create a new rule.
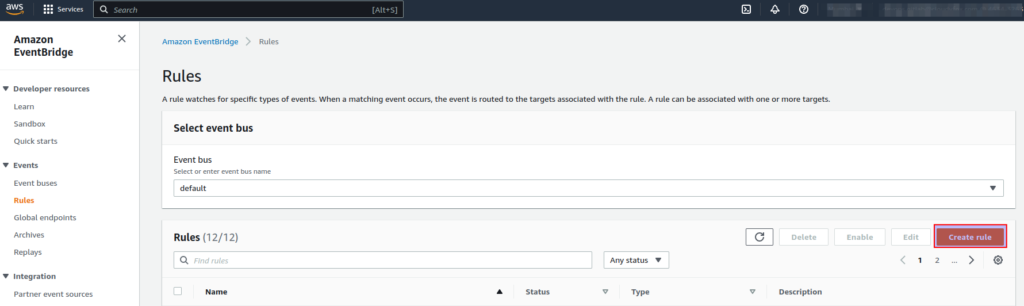
- After, clicking the Rules option you will be redirected to the Rules Page.
- Under the Event bus section, select the newly created event.
- Then, click the
Create ruleoption on the right side of the page.
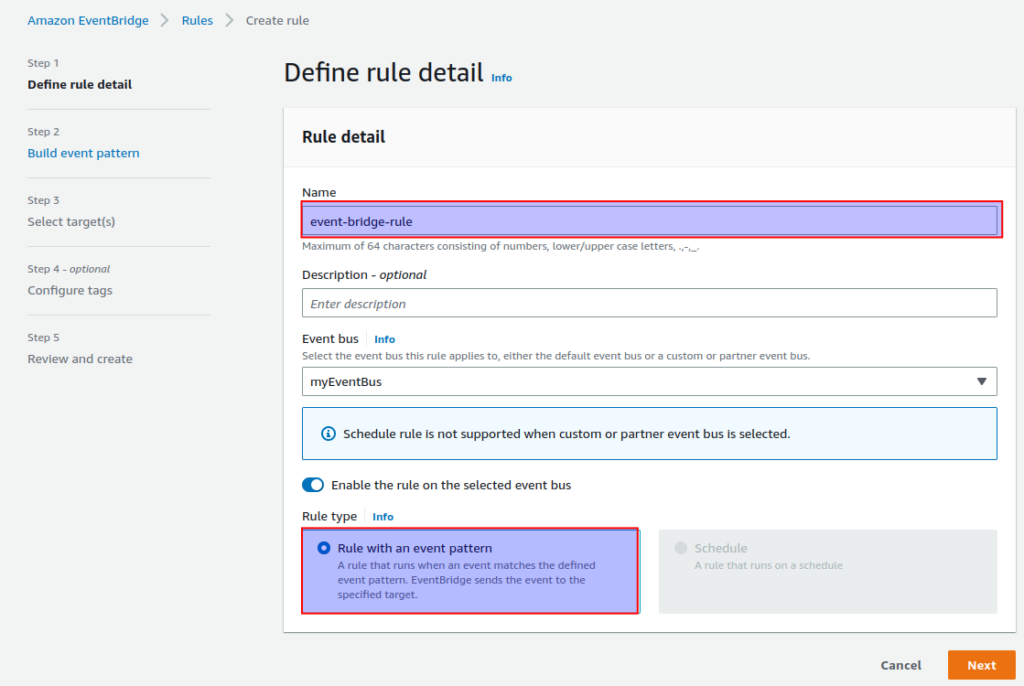
- Let’s enter a rule name as desired, we will use
event-bridge-rule for this article, and chooseRule with an envent patternunderRule Typeas shown below.
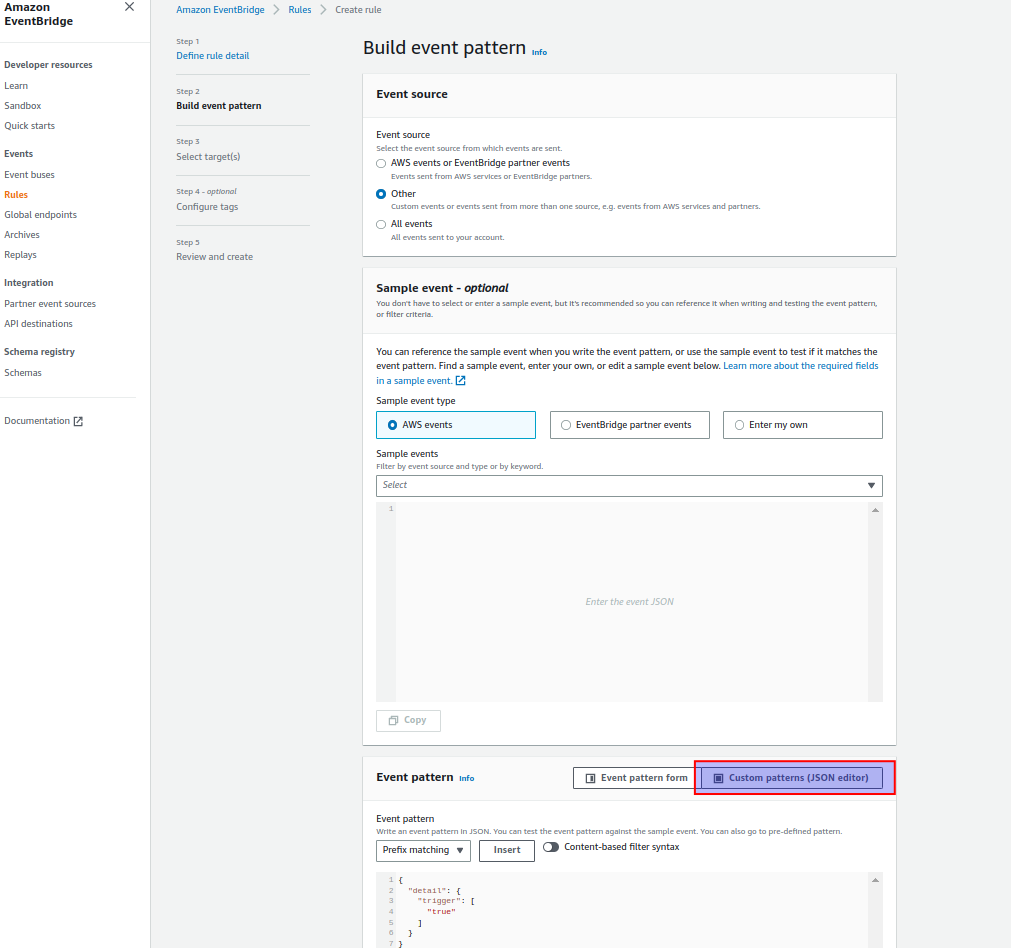
- Now, let’s build an event pattern, Select the
Custom patterns (JSON editor)under the Event pattern section. - Enter the following code inside the event pattern block.
## Custom pattern
{
  "detail": {
    "trigger":[
      "true"
    ]
  }
}
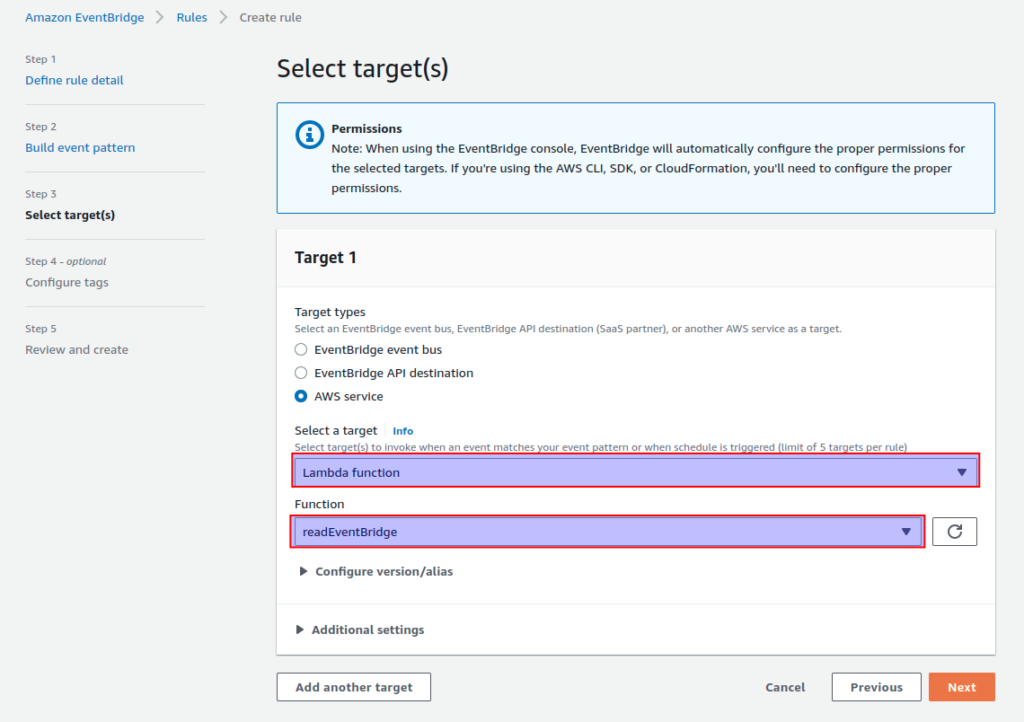
- Now, let’s select the event target. In our case, we will use the second lambda created above.
- Select the
AWS service, under the Target types section. - Select a lambda function option under the Select a target section.
- The choose
readEventBridgelambda function previously created under the Function section as shown in the image below.
- Complete the process by simply clicking the next button. Then you will be redirected to the Rules page.
- Now, let’s prepare our lambda function so that when we execute the lambda it will trigger the second lambda with the help of the amazon event bridge.
- Go to
triggerEventBridgeFunction, click on thetestbutton and choose Configure option. - Then, enter the event name and enter the following code inside the
Event JSONsection.
{
  "name": "lambda",
  "trigger": "true"
}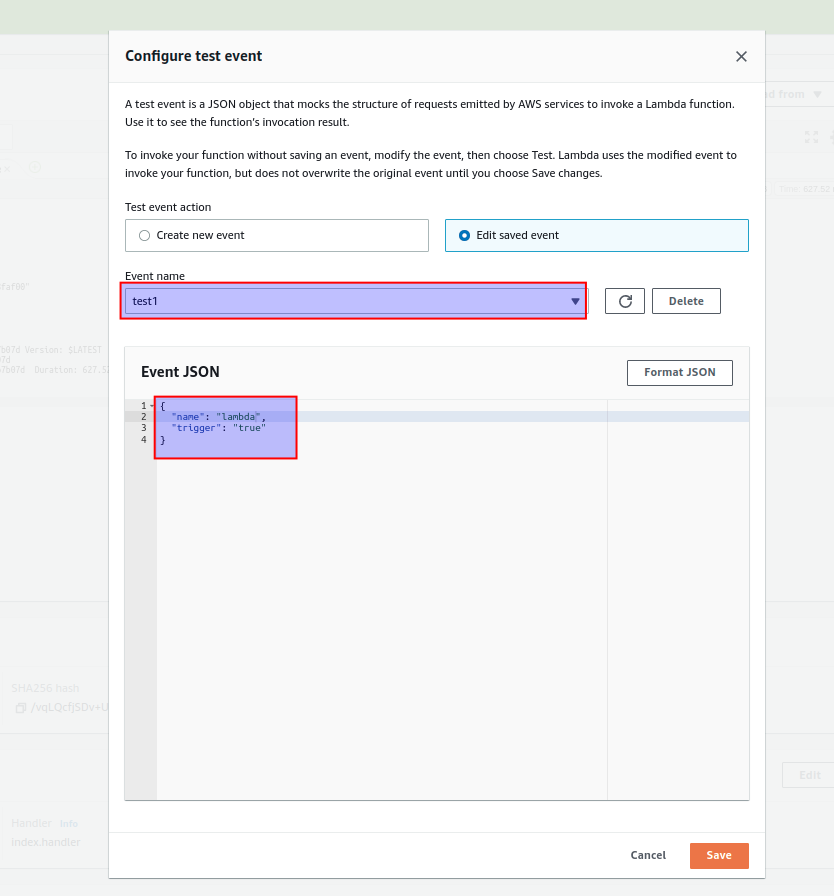
- Here, in the sample JSON, we provide
trigger=true, due to which the event bridge will trigger our second lambda and the second lambda will log the event response provided by the event bridge. - To execute the first lambda, click the test button and choose the name entered in the above step.
- Now, our second lambda will be triggered and it will log the event provided by the event bridge.
- To see the log, let’s go to the cloud watch section.
- Then, search
readEventBridgeand click the result.

- Then you will be redirected to the log list page.
- Under the Log Streams section click on the log stream data and you will be redirected to the log detail page.
Conclusion
In this article, we have learned how to use AWS Lambda with amazon event bridge.