Amazon Web Services (AWS) is one of the most used cloud platforms which provides more than 200 services including databases, storage, computing, application development, security, etc. Amazon S3 is one of the most used cloud storage services currently available. AWS S3 can be used by any type of user to store and protect any amount of data. AWS S3 provides different features so that you can organize, and optimize your data, and configure different access to provide access to your files according to the type of users.
AWS S3 provides different ways to upload your files to an S3 bucket. One of the ways to upload your file to S3 storage is using a pre-signed URL. The following steps are used to upload a file in the S3 bucket using a pre-signed URL.
- Create an API that accepts the filename of the file to be uploaded to the S3.
- Using the aws-sdk, make a request to the S3 with the provided file name to get a pre-signed URL and return the response.
- Using the response URL, the front end will make a PUT request to upload the file to the S3.
Pre-requisites
- Basic understanding of AWS and Node.js.
- An AWS account with access to create and upload files to the S3 bucket
1. Create an S3 Bucket
S3 bucket can be created using AWS GUI and CLI. Today, we are going to create a bucket using AWS GUI.
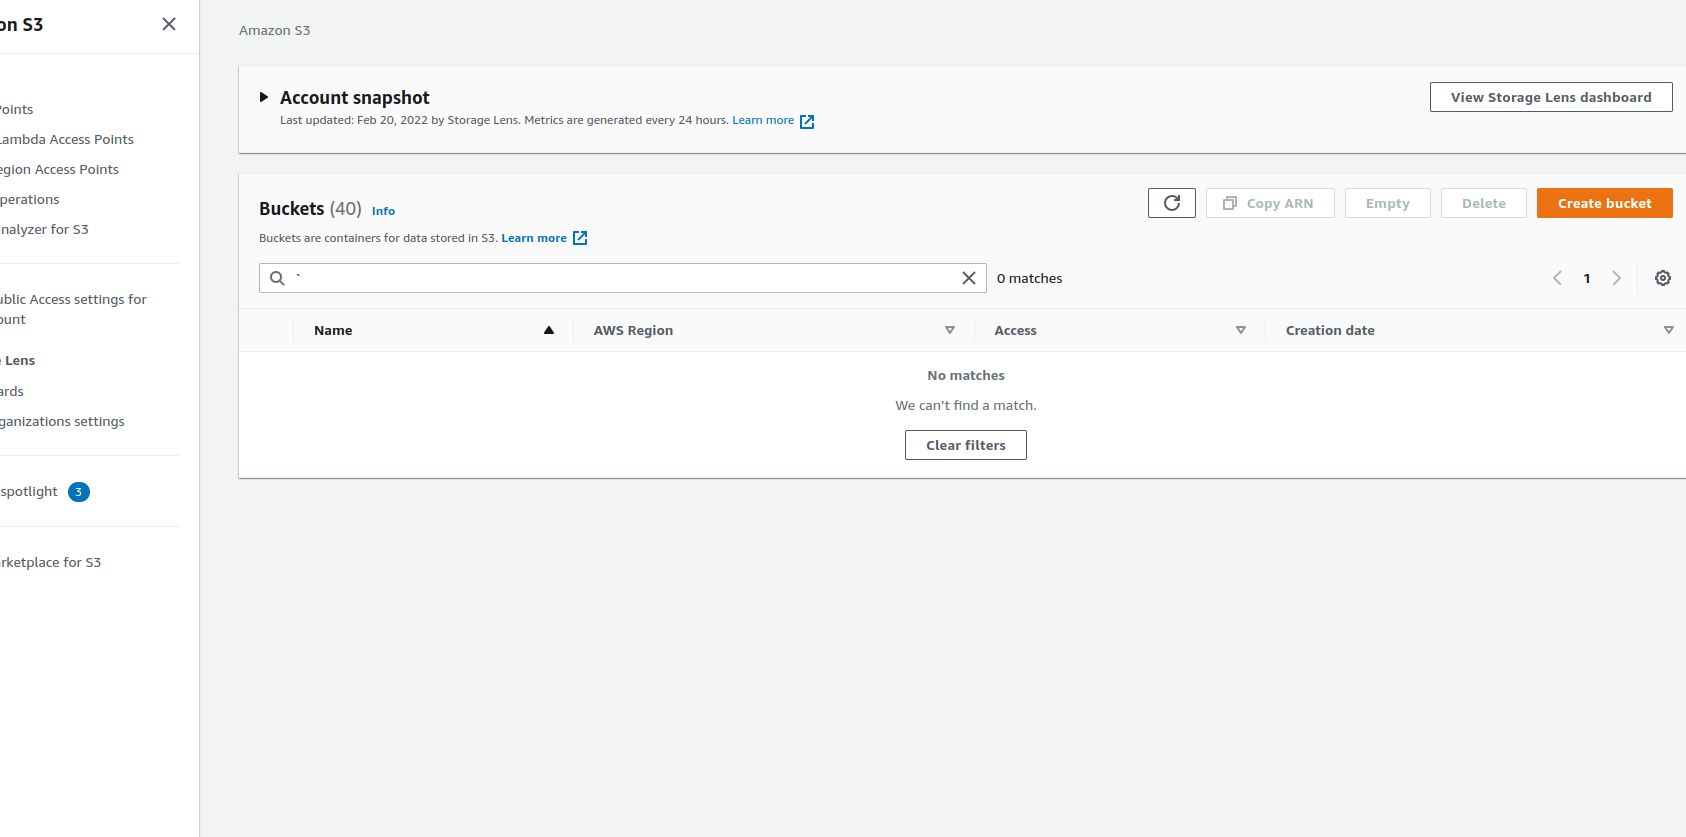
- Log in to the AWS Console and search for S3 service on the search bar at the top of the page.

- Click Create Bucket to create a bucket.

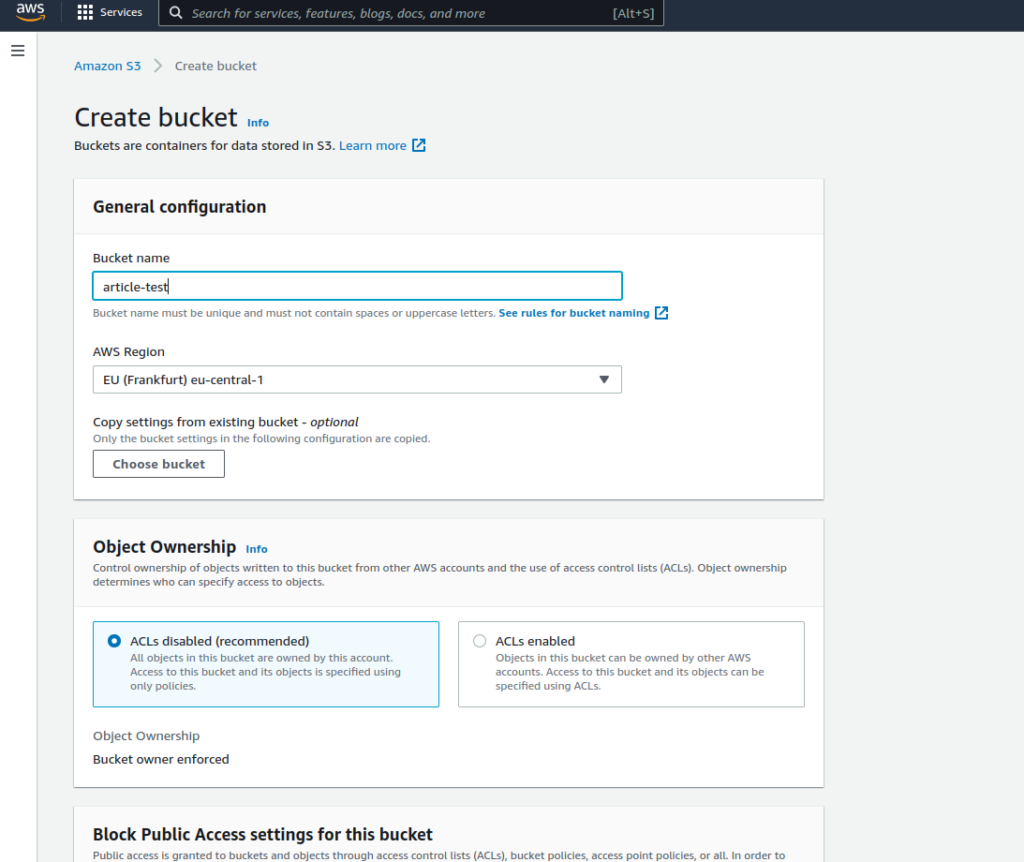
- Write your bucket name and the AWS region where the bucket will be created and then click Create Bucket Button.

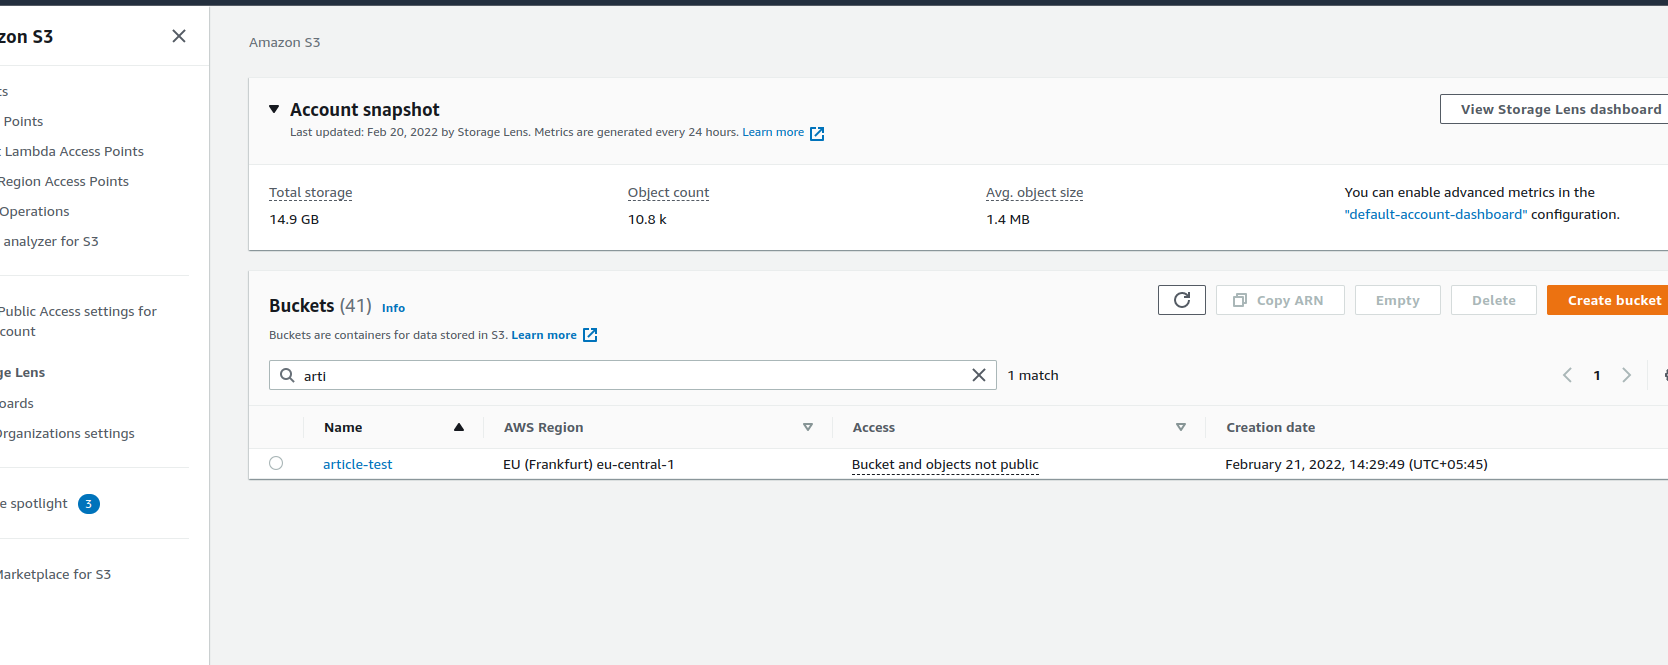
- The bucket is successfully created.

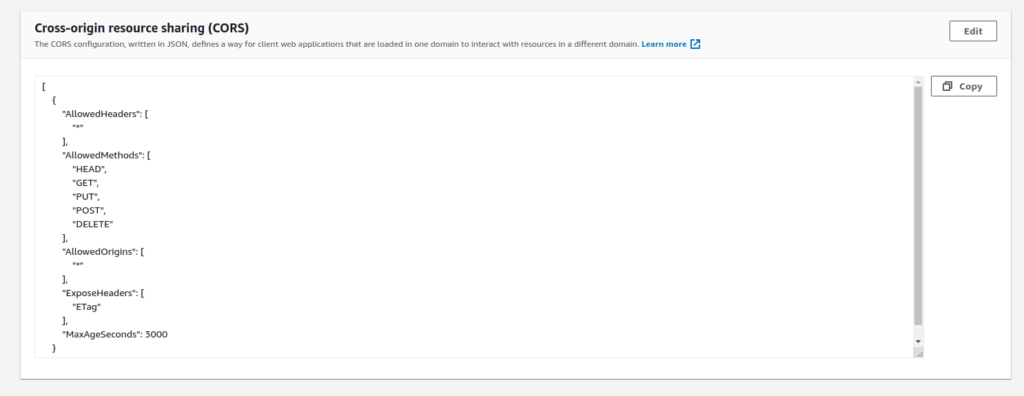
- Now, let’s add the following CORS policy under the permission tab of the bucket so that we can store files from all origins.

2. Using Javascript to generate a pre-signed URL
For generating the pre-signed URL, we have to use the aws-sdk package provided by AWS to communicate with the AWS S3 service. The following code makes the request to S3 and obtains the pre-signed URL.
const S3 = require("aws-sdk/clients/s3");

const s3 = new S3({
  region: AWS_REGION,
  accessKeyId:  AWS_ACCESS_KEY_ID,
  secretAccessKey: AWS_SECRET_ACCESS_KEY,
});

  const params = {
    Bucket: AWS_BUCKET_NAME,
    Key:  fileName,
    Expires: 300, // In seconds,
  };

  const url = await s3.getSignedUrlPromise("putObject", params);

  return url;
In the above function,
Firstly, we require the aws-sdk s3 plugin to communicate with AWS S3.
Then, we set up the S3 configuration using the AWS credentials.
The params object includes the following keys:
Bucket: Name of the bucket which stores all of our files.
Key: Name of the file which will be uploaded.
Expires: Duration after which the pre-signed URL will be expired.
The getSignedUrlPromise takes two arguments.
operations: the name of the operation to callparams: parameters required to perform the operation
In the above example, the getSignedUrlPromise generate the pre-signed URL like the following:
https://bucket.s3.eu-central-1.amazonaws.com/hello.png?response-content-disposition=inline&X-Amz-Security-Token=random-security-token&X-Amz-Algorithm=sample-algorithm&X-Amz-Date=date&X-Amz-SignedHeaders=host&X-Amz-Expires=300&X-Amz-Credential=credentials&X-Amz-Signature=signature
Conclusion
Hope this article helped you to create an S3 bucket using AWS GUI and generate a pre-signed URL of that bucket, using which the frontend developer can upload the files in the storage.
