Introduction
- Basic knowledge of Angular
- Setup of a local development environment. You will need Angular CLI to set up your environment.
We will discuss the component lifecycle hooks in angular in this article. Since the component in Angular is the main building block of the application, it is important for us to understand the lifecycle processing steps of the components in order to implement them in our applications.
Life Cycle Hooks
In Angular, every component goes through a life-cycle, where it goes through a number of different phases. There are 8 phases of the component life-cycle. Each stage is called a lifecycle hook event. In this way, we can control the components in different phases of an application using these hook events. A component must have a constructor method since it is a TypeScript class. The constructor of the component class executes before any other lifecycle hook events. Whenever we need to inject dependencies into a component, we should do so in the constructor. Angular executes its lifecycle hook methods in a particular order after executing the constructor.
List of Life Cycle – Learn Component Lifecycle Hooks In Angular
Component LifeCycle
Every component that we create on angular has its own lifecycle. Behind the curtain, angular itself creates, renders component into DOM. During component lifecycle, angular also checks it when the data-bound properties changes, with which it decides what to do with component within DOM object. Angular always destroys its component before removing it from the DOM object. Now, lets understand what hooks that we as a developer can use to know different state of components.
Here is the complete list of life cycle hooks, which Angular invokes during the component life cycle Angular invokes them when an event happens.
1. ngOnChanges
Angular runs the ngOnChanges life cycle hook whenever any of the component’s input properties changes. Initializing the input properties is the first step in the change detection cycle. The ngOnChanges hook is raised if it detects a change in any property. This occurs during every change detection cycle. When there is no change detected, the hook does not fire.
2. ngOnInit
The ngOnInit hook is triggered after Angular creates and updates your component’s input properties. It’s triggered right after the ngOnChanges hook.This hook is triggered only once and immediately after your component’s creation (during the initial detection of changes).This is the ideal place to add any initialisation logic for your component. Each input property of the component is available here. They can be used to get data from the backend server as part of http get requests or to run some initialization logic.
3. ngDoCheck
Angular application calls the ngDoCheck hook event every time a change is detected. This hook is called even if there is no change in the input properties. It is called after the ngOnChanges and ngOnInit hooks. We can use this hook to implement custom change detection, whenever Angular is unable to identify change in input properties. It’s especially helpful if we use the Onpush change detection strategy.
4. ngAfterContentInit
Angular component’s ngAfterContentInit Life cycle hook is raised after its projected content has been fully initialized. Angular also updates property values decorated with the ContentChildren and the ContentChild before raising this hook. Even if there is no content to project, this hook is raised.
5. ngAfterContentChecked
The ngAfterContentInit() method is called after the ngAfterContentInit() method executes each time the content of a component has been checked for changes by Angular’s change detection mechanism. The method is also called upon every subsequent execution of ngDoCheck(). It is mainly responsible for initializing child components.
6. ngAfterViewInit
This lifecycle hook method executes after Angular has initialized the component’s view and child views. The method runs after ngAfterContentChecked(). The hook applies only to components.This hook is called during the first change detection cycle, where angular initializes the view for the first time
7. ngAfterViewChecked
In Angular, ngAfterViewChecked is called after ngAterViewInit(). It gets called for every time change detection has been performed on the given component. This method is called after each subsequent call to ngAfterContentChecked(). Whenever any binding of the children directives is changed, this method is called. Therefore, this method is very useful when the component awaits a value coming from its children.
8. ngOnDestroy
This lifecycle method is executed just before the components are destroyed by Angular. It is very useful for unsubscribing to observables and detaching event handlers to avoid memory leaks. It is actually called just before the instance of the component is finally destroyed. It is called right before the component is removed from the DOM.
How to Use Lifecycle Hooks
- Import Hook interfaces
- Declare that Component/directive Implements lifecycle hook interface
- Create the hook method
Let create a sample project to playaround with these available life cycle hooks
Create a Sample Angular Project.Open the terminal and enter command below
ng new angular-lifecyclehooks-exampleAfter project is created,Run the server and open the app.component.ts file.
Import Hook interfaces
Import hook interfaces from the core module. The name of the Interface is hook name without ng
import
{OnChanges,OnInit,DoCheck,AfterContentInit,AfterContentChecked,AfterViewInit,AfterViewChecked,OnDestroy} from '@angular/core';
Component Implements lifecycle hook interface
Next,we need to define the AppComponent to implement all the life style looks we have defined fro the interface
export class AppComponent implements OnChanges,OnInit,DoCheck,AfterContentInit,AfterContentChecked,AfterViewInit,
AfterViewChecked,OnDestroy {
}
Create the hook method
The life cycle hook methods must use the same name as the hook.
We need to create each methods for lifecycle hooks
The complete code for the app.component.ts is
import { Component } from '@angular/core';
import {OnChanges,OnInit,DoCheck,AfterContentInit,AfterContentChecked,AfterViewInit,AfterViewChecked,OnDestroy} from '@angular/core';
@Component({
  selector: 'app-root',
  templateUrl: './app.component.html',
  styleUrls: ['./app.component.css']
})
export class AppComponent implements OnChanges,OnInit,DoCheck,AfterContentInit,AfterContentChecked,AfterViewInit,AfterViewChecked,OnDestroy {
  title = 'angular-lifecyclehooks-example';
  number: number = 50;

  constructor() {
    console.log(`constructor - number is ${this.number}`);
  }

  ngOnChanges() {
    console.log(`ngOnChanges - number is ${this.number}`);
  }

  ngOnInit() {
    console.log(`ngOnInit  - number is ${this.number}`);
  }

  ngDoCheck() {
    console.log("ngDoCheck")
  }

  ngAfterContentInit() {
    console.log("ngAfterContentInit");
  }

  ngAfterContentChecked() {
    console.log("ngAfterContentChecked");
  }

  ngAfterViewInit() {
    console.log("ngAfterViewInit");
  }

  ngAfterViewChecked() {
    console.log("ngAfterViewChecked");
  }

  ngOnDestroy() {
    console.log("ngOnDestroy");
  }

  addition(){
    this.number+=10;
  }

}
Here we have added two method to check the ngChange life style hook
Now add the code below inside content class in app.component.html file.
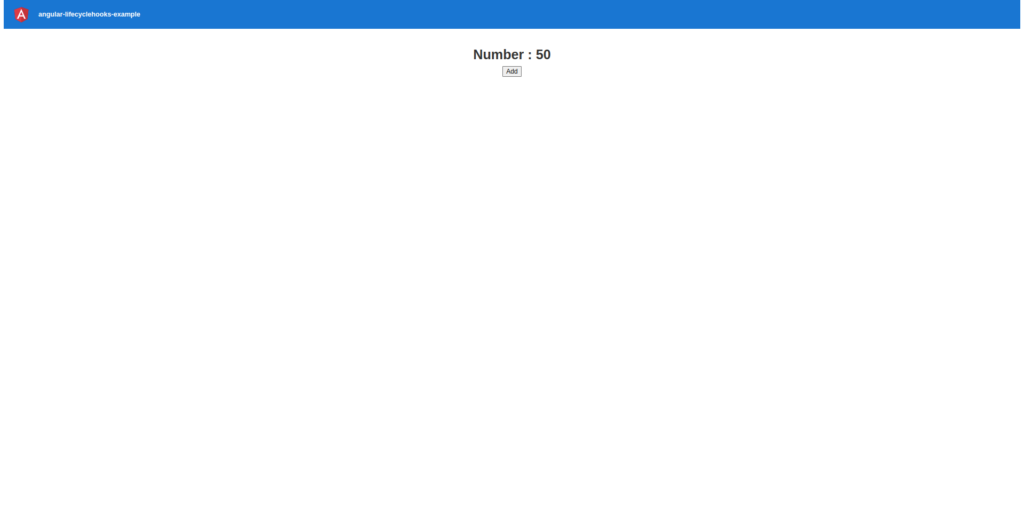
 <h1>Number : {{ data }}</h1>

<button type="button" class="btn btn-success"
        (click)="addition()">Add
</button>
Now click the URL in the browser http://localhost:4200.

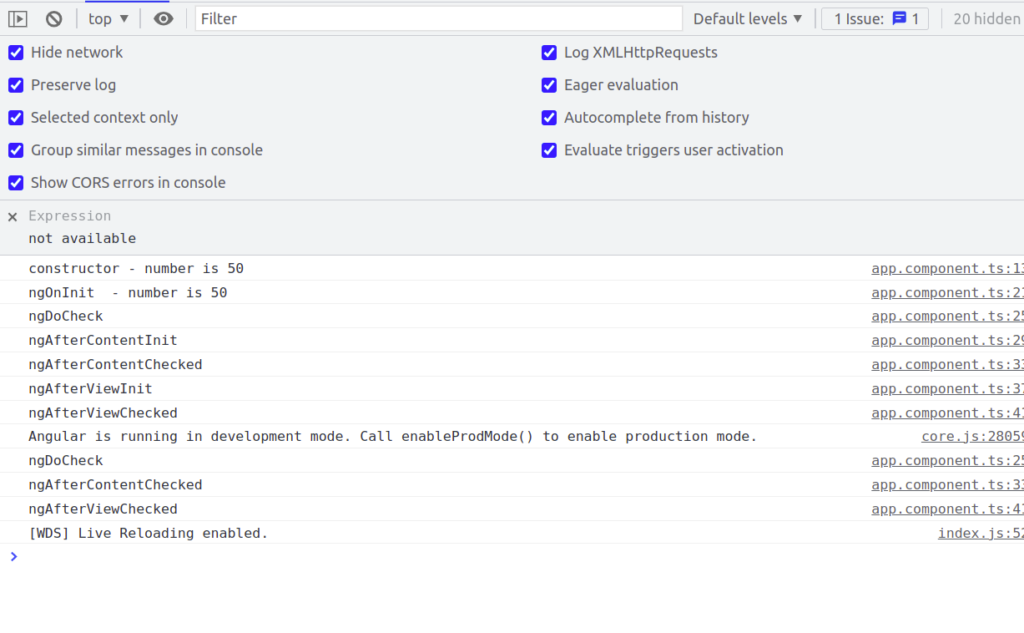
And check the console of that page

Now when we clicked on add buNow, when we click on add here, the value of the number will increase by 10.In the console, we can see ngDoCheck, ngAfterContentChecked, and ngAfterViewChecked being called in order.
Conclusion
From this article, we have learned about component lifecycle hooks in angular and how to use them.
