What is Kubernetes (K8s)?
Kubernetes, also known as K8s, is an open-source container management system developed on the Google platform. Kubernetes is for managing containerized applications. It provides mechanisms for deployment, maintenance, and scaling of applications in various types of physical, virtual, and cloud environments.
It helps to deliver consistently the complex applications running on hundreds to thousands of servers(clusters).
Why Kubernetes?
Kubernetes helps to perform maintenance and update without any downtime or interruption of services. As containerization is becoming a preferred method for packaging, deploying, and updating web apps Kubernetes is must use choice among the developers.
Kubernetes helps to control the resource allocation and traffic management for microservices or cloud applications. It allows you to assure where and when containerized applications run.
Features of K8s:
- Scheduling
- Self-healing capabilities
- Horizontal scaling and Load balancing
- Environment consistency for development, testing, production, etc.
- Isolated infrastructure (loosely coupled components)
- Enterprise-ready features
- App-centric management
- Auto-scaling infrastructure
Kubernetes Architecture
Terminologies
- Cluster
Simply, it is a collection of hosts or servers. It includes RAM, CPU, disk, etc.
- Master
It is a collection of components. These are used for all cluster decisions like scheduling and responding to cluster events.
- Node
A single host which is capable of running machines (virtual or physical). It runs kubeproxy, minikube, and kubelet which are part of the cluster.
- Namespace
A logical cluster environment, is widely used for scoping access or dividing a cluster.
Architecture
- Master Node
It is the most vital component of K8s and is responsible for the managing K8s cluster. It’s the entry point for all kinds of tasks. There might be more than one master node in the cluster.
It has various sub-components like: API Server, Controller Manager, Scheduler, ETCD.
API Server acts as an entry point for all the REST commands.
Controller Manager manages control loops that regulate the state of K8s. This makes sure that your current state is the same as the desired state.
Scheduler schedules the task to slave nodes and stores the resource usage info for every slave node. It is for distributing the workload.
ETCD stores configuration details and communicates with the most component to receive commands and work. Also manages networking parts.
- Worker Node (Slave Node)
It is a virtual or physical server that runs the application and is controlled by the master node. It contains all the required services to manage the networking between the containers and communicate with the master node.
It has sub-components like: Kubelet, Docker Container, Kube-proxy, Pod.
Kubelet gets the configuration of a Pod from the API Server and ensures that the containers are up and running.
Docker Container runs on each of the worker nodes. It runs the configured Pods.
Kube-proxy acts as a load balancer and network proxy to perform service on a worker node.
Pod is a combination of a single or multiple containers that logically run together on nodes.
Other Terminologies
- Replication Controllers
It is an object which defines a Pod template. It controls parameters to scale replicas of Pod horizontally.
- Replication Sets
It is to maintain a stable set of replica Pods running. Often used to guarantee the availability of specified no. of identical Pods.
- Deployments
Deployment uses a replication set as a building block which adds the feature of lifecycle management. It is defined to create new ReplicaSets or to remove existing Deployments and adopt them with new deployments.
- Stateful Sets
It is used to control Pods like deployment and scaling of a set of Pods. It provides the ordering and uniqueness of the Pods.
- Daemon Sets
It is also used to control Pods. It runs a copy of a Pod so that performing maintenance and offering services gets easy.
Advantages of K8s
- Largest community among container orchestration tools
- Variety of storage options like on-premises, SANs, and public clouds.
- Based on the principle of immutable infrastructure.
- Use vendor-specific APIs
- No downtime during server release and update.
- Improve productivity
Summarization
So, In short, Kubernetes-
- Helps to perform maintenance and update without interrupting services
- Can run on-premises OpenStack, public clouds Google, Azure, AWS, etc.
- Offers automated Scheduling and Self-Healing Capabilities.
- Consists of cluster, master, node, and namespace.
- Has mainly two important components: Master Node and Worker Node.
- Allows auto-scaling, unlike Docker Swarm.
Creating and Running Kubernetes Cluster
Installing Kubectl
To install and set up Kubernetes on your OS, follow the official documentation. Or let’s install:
Note: Make sure you have Docker installed on the machine(s) where you’re going to install Kubernetes. You can follow docker installation on your OS here or for Ubuntu here.
Linux
$ curl -LO https://storage.googleapis.com/kubernetes-release/release/$(curl -s https://storage.googleapis.com/kubernetes-release/release/stable.txt)/bin/linux/amd64/kubectl
$ chmod +x ./kubectl
$ sudo mv ./kubectl /usr/local/bin/kubectl
MacOS
$ curl -LO https://storage.googleapis.com/kubernetes-release/release/`curl -s https://storage.googleapis.com/kubernetes-release/release/stable.txt`/bin/darwin/amd64/kubectl
$ chmod +x ./kubectl
$ sudo mv ./kubectl /usr/local/bin/kubectl
Windows
$ curl -LO https://storage.googleapis.com/kubernetes-release/release/$(curl -s https://storage.googleapis.com/kubernetes-release/release/stable.txt)/bin/windows/amd64/kubectl.exeVerify:
$ kubectl versionOr,
$ kubectl version —output=yamlOutput should look like this:
clientVersion:
  buildDate: "2021-12-16T11:41:01Z"
  compiler: gc
  gitCommit: 86ec240af8cbd1b60bcc4c03c20da9b98005b92e
  gitTreeState: clean
  gitVersion: v1.23.1
  goVersion: go1.17.5
  major: "1"
  minor: "23"
  platform: linux/amd64

The connection to the server localhost:8080 was refused - did you specify the right host or port?
Repeat these steps on all the nodes if you’re using more than one.
Installing Minikube
Minikube supports several virtualization technologies. First, you need to download VirtualBox for your OS.
Note: Please keep in mind that for VirtualBox or HyperV to work, virtualization must be enabled in the BIOS. Most laptops should have it enabled by default.
Linux Minikube Installation:
$ curl -Lo minikube https://storage.googleapis.com/minikube/releases/latest/minikube-linux-amd64
$ chmod +x minikube
$ sudo mv minikube /usr/local/bin/
Verify:
$ minikube versionOutput will be:
minikube version: v1.24.0Kubectl, VirtualBox, and Minikube are installed on your machine. Now, you can good to go ahead and create a cluster.
Starting Minikube
Minikube will start a virtual machine locally and deploy the necessary Kubernetes components. The Virtual Machine will be created with Docker and Kubernetes by localkube binary.
To start the Minikube run the following command in your terminal:
$ minikube start --vm-driver=virtualbox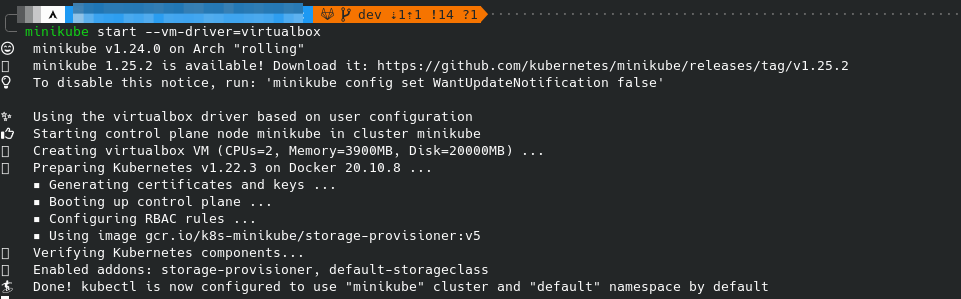
For Windows Users:
If you got any errors or problems with VirtualBox. You can use Hyper-V instead.
Go to Powershell Admin Window and execute:
$ Get-NetAdapterCreate hyperv virtual switch:
$ New-VMSwitch -name NonDockerSwitch -NetAdapterName Ethernet -AllowManagementOS $trueHere, replace Ethernet with your network connection name.
Now create MiniKube VM:
$ minikube start --vm-driver=hyperv --hyperv-virtual-switch "NonDockerSwitch" --memory=4096Verify MiniKube Status:
$ minikube statusThe output should look like this:
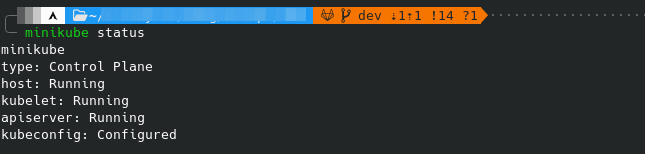
Minikube is running and your Kubernetes cluster is now initialized.
Now, you can explore the Kubernetes dashboard by running the following command:
$ minikube dashboardYou’ll be redirected to the following page:
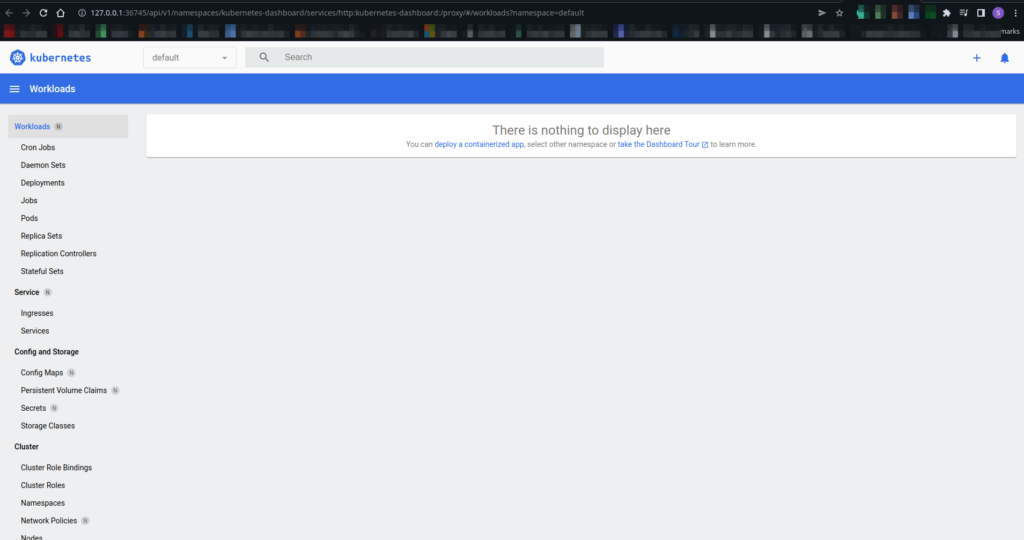
And here it is, you have successfully created and run a Kubernetes cluster using Minikube VirtualBox.
You can list all the running containers on VM:
$ docker container lsList all the nodes of the cluster:
$ kubectl get nodesThe output will be like this:
NAME       STATUS   ROLES                  AGE    VERSION
minikube   Ready    control-plane,master   131m   v1.22.3
Stopping Minikube:
$ minikube stopStarting Minikube:
$ minikube startDeleting Minikube:
$ minikube deleteThis is just the basics of Kubernetes. And there is a lot more to learn and explore about Kubernetes. You’re now ready to go and explore more.
Thank you!