Introduction to NestJs
NestJs is a framework for building scalable Node.js server-side applications. It uses JavaScript as its base language, and fully supports development with TypeScript. The project is generally set up with TypeScript but also supports development with JavaScript. It combines and uses the elements of Object-Oriented Programming, Functional Programming, and Functional Reactive Programming
It uses the Express framework, for the HTTP server. So, methods of Express work with Nest. It can also be set up with Fastify, but it uses Express by default if not explicitly set up with Fastify. Nest was created with solving the problem of architecture in mind, as an application made with Express if not managed properly, tends to get difficult to handle. Nest solves this by following MVC architecture out of the box, making the application testable, consistent, and maintainable. Its architecture is heavily inspired by Angular. It can use all the supported libraries built for node making it highly versatile.
Installing and setting NestJs
Installation
For working with NestJs, you need to scaffold the project using the Nest CLI or clone the Github repository:
$ git clone https://github.com/nestjs/typescript-starter.git projectFor installing the NestJs CLI and starting a new project follow the steps below:
## installation of nest cli
$ npm i -g @nestjs/cli

## initializing a nestjs project
$ nest new project-name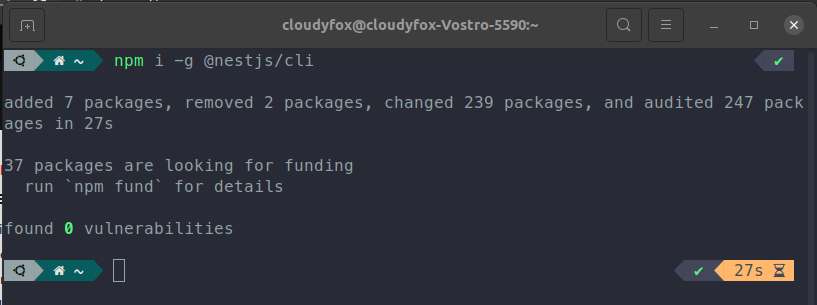
Scaffolding the project
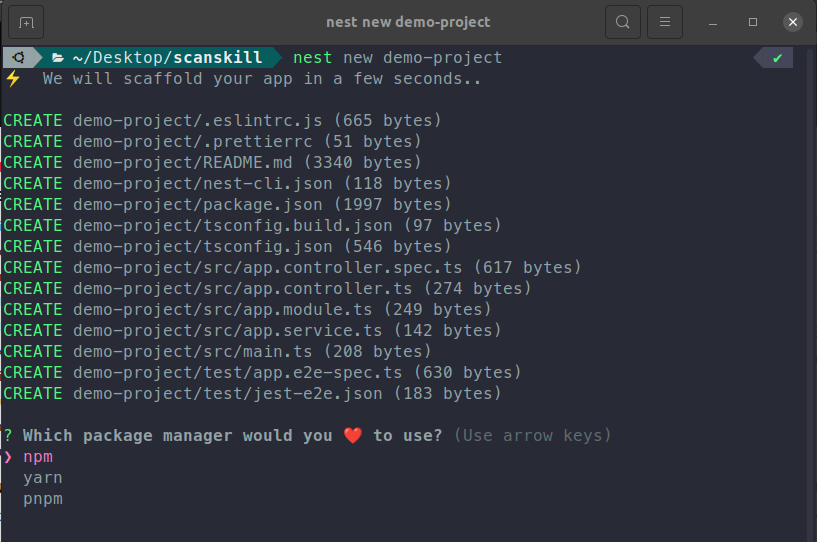
selecting package manager

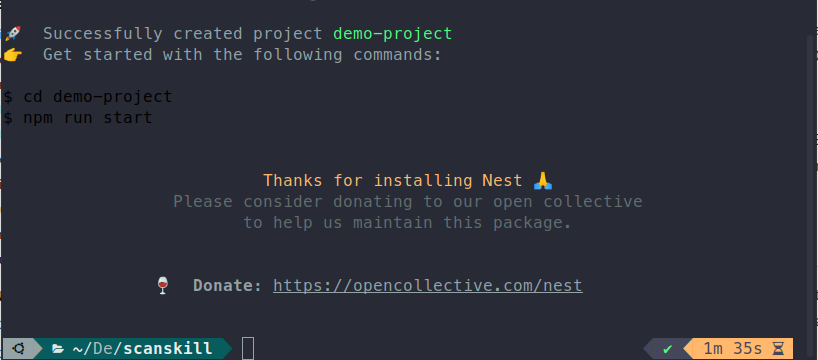
Project creation success
Starting the project
## starting up the application
$ cd project-name

## for development start server by
$ npm run start:dev

## for running application without watchmode
$ npm run start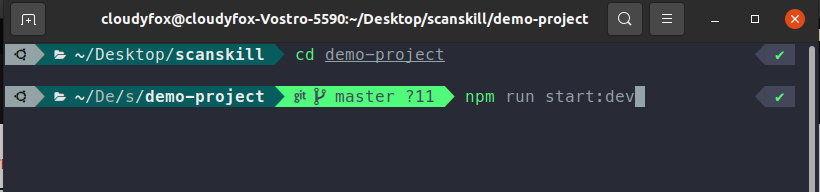
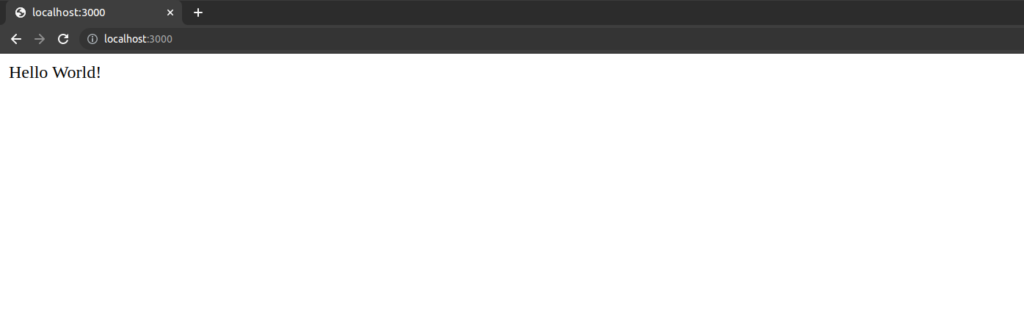
Starting the application
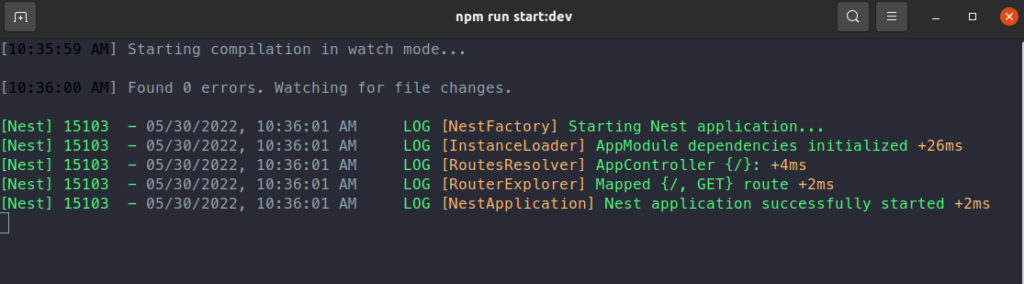
Go to the route: http://localhost:3000/ for checking if the application ran successfully.
## open the project in your favorite code editor
$ code .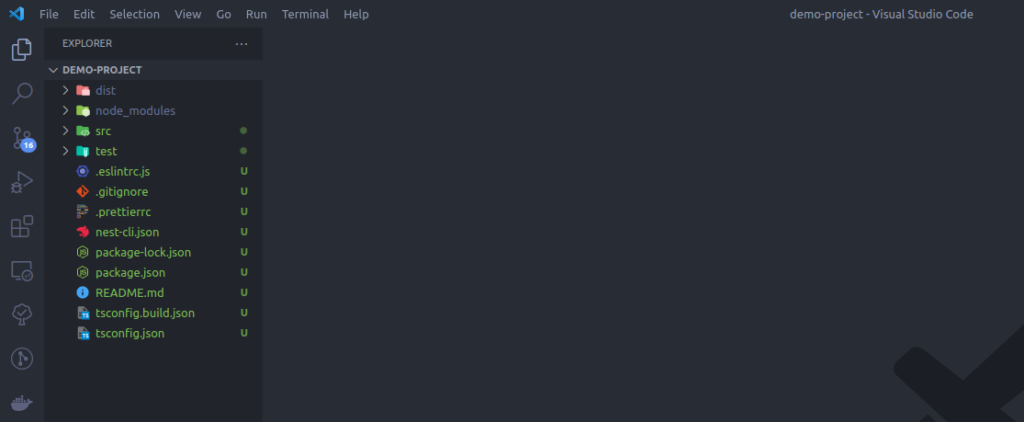
Now, you are ready with a NestJs project.
Model View Controller (MVC) architecture
MVC is a design pattern that separates an application into three components Model, View, and Controller. It separates the code into the data handling layer, presentation layer, and Business Logic layer. The figure below shows a pictorial representation of the Model, View, and Controller working in conjunction.
In the above figure, we can see that, the end-user sees the view layer, when interacting with the functionality like: posting an image, and inserting texts the user interacts with the controller. The controller manipulates data that is present in the data layer which is accessed through the model. From this, we can get a draw out a simple conclusion about the functionality of each layer and they are:
- Model: Holds data and interacts with the database
- View: Holds UI elements, that users interact with
- Controller: Holds business logic and interacts with model layer to interact with the Database
Advantages of MVC
- Easy to maintain as the code base grows
- Application is divided making it easier to test components in isolation
- Provides separation of concerns
- Easier to avoid complexity as the application is divided into three units
- Development can be performed in parallel
- Easier to introduce a new type of client
Disadvantages of MVC
- Multiple programmers are needed for development in parallel
- Knowledge of multiple technologies is required
- Increased complexity
Controllers in Nest
Controllers are the layer of code that handles the incoming requests and returning responses to the client. The client sends a request in, the controller handles the logic and performs the task that is need to be done, then returns the response back to the client through the same controller.
The controller has access to request and response objects that are present in Express. The controller also handles the routing part. For making a controller we use the decorator @Controller(). We can specify which route to invoke we can give parameters in the controller decorator @Controller(“user”), making the controller only trigger when /user route is requested by the user.
We use the CLI to create a controller, as it handles all the dependencies, like imports and exports for us.
$ nest g controller controllerNameNow, we create a controller user.
$ nest g controller user --no-spec
Here, we used --no-spec flag so that it doesn’t generate text file.
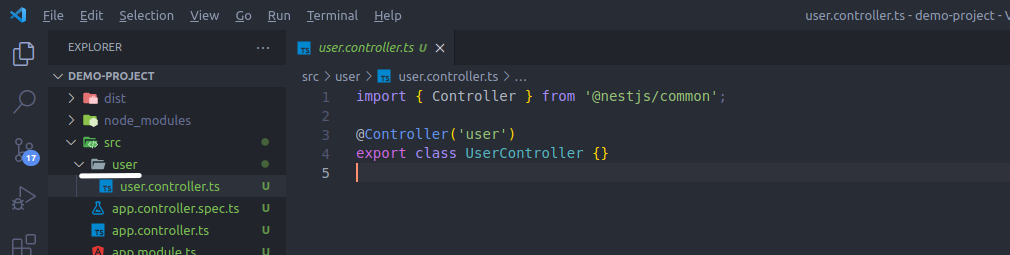
The user file is created inside the src folder and the user folder contains user.controller.ts which is the controller for user route.

It updated the modules file of app.module.ts, adding UserController inside the controllers of @Module() making it possible for the route to be used in the application. For any controller to work it should be defined inside the controller’s section of @Module() decorator of the module.
Now let’s create a create methods to handle different types of requests.
Handling different HTTP methods
We can define the HTTP methods as decorators on top of methods of the controller class making them handle different types of requests.
import { Controller, Get } from '@nestjs/common';

@Controller('user')
export class UserController {

  @Get()
  getAllUsers(): any {
    return [
      { id: 1, name: 'Josh'},
      { id: 2, name: 'Json'},
    ];
  }

}
Let us check if the get function is working by invoking, the get request at /user.
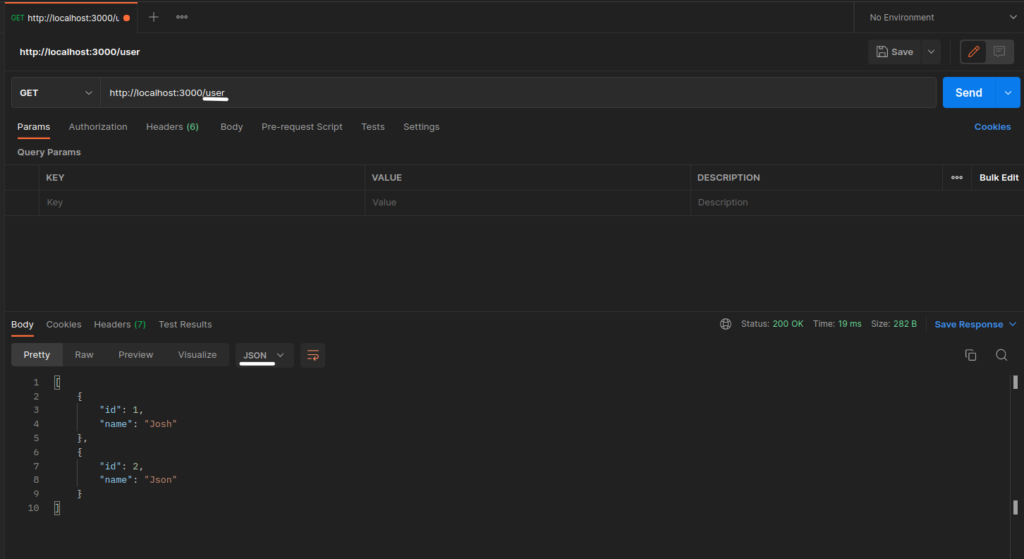
We see that the route /user is working. The response type of the above route is JSON as the response type of the getAllUser() method of the user controller is a JavaScript object. We can see this in action by changing the returning the same object by wrapping it in JSON.strinify() making the response type string.
return JSON.stringify( [ { id: 1, name: 'Josh' }, { id: 2, name: 'Json' } ] );The result of the following code change can be seen while invoking get at the same route.

We see that the response type changed to test while invoking the same route. The response type can be HTML or Text.
Likewise we can create POST, PUT, DELETE methods by using their respective decorators.
@Get()
@Post()
@Put()
@Delete()
They are imported from the same package @nestjs/common.
Handling client sent payload
We can use the client sent payload by using @Body() decorator.
import { Body, Controller, Post } from '@nestjs/common';

@Controller('user')
export class UserController {
  @Post()
  createEmail(@Body() body: any): any {
    const { username, fullname } = body;
    const email = username + '@scanskill.com';
    return { username, fullname, email };
  }
}
In the above code, the Post method createEmail() , we have @Body() next to the body which now has access to all the data present inside the request payload sent by the user. The above method takes the username and fullname sent by the user generates an email based on the provided username and returns it back to the user.

We can see that the POST method at the user route is called and the createEmail() method is invoked. The client sends username and fullname as request payload and gets username, fullname, and email in the response body.
Alternatively, if we want full access to the request method of Express then we follow these steps.
import { Controller, Post, Req } from '@nestjs/common';
import { Request } from 'express';

@Controller('user')
export class UserController {
  @Post()
  createEmail(@Req() req: Request): any {
    const { username, fullname } = req.body;
    const email = username + '@scanskill.com';
    return { username, fullname, email };
  }
}
We can use the Express request object by using @Req() decorator, and it has access to all the request methods present inside Express.

Handling request parameters and query strings
Request params
We use @Param() decorator to have access to the request parameter and we have to define the parameter inside the Request method. If it is being sent and it is a post method then, @Post(':id') and inside the method parameter section we use @Param('id'). Example below shows the use of request parameters.
import { Controller, Param, Post } from '@nestjs/common';

@Controller('user')
export class UserController {
  @Post(':id')
  returnRecievedParams(@Param('id') id: string): any {
    return { id };
  }
}
When invoked we get the request parameter as a response.
Query params
We use @Query() decorator to get access to the query parameter that is sent by the client. For accessing a specific item of the query parameter, we can specify it by @Query('id').
import { Controller, Get, Query } from '@nestjs/common';

@Controller('user')
export class UserController {
  @Get()
  returnRecievedQueryParam(@Query() query: any): any {
    const id = query.id;
    return { id };
  }
}
We invoked the method and got the id back we sent as query parameter back as a result.
Request and Response
We can use the request and response present inside Express by using @Req() and @Res() decorator. By doing that we have access to all the methods present inside the request and response of the Express framework. We will see this in the example below.
import { Controller, Get, Req, Res } from '@nestjs/common';
import { Request, Response } from 'express';

@Controller('user')
export class UserController {
  @Get()
  createUser(@Req() req: Request, @Res() res: Response): any {
    const {name, email} = req.body;
    const id = req.query.id;

    res.status(201).json({message: "Executed Successfully", data: { id, name, email }})
  }
}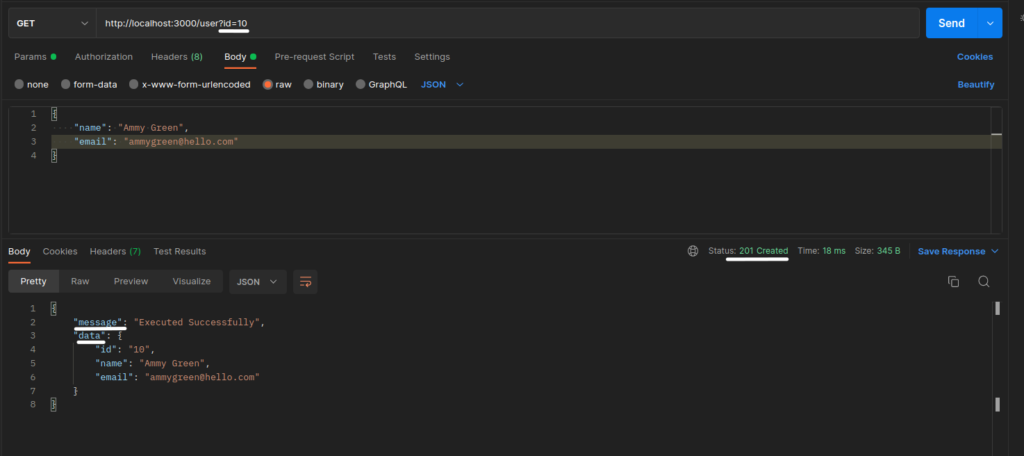
We can see that we can access the underlying Express methods request and response by using @Req() and @Res() which are equivalent to Express frameworks request and response.
Providers
Providers are the classes that can be injected as a dependency. It creates objects of the providers at runtime and keeps them inside the IoC container, by doing that we have access to the object of those classes throughout the life cycle of the application. We have access to those objects of classes and we can inject them by simply referring to the provider class.
To create a provider we decorate the class with @Injectable() and refer to it in the module file inside the @Module() decorator with the key providers. We will look at an example of this by creating a service that is also a provider.
Service in Nest
Services are a type of provider. The concept with service is that the controller part of our application should only handle routing and not the bulk logic of the application. We keep those logical sections inside services, many services are possible to be consumed by a single controller.
We can create a service by using CLI.
$ nest g service user --no-spec 
The created service comes with @Injecteble().

UserService is added in the providers section of the app.module.ts. Which makes the object of UserService Class at runtime, now we can use the object class by just referring to the class name.
We will make a /user/login route, which takes the user’s email and password processes it, and sends a success or error response back to the client.
//# Controller (user.controller.ts)
import { Controller, Post, Req, Res } from '@nestjs/common';
import { Request, Response } from 'express';
import { UserService } from './user.service';

@Controller('user')
export class UserController {
  constructor(private readonly userService: UserService) {}

  @Post('/login')
  login(@Req() req: Request, @Res() res: Response): any {
    const { email, password } = req.body;
    try {
      res.status(200).send(this.userService.login(email, password));
    } catch (error) {
      res.status(401).send(error);
    }
  }
}
In the above code we see that we can receive the object of UserService class by getting a reference of UserService as seen in the constructor: constructor(private readonly userService: UserService) {} , now the userService has the access to the UserService Class.
//# Service (user.service.ts)
import { Injectable } from '@nestjs/common';
@Injectable()
export class UserService {
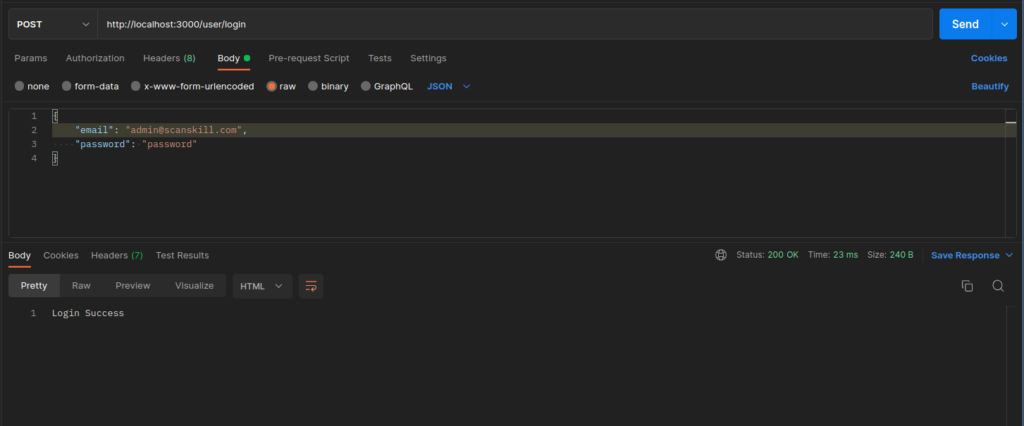
login(email: string, password: string): string {
if (email === 'admin@scanskill.com' && password === 'password') {
return 'Login Success';
}
throw 'Email or Password is incorrect';
}
}On Login success:
On Login failure:

So, this is how the providers in nestjs work. To recap, they create objects of all the @Injectable() decorated classes when mentioned in the module providers array in the first running of the application. It helps in achieving loose coupling in the application.
Module in Nest
From the above picture, you can get an idea that a NestJS application contains one main module here Application Module and all other modules are nested inside it. Modules can be nested inside one another, but in the end, it is all added to the application module. From this process, a dependency tree is created by Nest to keep track of all the dependencies. Controllers and services are nested inside the module.
The benefit of this approach is that the written code can be arranged. The controllers and providers can be defined in their respective modules, then import the main application module app.module.ts in the imports section of the @Module() decorator.
We can create Modules in Nest by using nest CLI
$ nest g module customer --no-specBy doing this, new customer.module.ts is created inside the customer file and, it is also imported into the main application module.

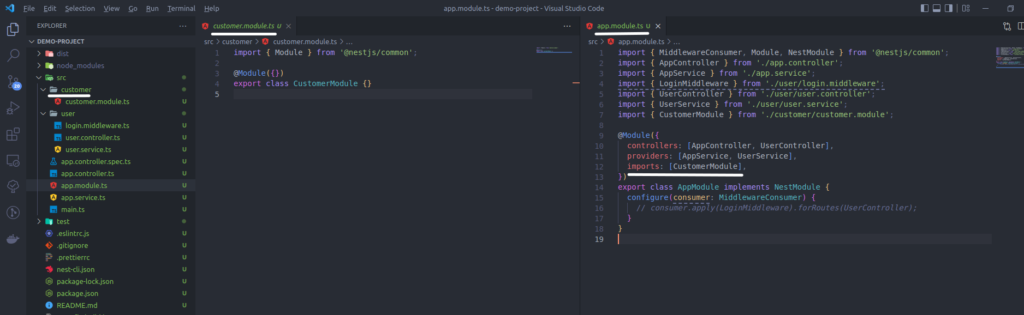
When the file is generated, there are changes made to the app.module.ts is the @Module(). The CustomerModule is added inside the imports section. Now when we make controllers and services for the customer module.

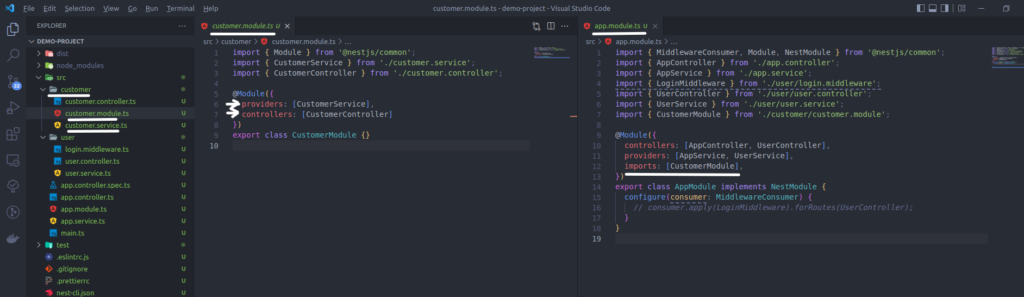
customer.module.tsWhen the customer service and controller are generated, unlike user service and controller that didn’t module and made direct changes to app.module.ts. The providers and controllers are not added to the main module instead of that, the same process takes place inside the customer.module.ts. Now, let’s make changes to customer controller and service for testing if the written module works or not.
//# customer.service.ts

import { Injectable } from '@nestjs/common';

@Injectable()
export class CustomerService {
  get() {
    return 'Present inside the customer module';
  }
}
//# customer.controller.ts
import { Controller, Get } from '@nestjs/common';
import { CustomerService } from './customer.service';
@Controller('customer')
export class CustomerController {
constructor(private readonly customerService: CustomerService) {}
@Get()
get() {
return this.customerService.get();
}
}Now, invoking an HTTP GET request on /customer.
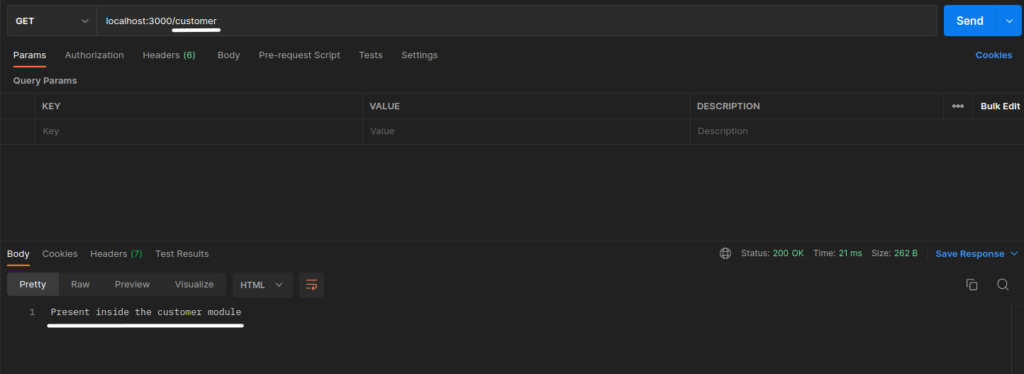
/customer routeSo, we can see that the function present inside the controller of the customer module is invoked. This process of modular programming makes it possible that code can be easily managed. Instead of adding all the controllers and providers section, making it less cluttered, also it manages to separate concerns.
Middleware
Middleware is a function that is called before the route function is executed. A Middleware has access to request, response and next function. When the next() function is invoked it goes on to the consecutive function for which the middleware was applied.
The middleware below checks if the parameter is present or not in the body of the request. The middleware checks if the request body contains email and password or not.
//# middleware (login.middleware.ts)

import { Injectable, NestMiddleware } from '@nestjs/common';
import { NextFunction, Request, Response } from 'express';
@Injectable()
export class LoginMiddleware implements NestMiddleware {
  use(req: Request, res: Response, next: NextFunction) {
    if(!req.body.email || !req.body.password) {
      return res.status(403).send('email or password missing');
    }
    next();
  }
}
If the email and password in the above case are not found the error is thrown from the middleware itself. If the email and password are found in the request body the next() the function is invoked telling the middleware to move forward and move to the function that the middleware is working for.
//# app module (app.module.ts)
import { MiddlewareConsumer, Module, NestModule } from '@nestjs/common';
import { AppController } from './app.controller';
import { AppService } from './app.service';
import { LoginMiddleware } from './user/login.middleware';
import { UserController } from './user/user.controller';
import { UserService } from './user/user.service';

@Module({
  imports: [],
  controllers: [AppController, UserController],
  providers: [AppService, UserService],
})
export class AppModule implements NestModule {
  configure(consumer: MiddlewareConsumer) {
    consumer.apply(LoginMiddleware).forRoutes(UserController);
  }
}
By configuring the middleware on the UserController for each API hit, it checks for the request body. From this, we can see that middleware functions act as safeguards for the upcoming function.
on success:

on failure (middleware thrown error):

Now that the password is missing from the request payload: email or password missing error is thrown by the LoginMiddleware.
Exception Filters
NestJS comes with a built-in exception layer that handles all the unhandled exceptions across the application. If an exception is not handled by the application, it is handled by this layer and it sends an appropriate response back to the requester.
We use the HttpException class present inside the @nestjs/common package for handling the HTTP-based exceptions. We will see an implementation with the use of HttpException the class.
//# user.controller.ts

import { Controller, Post, Req, Res } from '@nestjs/common';
import { Request, Response } from 'express';
import { UserService } from './user.service';

@Controller('user')
export class UserController {
  constructor(private readonly userService: UserService) {}

  @Post('/login')
  login(@Req() req: Request, @Res() res: Response): any {
    const { email, password } = req.body;
    res.status(200).send(this.userService.login(email, password));
  }
}
//# user.service.ts
import { HttpException, HttpStatus, Injectable } from '@nestjs/common';
@Injectable()
export class UserService {
login(email: string, password: string): string {
if (email === 'admin@scanskill.com' && password === 'password') {
return 'Login Success';
}
throw new HttpException('Email or Password is incorrect', HttpStatus.FORBIDDEN);
}
}
On login Success:
On Login Failure:
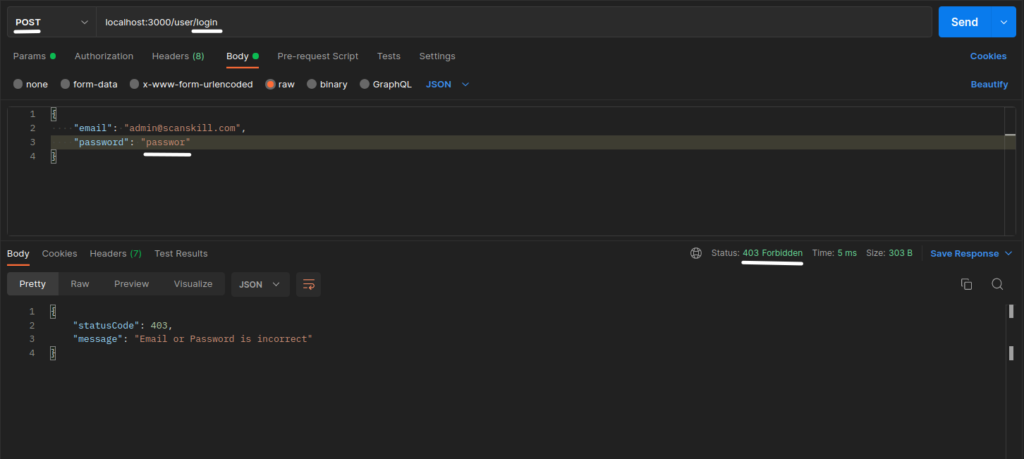
We can see that when the email or password is not matching then the HttpException is thrown from the user service with the message and status code. The HttpStatus is an enum containing all the possible HTTP status codes.
Pipes
In Nest, pipes operate on arguments which are being processed the rough a controller or the route handler. We use pipes on two cases:
- Transformation: transform incoming data into the desired form (i.e. from string to integer )
- Validation: Evaluate incoming data and pass it if it is correct otherwise throw an error
The errors thrown by pipes are handled by the global exception layer. Following are some of the built-in pipes present in nest:
ParseIntPipeParseFloatPipeParseBoolPipeParseArrayPipeParseUUIDPipe
We will look ParseIntPipe in the example below.
//# user.controller.ts

import { Controller, Get, Query } from '@nestjs/common';
import { Request, Response } from 'express';
import { UserService } from './user.service';

@Controller('user')
export class UserController {
  constructor(private readonly userService: UserService) {}

  @Get()
  parseIncomingStringValue(@Query('id') id){
    console.log(typeof id);
  }
}
parseIncomingStringValue() method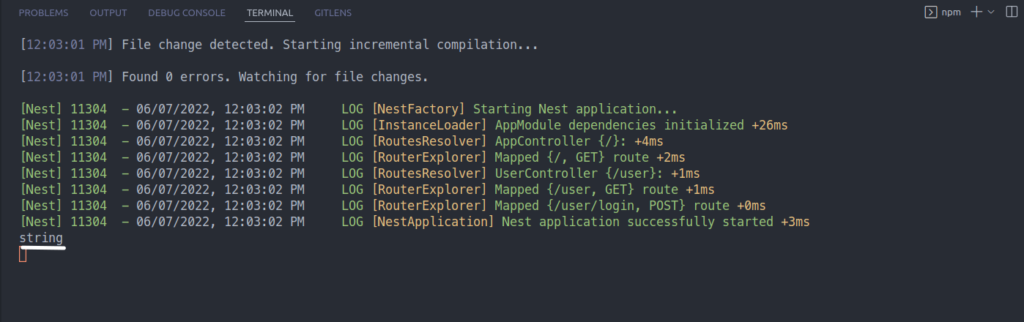
ParseIntPipeNow, let’s add ParseIntPipe to the incoming id.
  @Get()
  parseIncommingStringValue(@Query('id', ParseIntPipe) id){
    console.log(typeof id);
  }
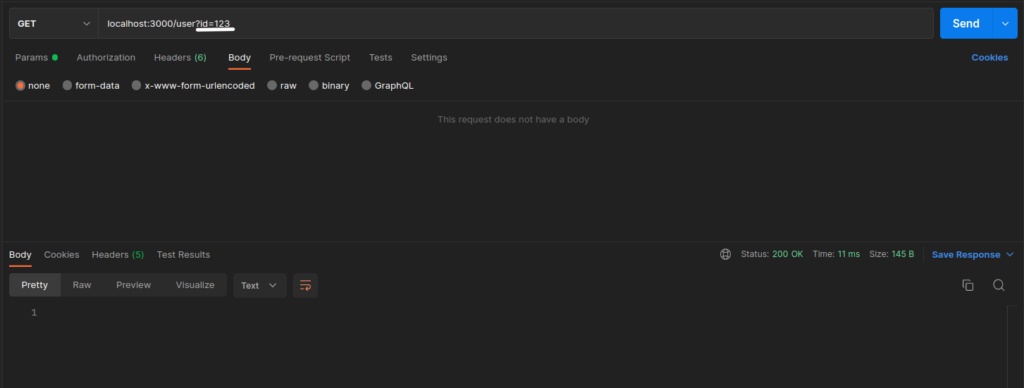
ParseIntPipeIf values that cannot be converted to number comes then,
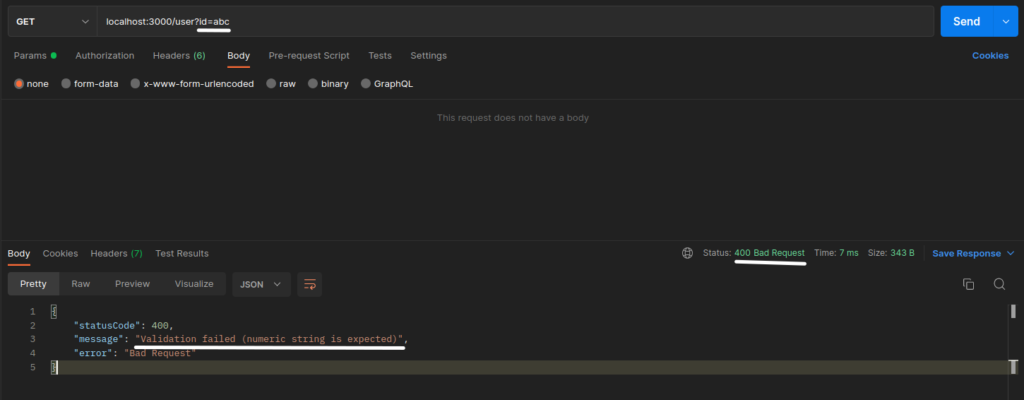
In the above examples, we saw both validation and transformation properties of nest pipes.
CRUD operations in MySQL using sequelize package
Let us learn how to perform CRUD operations in the MySQL database in NestJS.
Initializing a NestJS application
Let’s set up a Nest application by using the nest CLI.
## initializing a nest application
$ nest new nest-mysql

## open the application with your favorite code editor
$ code nest-mysql


Now that the nest application is initialized, we will install some dependencies that are needed for integrating MySQL.
Adding and implementing the sequelize package
We are going to interact with MySQL using sequelize package which is a modern TypeScript and Node.js® is a JavaScript runtime built on Chrome’s V8 JavaScript engine ORM for MySQL, SQLite, Postgres, SQL Server, and more. It supports transactions, raw queries, and much more. Now we install some dependencies.
$ npm install --save @nestjs/sequelize sequelize sequelize-typescript mysql2
$ npm install --save-dev @types/sequelize
Now that the dependencies are added we need to initialize the sequelize at the start of the application for it to connect with the MySQL database. We achieve this by initializing sequelize in the main module of the application which happens to be app.module.ts. We add the code for connecting to the MySQL database in the imports key of the @Module() decorator.
import { Module } from '@nestjs/common';
import { SequelizeModule } from '@nestjs/sequelize';
import { AppController } from './app.controller';
import { AppService } from './app.service';

@Module({
  imports: [
    SequelizeModule.forRoot({
      dialect: 'mysql',
      host: 'localhost',
      port: 3306,
      username: 'root',
      password: 'password',
      database: 'scan_skill',  //* if not provided than you have full database access
    }),
  ],
  controllers: [AppController],
  providers: [AppService],
})
export class AppModule {}
We added SequelizeModule.forRoot({dialect, host, port, username, password, database}) in the import section, it creates the connection with the database. When the application starts the connection with MySQL is also established. If the database key is not defined then you have access to all databases present inside your MySQL server.
So we have created the connection with the MySQL database successfully. For testing, if it truly has a connection with the database, let’s perform CRUD operations with it.
CRUD operations
Now that we have initialized the application and created a connection with the MySQL database, the next step is performing CRUD operations with it. We are going to interact with the user table the schema of the table is shown below.

For performing the operation we create a user service and user controller.
## creating user controller and service
$ nest g controller user --no-spec
$ nest g service user --no-spec 

Create operation
We are going to create a user. For that let’s create a insertUser() the method inside user service and controller.
//# user.service.ts
import { Injectable } from '@nestjs/common';
import { Sequelize } from 'sequelize-typescript';
import { QueryTypes } from 'sequelize';

@Injectable()
export class UserService {
  constructor(private readonly sequelize: Sequelize) {}

  async insertUser(data) {
    const { name, email, password } = data;
    const insertQuery =
      'INSERT INTO user (name, email, password) VALUES (:name, :email, :password)';

    await this.sequelize.query(insertQuery, {
      replacements: {
        name: name,
        email: email,
        passowrd: password,
      },
      type: QueryTypes.INSERT,
    });

    return data;
  }

}
//# user.controller.ts
import { Body, Controller, Post } from '@nestjs/common';
import { UserService } from './user.service';
@Controller('user')
export class UserController {
constructor(private readonly userService: UserService) {}
@Post()
async insertUser(@Body() body) {
return await this.userService.insertUser(body);
}
}Now let’s hit the POST /user route to create a new user.

/user APINow check the user table if the data is present or not.

We see that the data has successfully been placed on the table.
Read operation
For a read operation let’s create getUsers() method.
//# user.service.ts
import { Injectable } from '@nestjs/common';
import { Sequelize } from 'sequelize-typescript';
import { QueryTypes } from 'sequelize';

@Injectable()
export class UserService {
  constructor(private readonly sequelize: Sequelize) {}

  async getUsers() {
    const selectQuery = 'SELECT * FROM user';
    const result = await this.sequelize.query(selectQuery, {
      type: QueryTypes.SELECT,
    });
    return result;
  }

}
//# user.controller.ts
import { Body, Controller, Get, Post } from '@nestjs/common';
import { UserService } from './user.service';
@Controller('user')
export class UserController {
constructor(private readonly userService: UserService) {}
@Get()
async getUsers() {
return await this.userService.getUsers();
}
}Now let’s send a GET request at /user.

/user routeWe can see that all the data present inside the user table is sent back on response.
Update operation
For update let’s create updateById() method that takes the user id and edits the data.
//# user.service.ts

import { Injectable } from '@nestjs/common';
import { Sequelize } from 'sequelize-typescript';
import { QueryTypes } from 'sequelize';

@Injectable()
export class UserService {
  constructor(private readonly sequelize: Sequelize) {}

  async updateById(id, data) {
    const selectQuery = 'SELECT * FROM user';
    const [oldDocs]: any = await this.sequelize.query(selectQuery, {
      type: QueryTypes.SELECT,
    });

    const name = data.name || oldDocs.name;
    const email = data.email || oldDocs.email;
    const password = data.password || oldDocs.password;

    const updateQuery =
      'UPDATE user SET name = :name, email = :email, password = :password, updated_at = CURRENT_TIMESTAMP WHERE id = :id';
    await this.sequelize.query(updateQuery, {
      replacements: {
        name: name,
        email: email,
        password: password,
        id: id,
      },
      type: QueryTypes.UPDATE,
    });

    return { id, ...data };
  }

}
//# user.controller.ts
import { Body, Controller, Delete, Get, Param, Post, Put } from '@nestjs/common';
import { UserService } from './user.service';
@Controller('user')
export class UserController {
constructor(private readonly userService: UserService) {}
@Put('/:id')
async updateById(@Param('id') id, @Body() body) {
return await this.userService.updateById(id, body);
}
}Now, let’s send a PUT request to /user/:id route and edit information of the user with id 1.
Before edit


/user
So, we can see that the data that was sent has been updated in the table.
Delete operation
Now let’s create deleteById() method which deletes the user with matched id.
//# user.service.ts
import { Injectable } from '@nestjs/common';
import { Sequelize } from 'sequelize-typescript';
import { QueryTypes } from 'sequelize';

@Injectable()
export class UserService {
  constructor(private readonly sequelize: Sequelize) {}

  async deleteById(id) {
    const deleteQuery = 'DELETE FROM user WHERE id = :id';
    await this.sequelize.query(deleteQuery, {
      replacements: { id: id },
      type: QueryTypes.DELETE,
    });

    return { id };
  }

}
//# user.controller.ts
import { Body, Controller, Delete, Get, Param, Post, Put } from '@nestjs/common';
import { UserService } from './user.service';
@Controller('user')
export class UserController {
constructor(private readonly userService: UserService) {}
@Delete('/:id')
async DeleteById(@Param('id') id) {
return await this.userService.deleteById(id);
}
}Now, let’s send DELETE request at /user/:id where id is 1.


/user/:id route
We can see that the user with id 1 has been deleted from the user table.
So, this concludes performing CRUD operation in MySQL with NestJS.
CRUD operations in MongoDB using the mongoose package
In this section, we are going to look into the initialization of the nest application along with adding and implementing the sequelize package which will help with the MongoDB database connection.
Initializing a NestJS application
Let’s set up a Nest application by using the nest CLI.
## initializing a nest application
$ nest new nest-mongodb
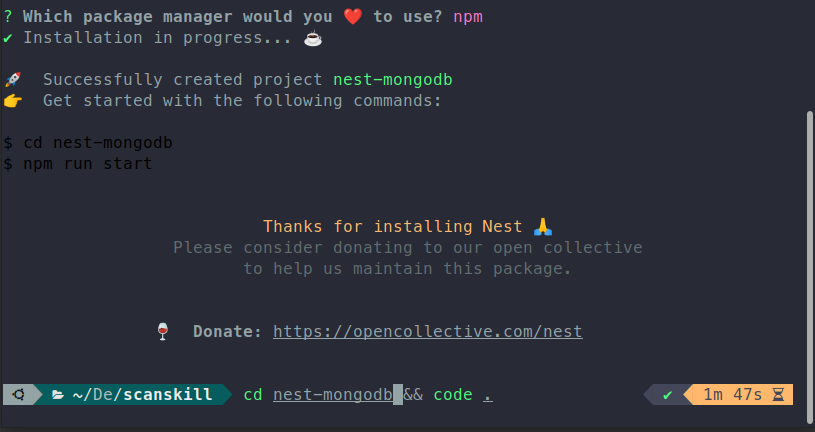
## open the application with your favorite code editor
$ code nest-mongodb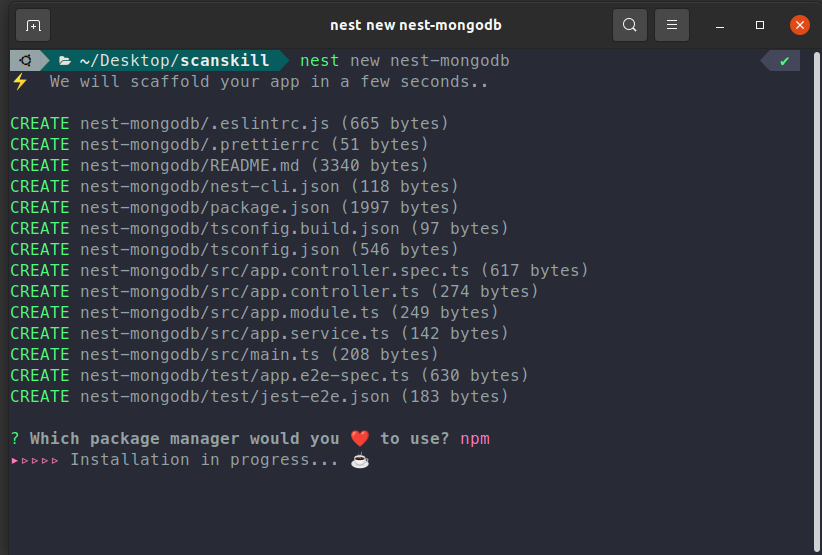
Now that the nest application is initialized, we will install some dependencies that are needed for integrating MongoDB.
Adding and implementing the mongoose package
We are going to interact with MongoDB using the mongoose package which is a modern TypeScript and is an ORM library that creates a connection between MongoDB and the Express-based web application frameworks.
$ npm install --save @nestjs/mongoose mongoose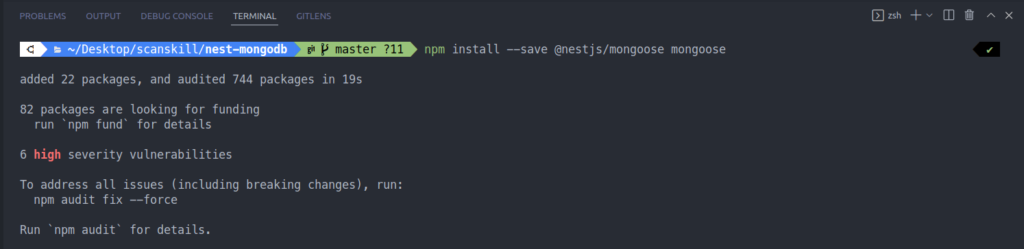
Now that the dependencies are added we need to initialize the mongoose to create a connection with MongoDB. We initialize mongoose in the main module of the application, that being app.module.ts. We add the code for connecting to the MongoDB database in the imports key of the @Module() decorator.
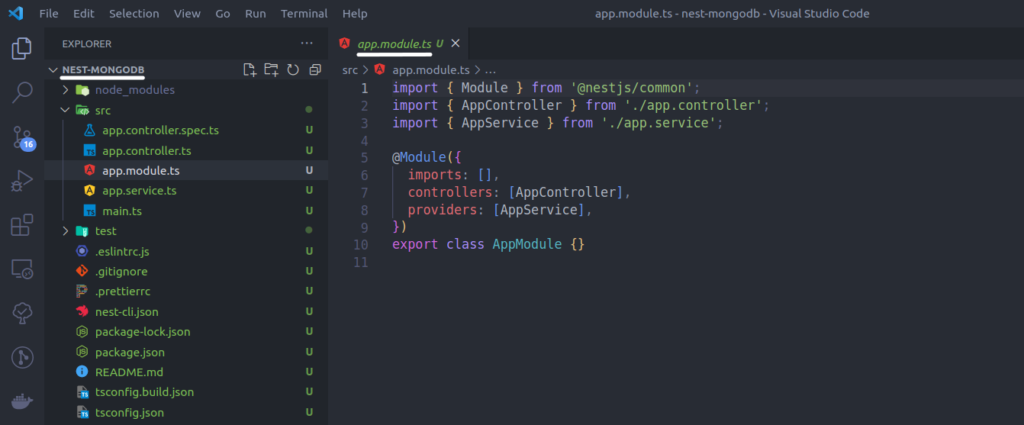
//# app.module.ts

import { Module } from '@nestjs/common';
import { MongooseModule } from '@nestjs/mongoose';
import { AppController } from './app.controller';
import { AppService } from './app.service';

@Module({
  imports: [
    MongooseModule.forRoot(
      'mongodb+srv://user:password@example.mongodb.net/scanskill?retryWrites=true&w=majority',
    )],
  controllers: [AppController],
  providers: [AppService],
})
export class AppModule {}
In the above code, the MongooseModule.forRoot() takes MongoDB connection URL is appended with username, password, and database name. Now let’s run the application and test our connection with the MongoDB database.
$ npm run start:dev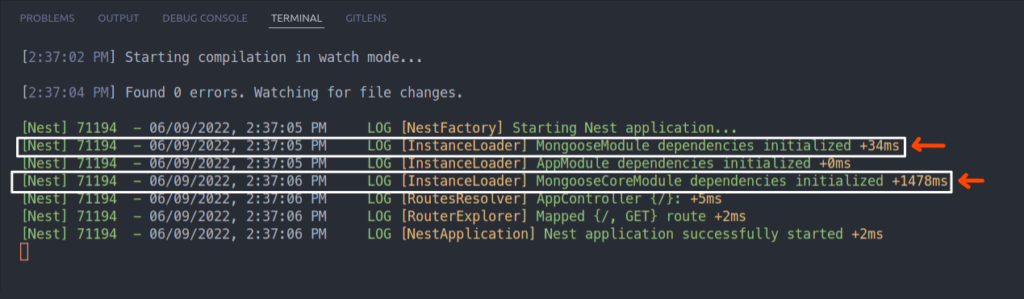
If mongoose dependencies are initialized and mongoose core module dependencies are initialized, it means that the connection to the MongoDB database was a success.
Now that the connection to the database was a success, we will perform CRUD operations on MongoDB using the mongoose package.
CRUD operations
Now that we have initialized the application and created a connection with the MongoDB database, the next step is performing CRUD operations with it. We are going to interact with the user collection. For that to be possible we need to make a schema of the user collection. The reason we need to make a schema is that the mongoose package requires it for interacting with the collections present inside the MongoDB database.
Creating Schema
We are going to create a schema named user which has elements like name, email, password, createdAt, and updatedAt.
For that let’s first create a user module that houses all the user-related operations.
$ nest g module user --no-spec
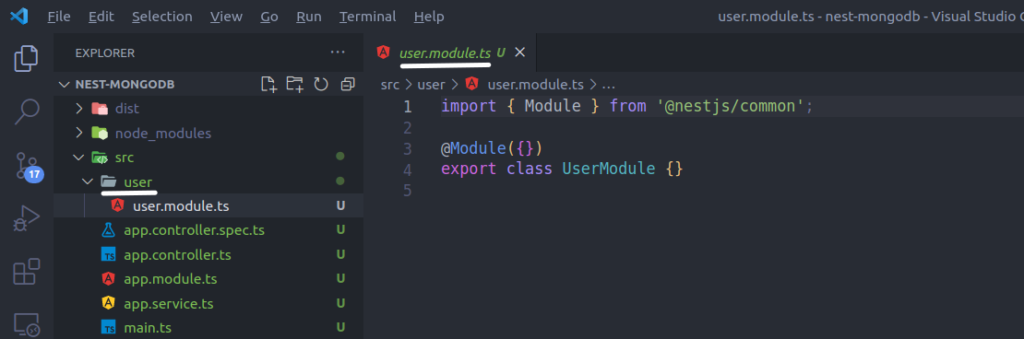
Now, that the user module is created inside the user folder, we create a folder called schemas and make a file named user.schema.ts, that contains the user schema.
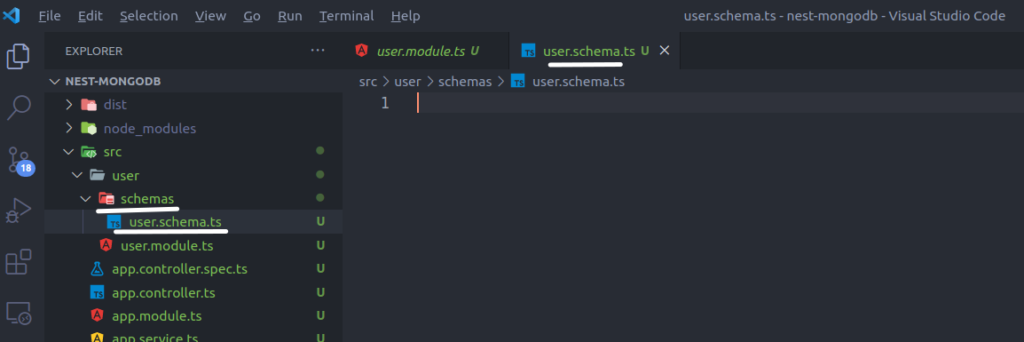
Now, let’s create the user schema
//# user.schema.ts

import { Prop, Schema, SchemaFactory } from '@nestjs/mongoose';
import { Document } from 'mongoose';

export type userDocument = User & Document;

@Schema({ strict: false, versionKey: false })
export class User {
  @Prop()
  name?: string;

  @Prop({ required: true, unique: true })
  email: string;

  @Prop({ required: true })
  password: string;

  @Prop({ required: true })
  createdAt: Date;

  @Prop({ required: true })
  updatedAt: Date;
}

export const UserSchema = SchemaFactory.createForClass(User);
We create a class that has variables that can be represented as string, Date, number, and different other types. the @Schema() decorator tells that it is a mongoose schema. the @Prop() takes different keys like, is the value is required then the required: true is used. If the element needs to be unique then the unique: true is used.
If the value needs to be optional then ?: needs to be used instead of : as seen in the case of name and email respectively. where name is optional name ?: string is used and in the case where email is required email: string is used.
For this schema to be usable we need to import in the user.module.ts file, inside the imports array of @Module() decorator.
//# user.module.ts

import { Module } from '@nestjs/common';
import { MongooseModule } from '@nestjs/mongoose';
import { User } from './schemas/user.schema';

@Module({
  imports: [MongooseModule.forFeature([{ name: User.name, schema: User }])],
})
export class UserModule {}
Now that the schema is created and imported into the user module. We will now create user controller and service.
$ nest g service user --no-spec
$ nest g controller user --no-spec
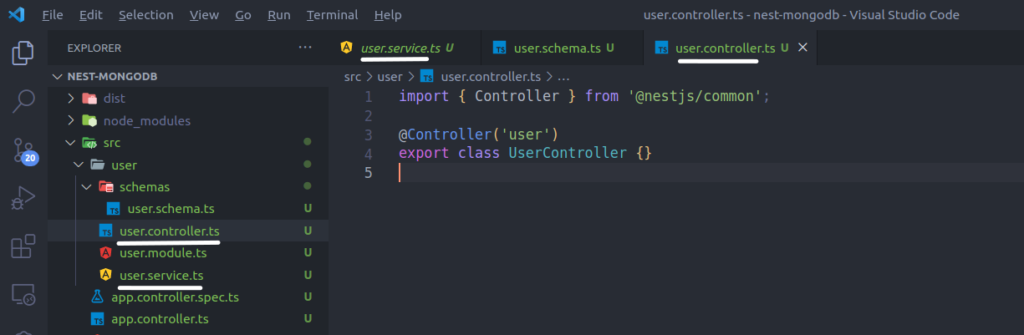
Now, that the controller, service, and schema are created let’s move on to the main part that is performing crud operations.
Create operation
We are going to create a method called insertOne() inside user service and controller, which creates users.
//# user.service.ts

import { Injectable } from '@nestjs/common';
import { InjectModel } from '@nestjs/mongoose';
import { Model } from 'mongoose';
import { User, userDocument } from './schemas/user.schema';

@Injectable()
export class UserService {
  constructor(
    @InjectModel(User.name) private readonly model: Model<userDocument>,
  ) {}

  async insertOne(data): Promise<User> {
    return await new this.model({
      ...data,
      createdAt: new Date(),
      updatedAt: new Date(),
    }).save();
  }
}
//# user.controller.ts

import { Body, Controller, Post} from '@nestjs/common';
import { UserService } from './user.service';

@Controller('user')
export class UserController {
  constructor(private readonly userService: UserService) {}

  @Post()
  async insertOne(@Body() body) {
    return await this.userService.insertOne(body);
  }
}
Now, let’s create an HTTP POST request at /user route
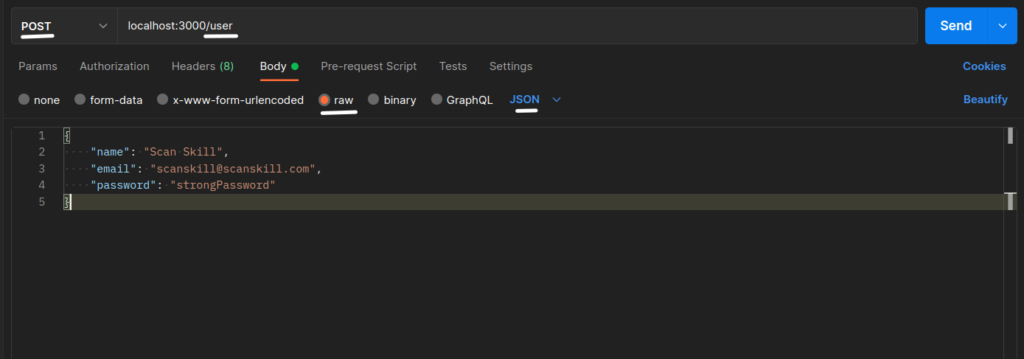
/user 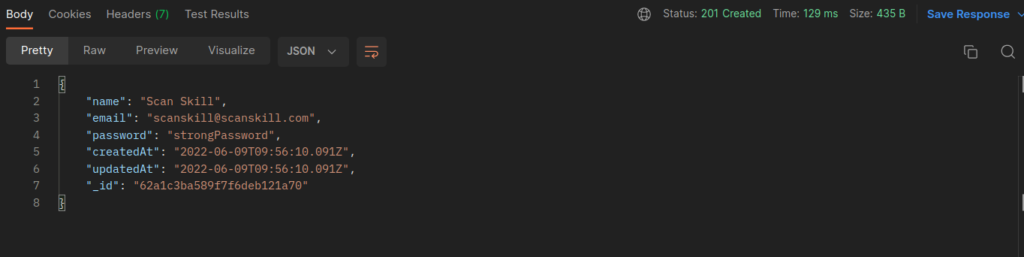

We see that the data has been successfully placed on the database.
Read operation
For the read let’s create findAll() method which finds all the data present inside the user collection.
//# user.service.ts

import { Injectable } from '@nestjs/common';
import { InjectModel } from '@nestjs/mongoose';
import { Model } from 'mongoose';
import { User, userDocument } from './schemas/user.schema';

@Injectable()
export class UserService {
  constructor(
    @InjectModel(User.name) private readonly model: Model<userDocument>,
  ) {}

  async findAll(): Promise<User[]> {
    return await this.model.find().exec();
  }
}
//# user.controller.ts
import { Body, Controller, Get } from '@nestjs/common';
import { UserService } from './user.service';
@Controller('user')
export class UserController {
constructor(private readonly userService: UserService) {}
@Get()
async findAll() {
return await this.userService.findAll();
}
}
Now let’s create an HTTP GET request on the /user route

/user route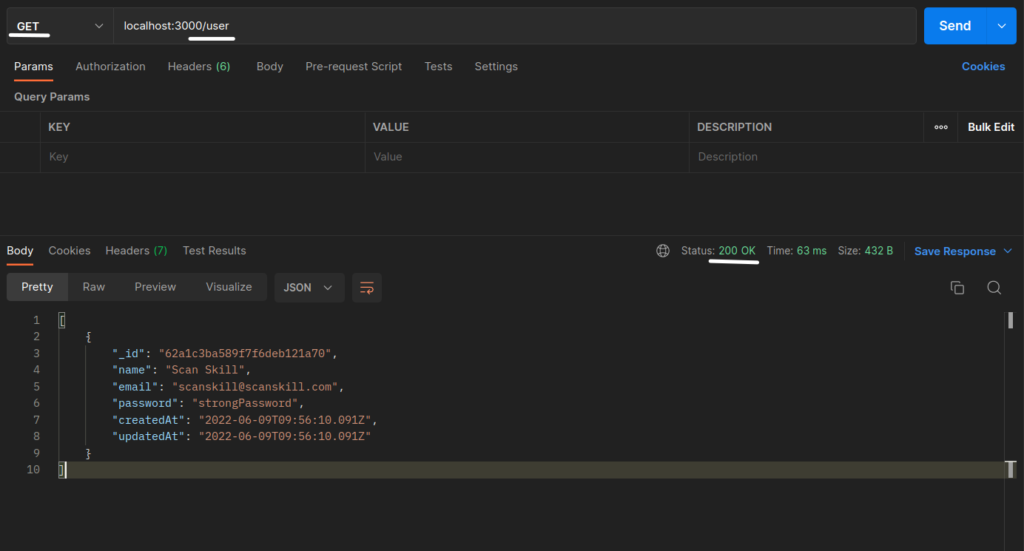
We see that all the data present inside the user collection were sent back on response.
Update operation
For update let’s create updateOne() method inside the user controller and service.
//# user.service.ts

import { Injectable } from '@nestjs/common';
import { InjectModel } from '@nestjs/mongoose';
import { Model } from 'mongoose';
import { User, userDocument } from './schemas/user.schema';

@Injectable()
export class UserService {
  constructor(
    @InjectModel(User.name) private readonly model: Model<userDocument>,
  ) {}

  async updateOne(id: string, data): Promise<User> {
    const updatedAt = new Date();
    const oldPayload = await this.model.findByIdAndUpdate(id, {
      ...data,
      updatedAt,
    });
    const result: any = {
      _id: oldPayload._id,
      email: data.email || oldPayload.email,
      password: data.password || oldPayload.password,
      createdAt: oldPayload.createdAt,
      updatedAt: updatedAt,
    };
    return result;
  }
}
//# user.controller.ts
import { Body, Controller, Param, Put } from '@nestjs/common';
import { UserService } from './user.service';
@Controller('user')
export class UserController {
constructor(private readonly userService: UserService) {}
@Put('/:id')
async updateOne(@Param('id') id: string, @Body() body) {
return await this.userService.updateOne(id, body);
}
}Now, let’s send an HTTP PUT request with the user id of /user/:id.
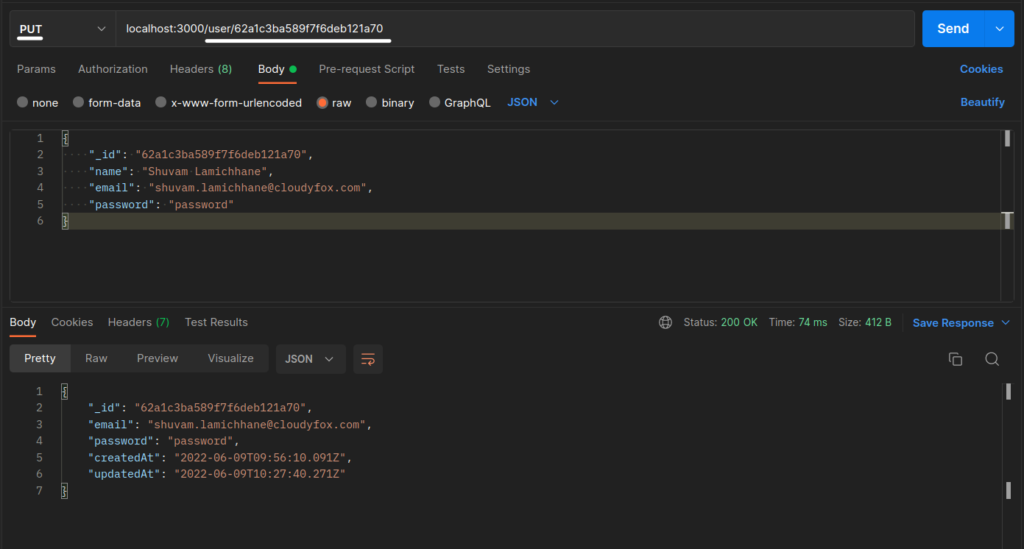
/user/:id route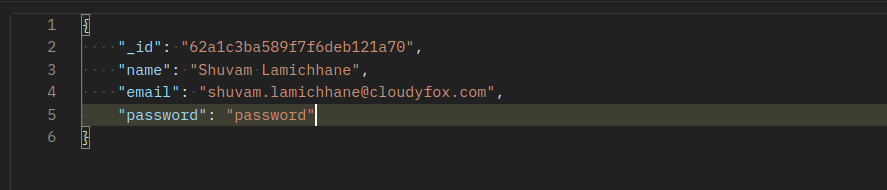
Before update
After update

So, we can see that the data that was sent has been updated in the user collection.
Delete operation
Now let’s create deleteOne() method which deletes the user with matched id.
//# user.service.ts

import { Injectable } from '@nestjs/common';
import { InjectModel } from '@nestjs/mongoose';
import { Model } from 'mongoose';
import { User, userDocument } from './schemas/user.schema';

@Injectable()
export class UserService {
  constructor(
    @InjectModel(User.name) private readonly model: Model<userDocument>,
  ) {}

  async deleteOne(id: string): Promise<User> {
    return await this.model.findByIdAndDelete(id);
  }

}
//# user.controller.ts
import { Controller, Delete, Param } from '@nestjs/common';
import { UserService } from './user.service';
@Controller('user')
export class UserController {
constructor(private readonly userService: UserService) {}
@Delete('/:id')
async deleteOne(@Param('id') id: string) {
return await this.userService.deleteOne(id);
}
}Now, let’s send an HTTP DELETE request at /user/:id route.
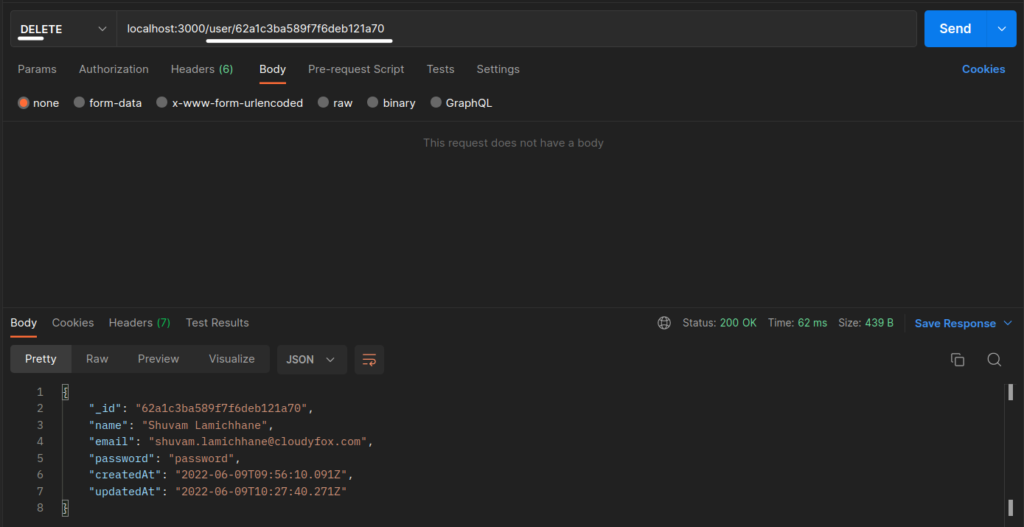
/user/:idroute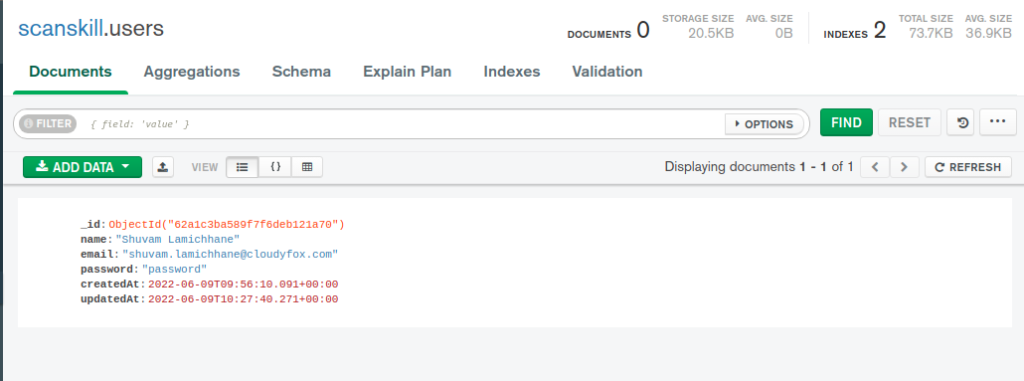
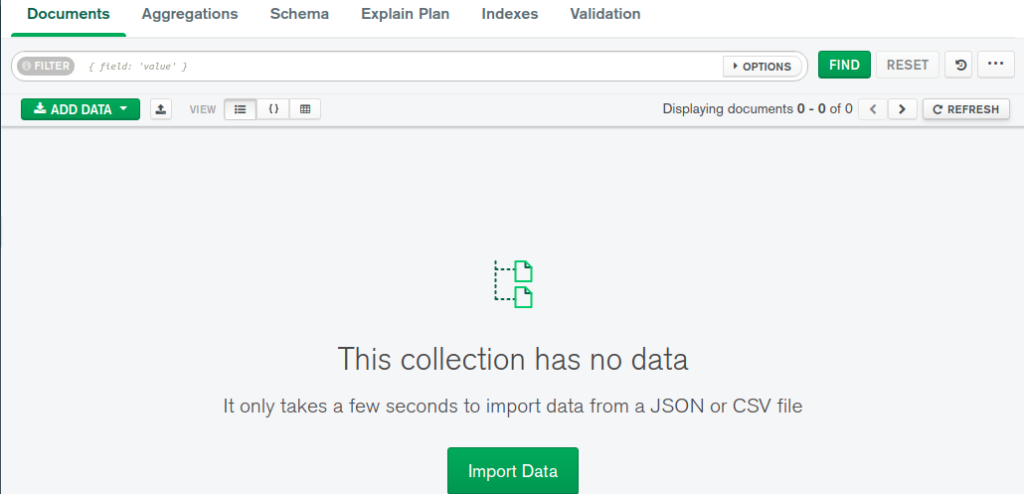
We can see that the single user present in the user collection has been deleted.
So, this concludes performing CRUD operation in MongoDB with NestJS.
Conclusion
In this chapter, we’ve seen an overview of NestJS, which is a framework, and how it works. We also looked at topics such as MVC, controller, services, modules, and performing CRUD operations on MySQL(SQL) and MongoDB(No-SQL).