

Node.js is an asynchronous event-driven JavaScript runtime designed to build scalable network applications. It provides a non-blocking (asynchronous) I/O and cross-platform runtime environment for building a highly scalable server-side application using JavaScript. Uploading files in node js is laborious due to its async nature and network programming approach. There are different ways to upload files in node js. Multer is one of them using which, we can smoothly implement the uploading features. Multer is a node.js middleware that deals with multipart/form-data which can be used to upload files in node js. Lets learn how to upload files in node js using multer.
Prerequisites
- A basic understading of node.js
- A general understanding of HTTP request methods in Express framework
How to upload files in node js using multer ?
Project Setup
We will be using Node.js, Express framework, and Multer to upload a file.
Create a new directory named multer-upload , change into that directory.
mkdir multer-upload
cd multer-upload
Inside the multer-upload directory, initialize a node.js project
npm initCreate an entry file index.js where all the express logic along with multer configuration and file upload is handled.
touch index.jsNext, let’s install dependencies like express and Multer necessary to upload files in node js.
npm install multer express --saveHandling the Express Server
In index.js , we will initialize all the modules needed for file upload.
const express = require('express')
const multer = require('multer');

const app = express();
const upload = multer({dest: 'uploads/'});

app.use(express.json());
app.use(express.urlencoded({extended: true}));

app.listen(3000, function () {
    console.log('App listening on port 3000!');
});
In the above example, a basic express module is set up and the location where the Multer will upload the file is defined.
Uploading a Single File
app.post('/upload', upload.single('file'), (req, res, next) => {
   if (!req.file) {
    console.log("No file received");
    return res.send({
      success: false
    });
  } else {
    console.log('file received');
    return res.send({
      success: true
    })
  }
});
In the above sample code, when the /upload the route is accessed with the POST method, the Multer will store the file provided in the variable named file into the uploads directory. The second argument in the POST request upload.single() is the Multer method responsible for saving a single file inside the predefined directory. If no file is provided in the request, the response No file received is returned to the user.
By default, Multer will generate a random name without the extension and store it inside the temporary directory of the system. Since we have defined the custom destination to store the uploaded file, the uploaded files will be stored in that directory. For generating filename with extension,
Remove this configuration from the above sample code:
const upload = multer({dest: 'uploads/'});and replace it with this:
//Configuration for Multer
const storage = multer.diskStorage({
  destination: (req, file, cb) => {
    cb(null, "/uploads");
  },
  filename: (req, file, cb) => {
    cb(null, Date.now() + "-" + file.originalname);
  },
});
const upload = multer({ storage: storage })
Using the above configuration, Multer will store the file in the uploads directory with the custom file name. The diskStorage contains only two options: destination and filename. The destination determines the location where the uploaded file will be stored and the filename determines what the name of the file should be. The file.originalname get the name of the uploaded file and append the current date in front of the filename. The file variable in the above configuration is the information about the file uploaded in the request. and req contains the request information.
Uploading Multiple Files
//Uploading multiple files
app.post('/upload/multiple', upload.array('files', 5), (req, res, next) => {
   if (!req.files) {
    console.log("No files received");
    return res.send({
      success: false
    });
  } else {
    console.log('files received');
    return res.send({
      success: true
    })
  }
});
In the above sample code, when the upload/multiple route is accessed with the POST method, the Multer will store the multiple files provided in the request into the uploads directory. Here, the argument upload.array() is responsible for uploading multiple files to the pre-defined directory. The second argument in upload.array() the method defines the maximum limit of the files that can be uploaded at a time. In our case, we can only upload 5 files at a single request.
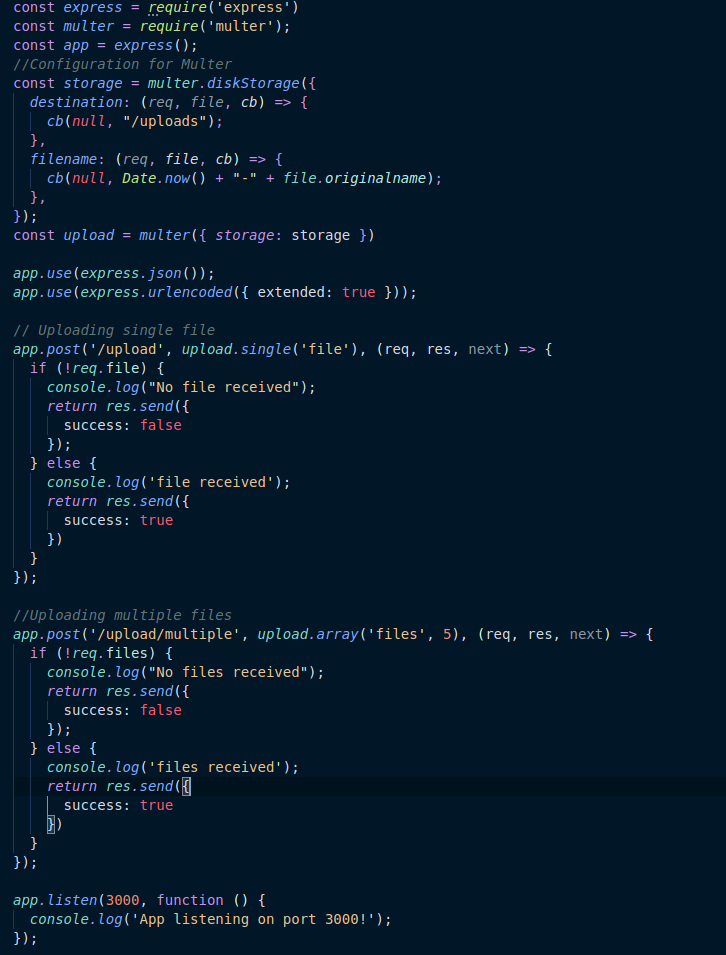
The final index.js file will look like this:
Conclusion
With this, we can upload files in node js using multer and express with a custom filename and directory where files are stored. If you are looking for another approach for file upload look into this article.